 Hello! I'm wondering... How much time do you spend creating? Crocheting or knitting, painting or doodling, woodworking or sculpting - whatever your medium of choice is, how much time do you spend with it? I spend several hours each day doing different artistic activities. Recently,two things have been crossing my mind. One is, can I finally call myself an artist, and the other is wondering how other creative people spend their time. I don't know why, but I often wonder if am I really an artist., Why do I struggle with this? Why, when I apply this title (label?) to myself do I feel like an impostor? I'm sure that I would easily use this term to describe me if I was someone else, so what's the big deal? There probably is some deep hidden reason that has to do with my childhood and parents, but I'll leave that for another time. Instead, I am going to practice (positive) self actualization and say it out loud, "I am an artist!" There, that felt good! Why don't you try it? Feels good doesn't it? 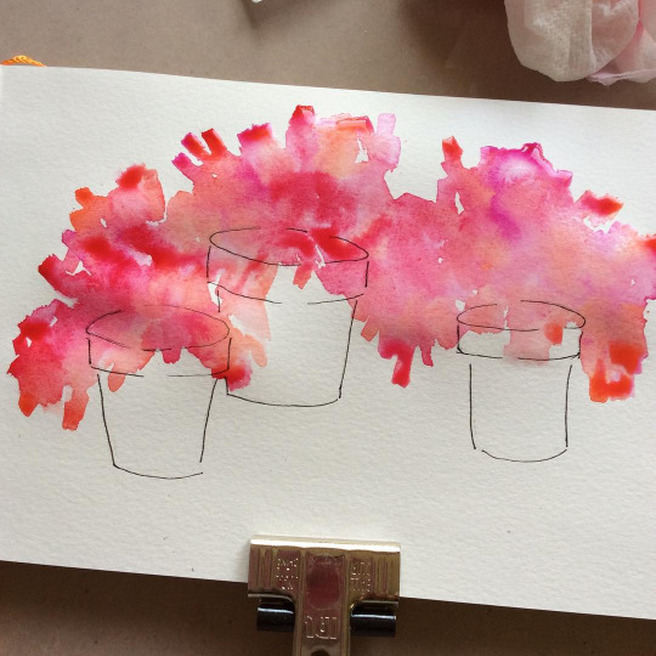 Like all worthwhile things, it is going to take practice. Hopefully in time I will be able to refer to myself as an artist as easily as I call myself a wife and mother.
Art in any form is fulfilling. Just like my struggle to call myself an artist, I have moments of hesitation when I call the activities that I partake in art. Inside I know that what I'm doing is art, but the world around me is conditioned to call the things that I do crafts and hobbies. Not that there is anything wrong with that, but there is so much more to it. Turning thread into a beautiful piece of lace is art. The finished object is a piece of art. The same with the beautiful knit shawl, the matching beaded earrings and necklace and watercolor that I am painting today. All of these are creative and artistic expressions of me (and you too!) And as my lovely friend Lisa Bogart recently said, "Creating fulfills something inside up." All this comes around to time. How much time do you spend creating?
14 Comments
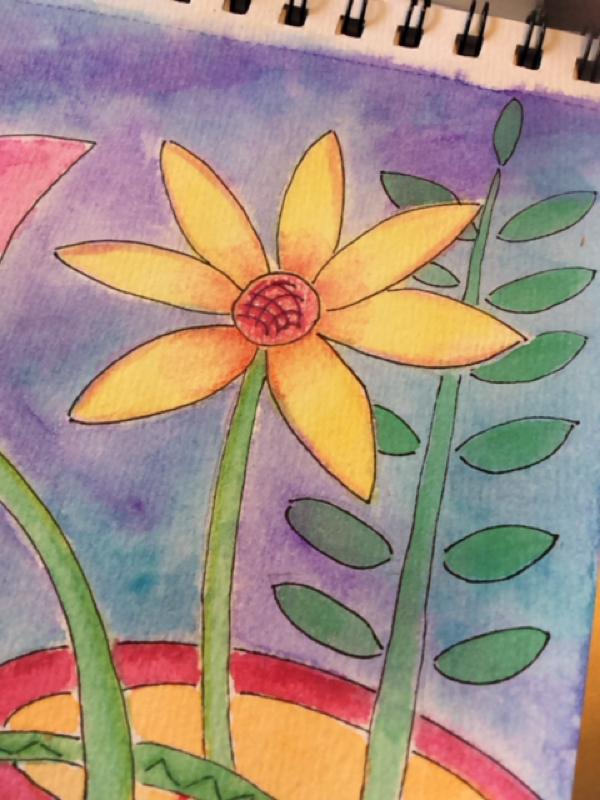
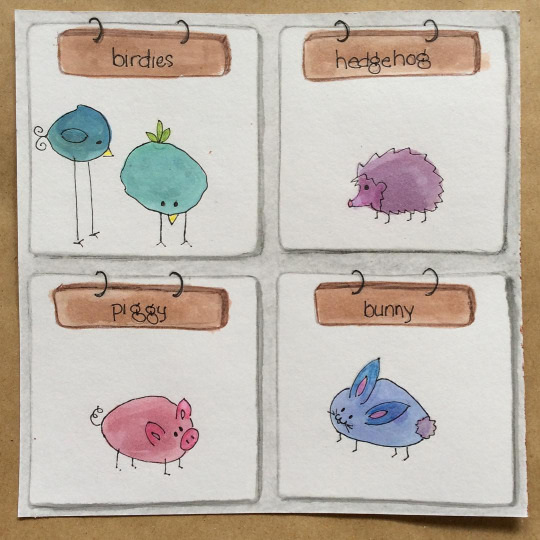 Trying New ThingsI have been trying lots of new things lately (sewing, drawing, watercolors etc.), and having a grand time. My desire and ability to create is in high gear! Plus I have all of these great ideas for blog posts. I want to talk about social media and how it impacts the way that we think about ourselves. I want to talk about encouraging you (and me) to try new things and have fun while doing it. I want to talk about how important it is to find activities that you enjoy and to pursue them. I want to talk about giving yourself permission to do things that make you happy. For some reason the words are stuck. I think these are interesting topics and relevant to the crafting world. We're just not going to be talking about them today! Instead let me tell you about these watercolors and sketches! 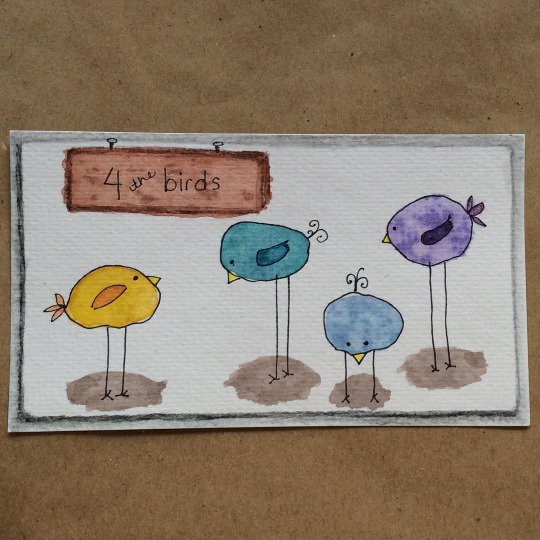 I found some inspiration on Pinterest and decided to see what would happen if I made my own "paint blob" animals. The birds came easily after all the practice I have had working on the Nirvana Design logo. The others took a few rounds to get ears and such in the right place. 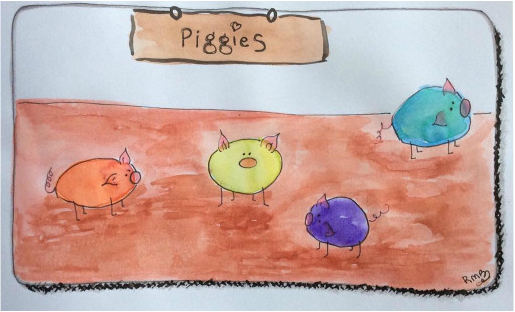 There is something irrationally cute about these small farm animals. I am taken with the piggies (even the word echos cuteness) and for the past two nights I have been sketching them in various poses. Mostly trying to capture a pig in flight. 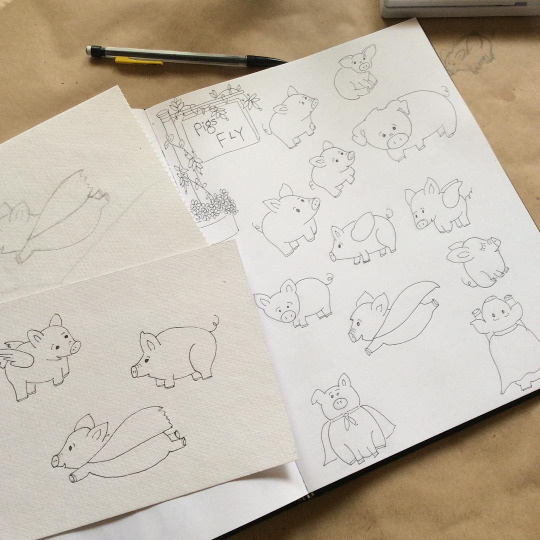 Right up there on the adorable scale don't you think? My water color technique is rough, but I am going to try adding color to the two on the left tomorrow. Regardless of how it turns out I am reveling in the joy of putting brush to paper and watching to changes that occur.
Why not take a chance and try something new today?! I bet you'll be surprised! Thanks for stopping by friends. Until next time, wishing you creativity and joy! 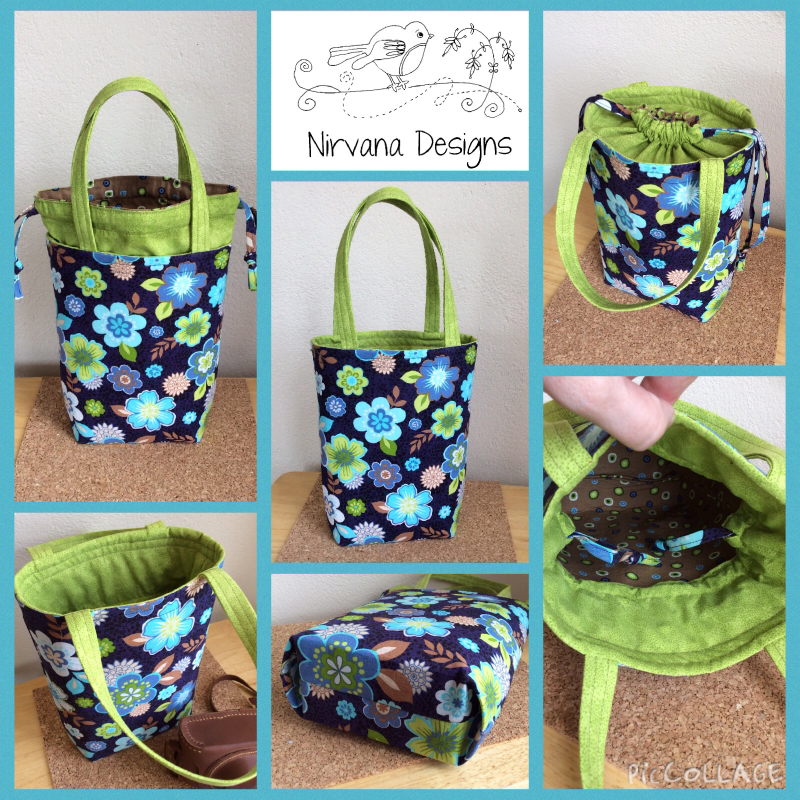 One of the great things about knitting and crocheting are all of the fab tools and accessories that go with it. And have you seen the project bags that are out there?!? All over Facebook and Instagram I see pictures of fun, whimsical, pretty and sometimes even silly bags. I had to get me some! This desire to possess something fantastic to hold all my projects has catapulted me into a whole lot of machine and hand stitching. In fact, you might say that I've become a bit of a bag making fiend! 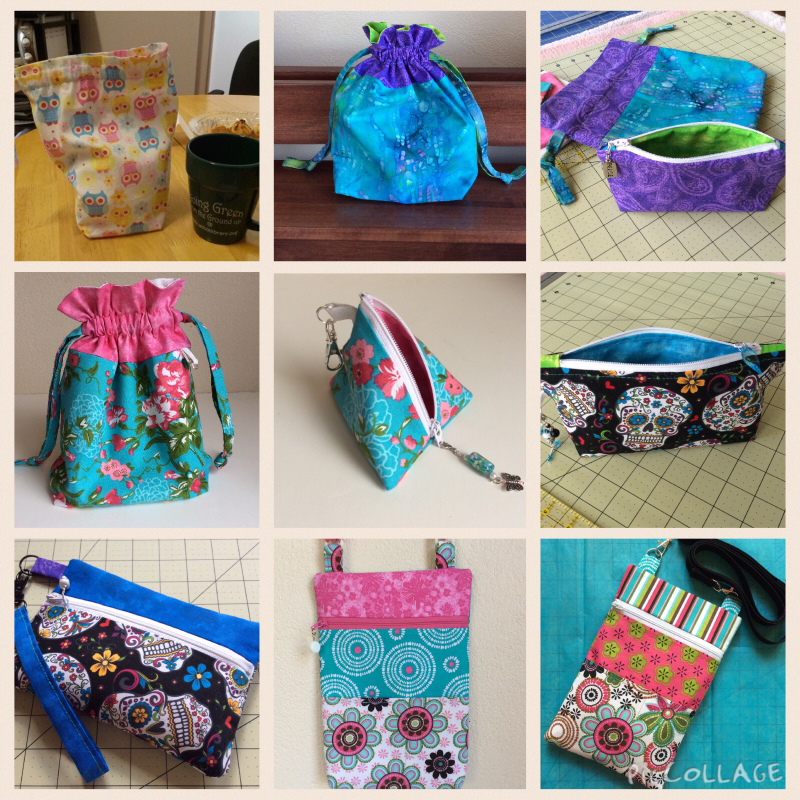 Here is a look at (some) of what I've been making for the past few months. What I thought was going to be a one shot deal has turned into my latest obsession. When I started I was barely a beginner and my machine and I hadn't spoken in years. After watching tutorials and following along l got the hang of it. Turns out I love it. I"m really pleased with the bags that I have made. I always get compliments when I use my cross-body bags and that is a great feeling! I think that other people (you maybe?) like them too. So much, that they (or you?) will want to buy them. My goal in making so many different shapes and sizes is to come up with a line of bags that 1) look fabulous, 2) are well made, and 3) are fun to make. I think I've finally done it! 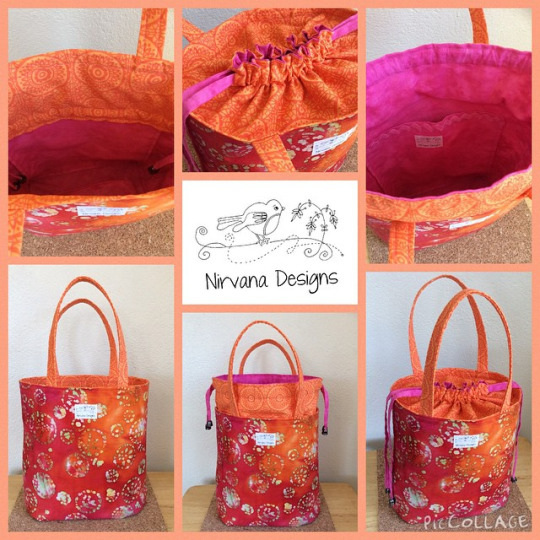 Don't you love this batik fabric?!? The bright orange and pink are such a bold and fresh combo. Thankfully I was able to get my hands on a decent stash so there will be more than just this one bag. Although the coordinating fabric for the drawstring section will be different.
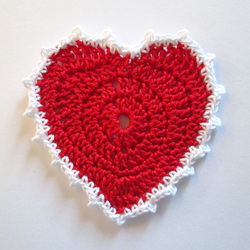
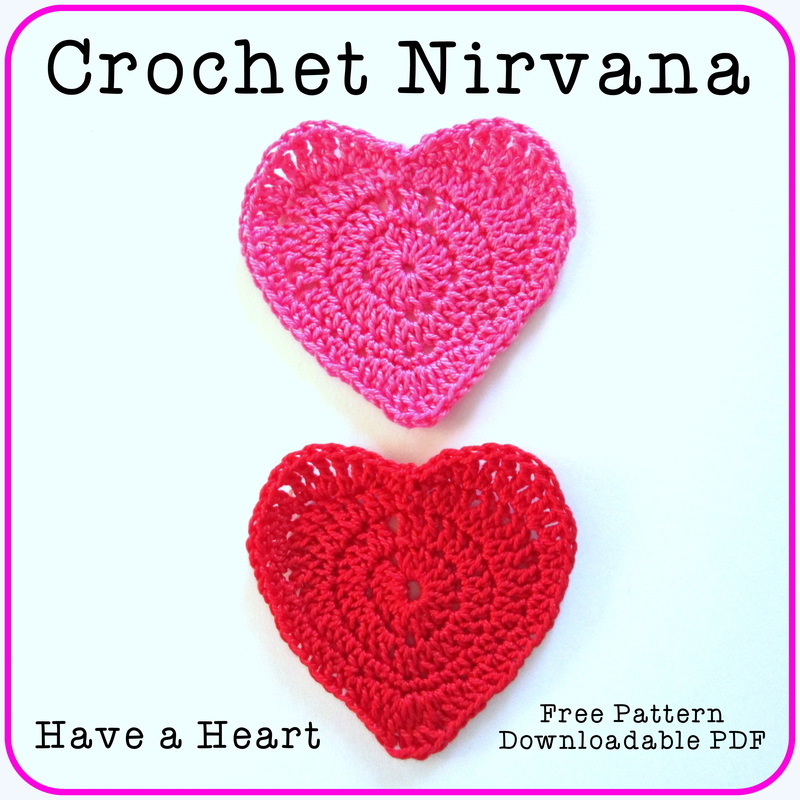
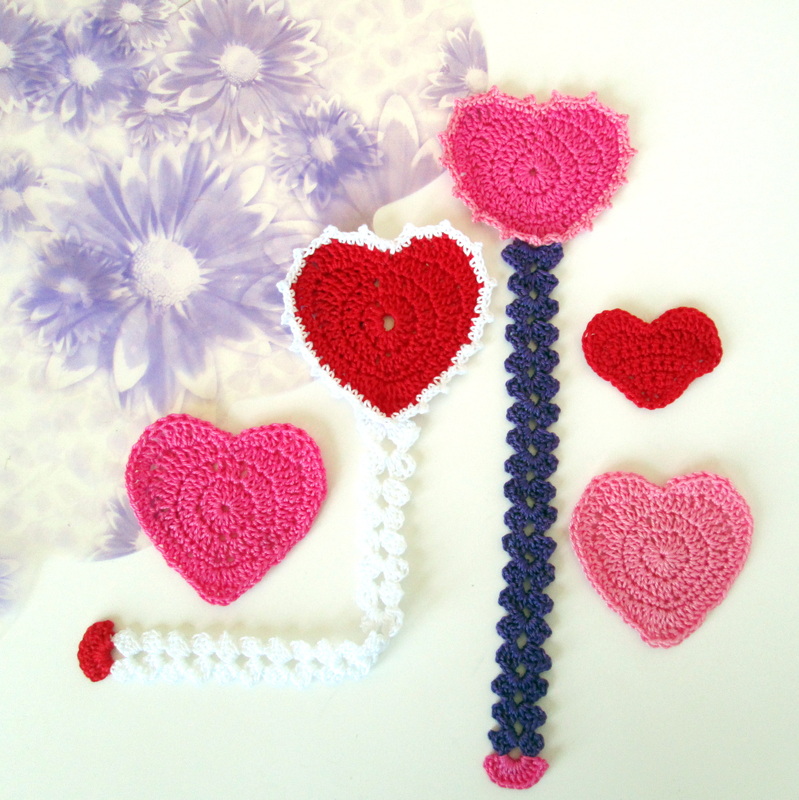
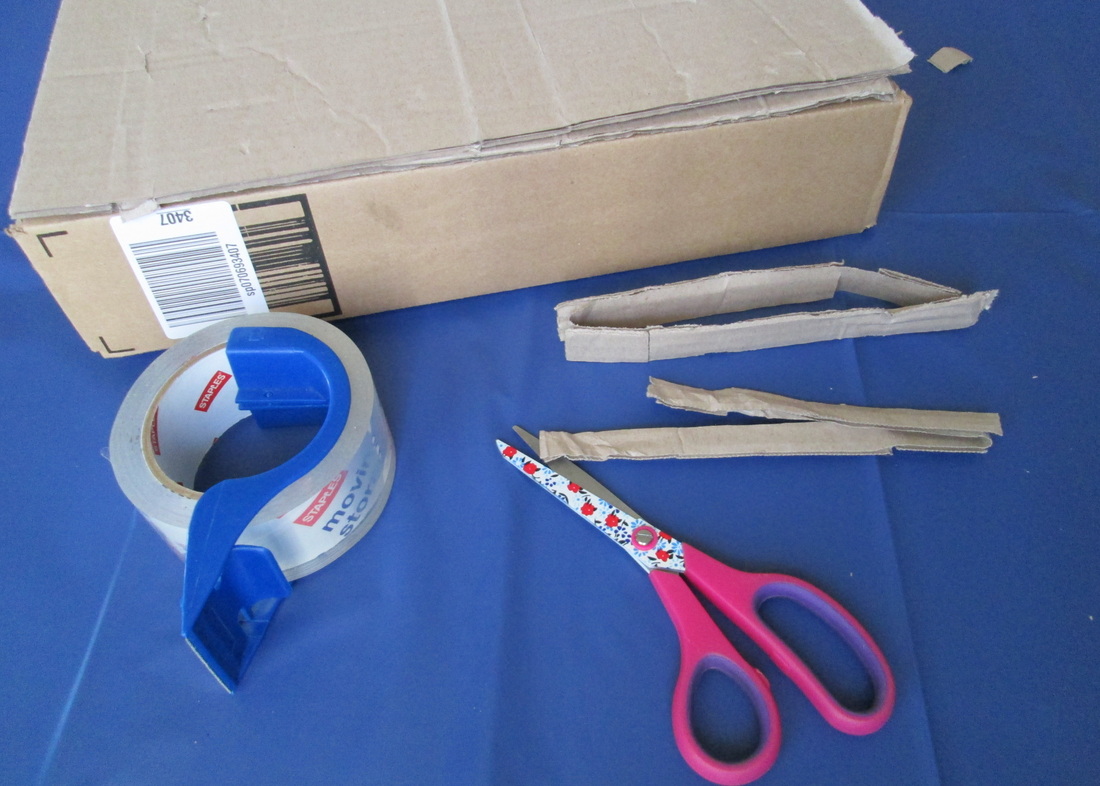
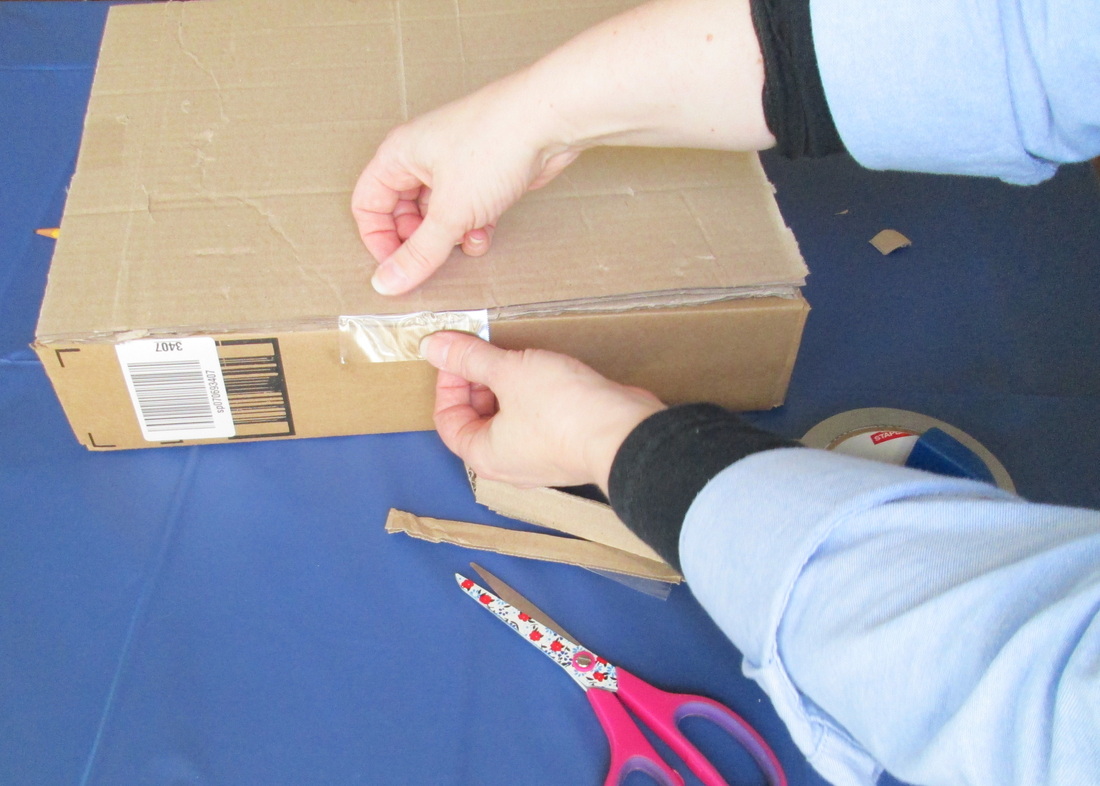
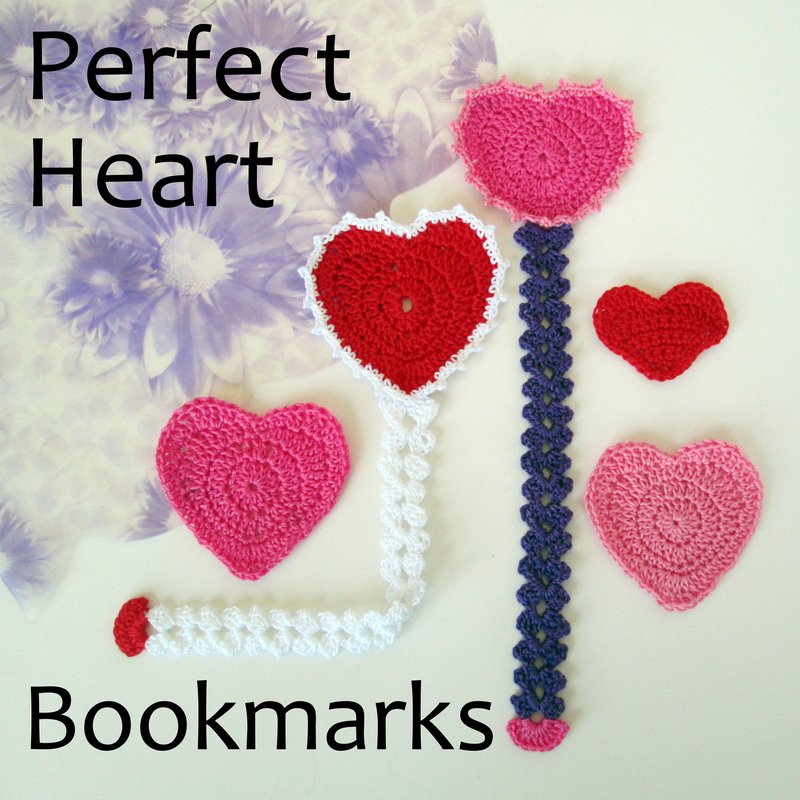
I have been creating and making like mad. Now it is time to buckle down and do the business side of things. After all, getting things sold opens the door to more creative opportunities! Thanks for stopping by. Blessings & Joy - RobinBrz 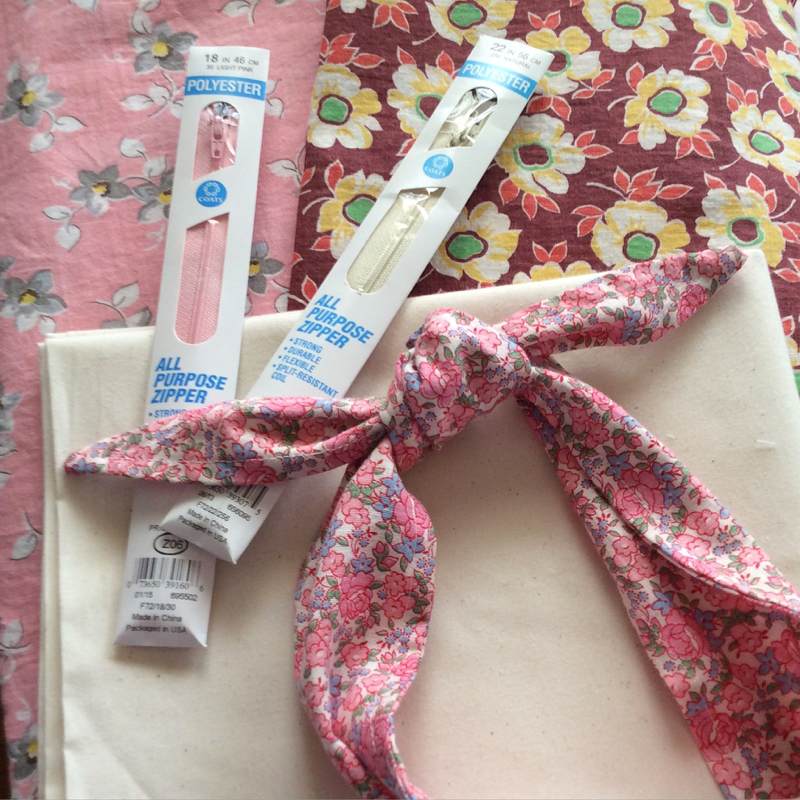 Greetings Friends! Last week my wonderful coworker Marie gave me a pile of vintage feed sacks that she has been hanging onto for someday. Apparently they came from her mother in law who also kept them for someday. Marie and her husband Walter estimate that they've been waiting for that day to come since the 1930's. Turns out that this is someday and I have been chosen to give them the life they deserve! 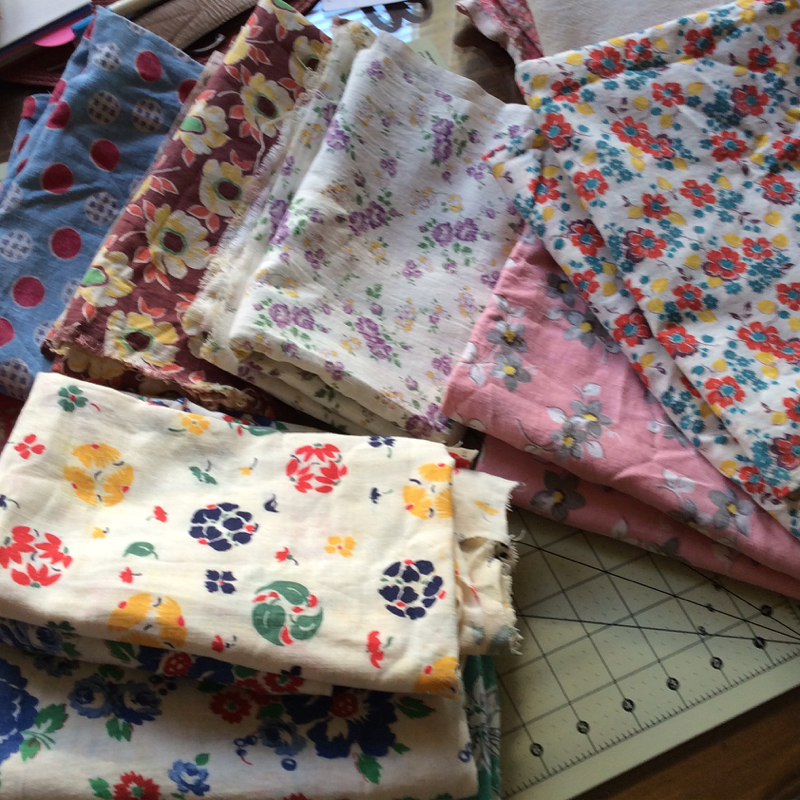 Aren't they something? I had no idea they used such pretty patterns for such a utilitarian task as holding grain. One of my FB friends said it was very common, and all the girls had feed sack dresses! I think it's a brilliant example of giving the people what they want/need and being thrifty. 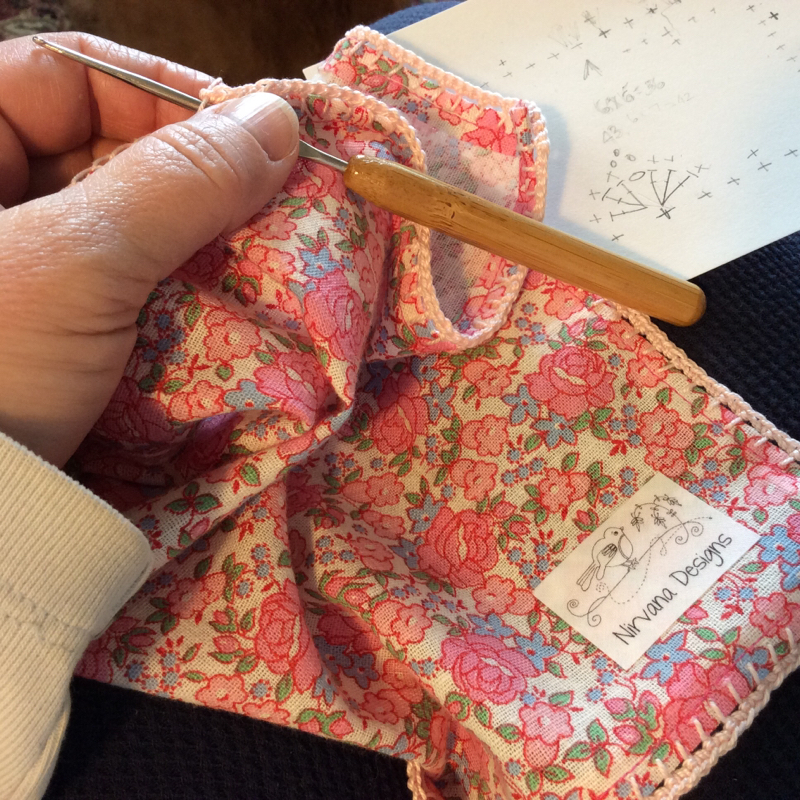 There were a few scraps already cut. To see how it behaves, I stitched one into this little hankie. I'm just about finished adding a bit of crochet lace to girly it up. I also stitched one of the longer pieces into a "Rosie (the Riviter)" headband / hair tie. Totally fun. My son thinks I look ridiculous, but honestly he's 18, what does he know?! 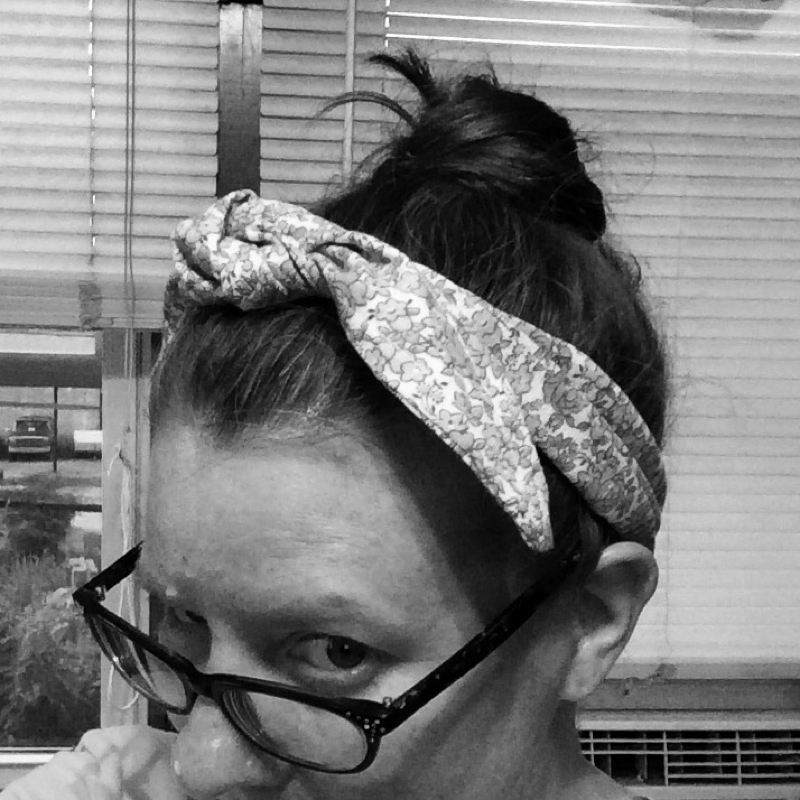 All of the fabric is clean and in good shape. There is a bit of yellowing on some pieces at the folds. I experimented with a homemade cleaning solution (baking soda, peroxide, Borax etc.) and have no doubt that it will all be useable. I chose these two patterns for my first bags. I bought an un-bleached heavy(ish) muslin for the lining and a few zippers should I decide to go that way. I'm not sue just yet what style bag I'm going to make first. I'm leaning towards the larger drawstring tote and adding a zippered center pocket that can also act as a divider. We'll see. It's about time to head to work. I'll give it some thought. Maybe Marie has an idea for something she'd like. Come on back and see what happens next! Thanks so much for stopping by and spending a bit of your day with me. Until next time friends, Blessings & Love! 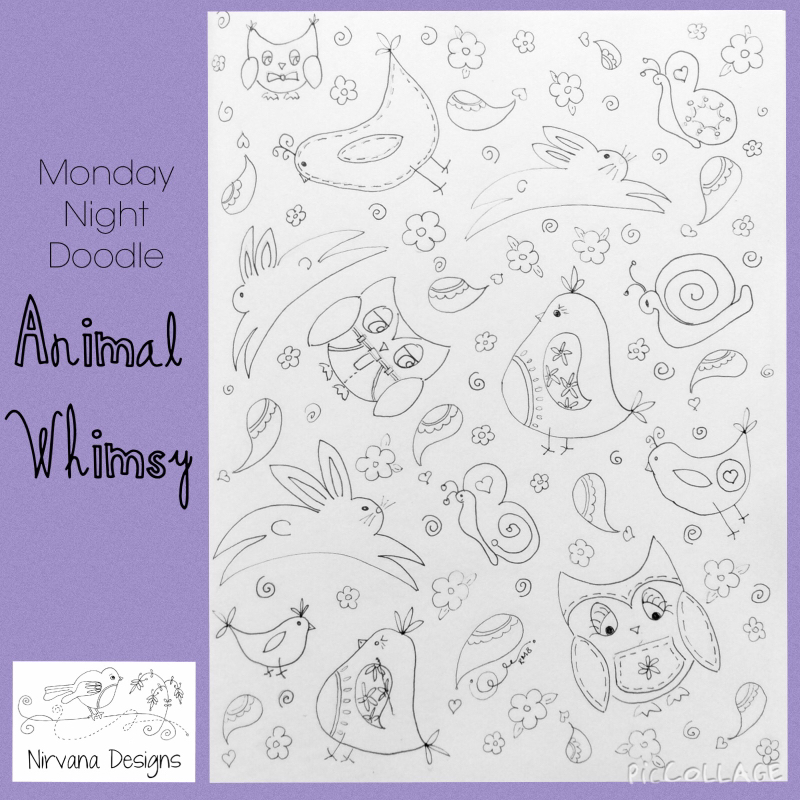 Greetings! Although it seems like I have abandon the blog, the truth is I've been focusing my energy on making things instead of writing about them. Lots of sewing and doodles and jewelry making - not so much crochet and knitting. I'm enjoying stretching my wings and learning new things. I'm not sure how the blog fits, but for today I was motivated to share my art. The renewed interest in drawing came about as I worked to create a new logo for our etsy shop Nirvana Designs. 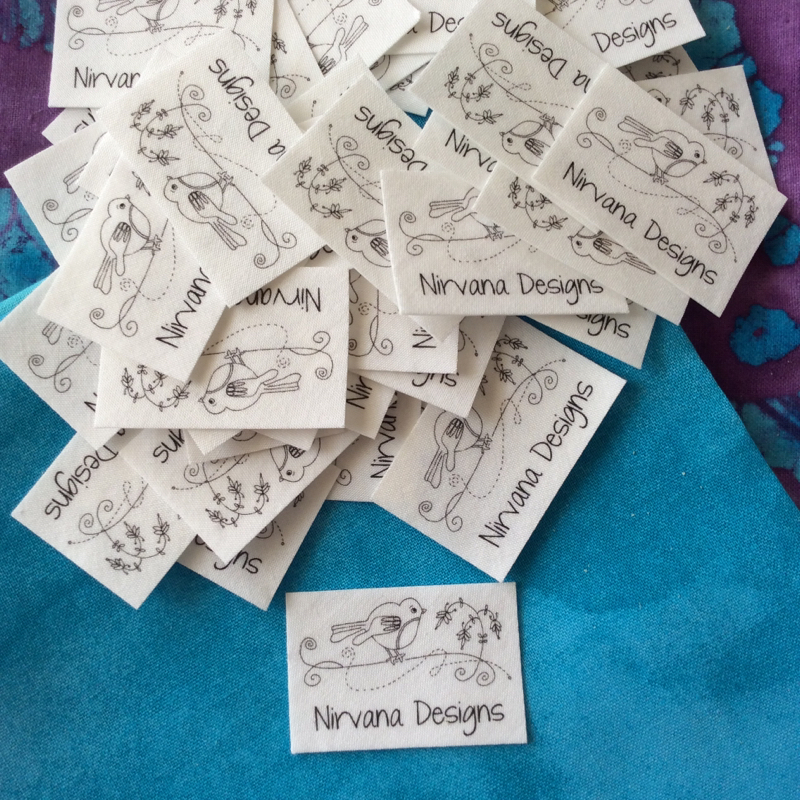 It was nice to visit today. Hopefully we'll be seeing more of each other. If you're wondering what else I've been up to, check me out on Facebook and Instagram. I post there pretty much daily! Until next time friends, Wishing you blessings and joy! 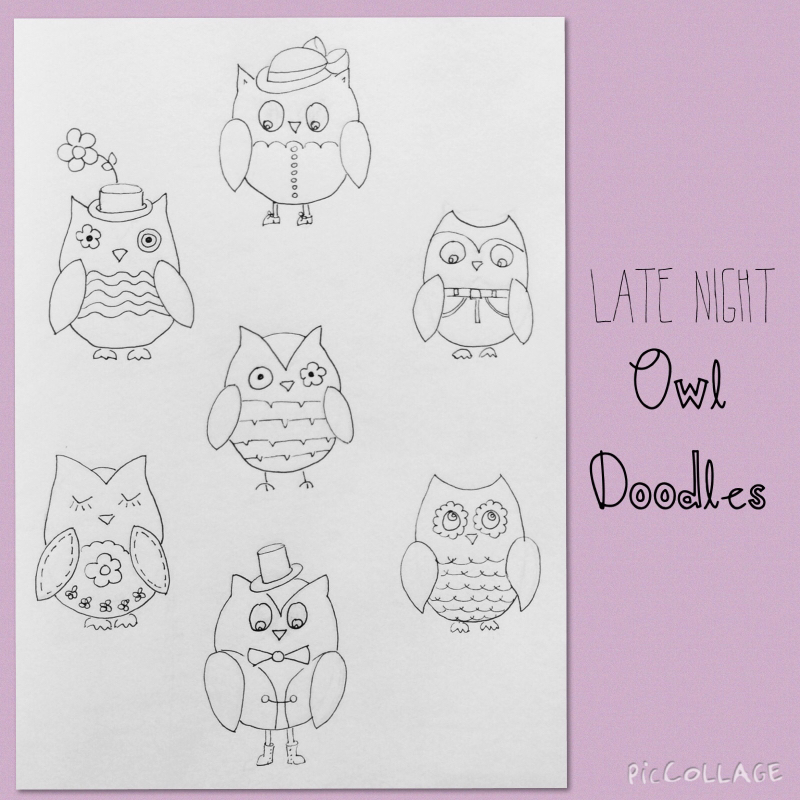 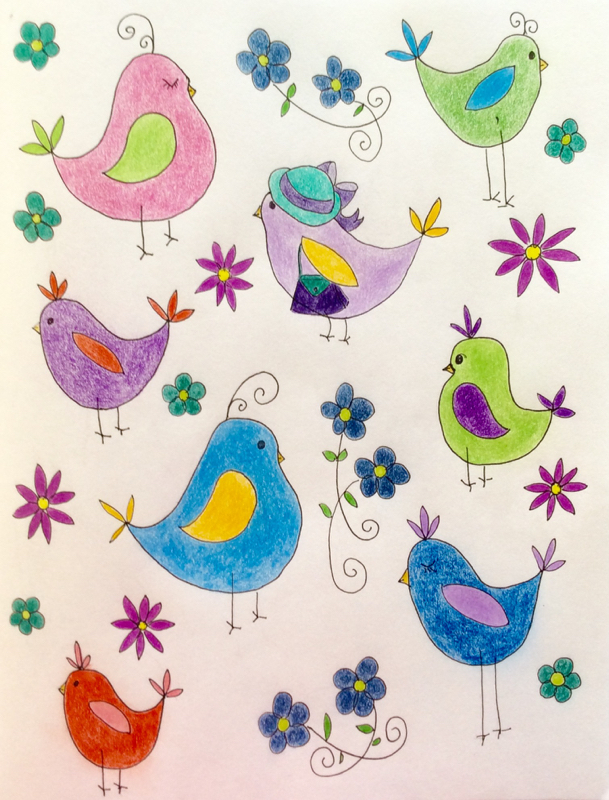 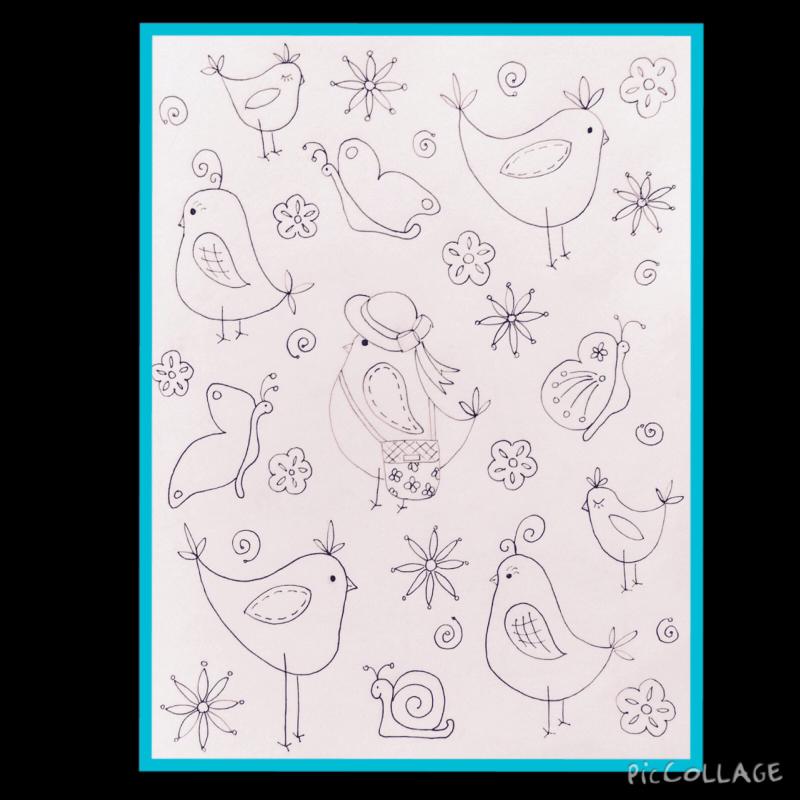 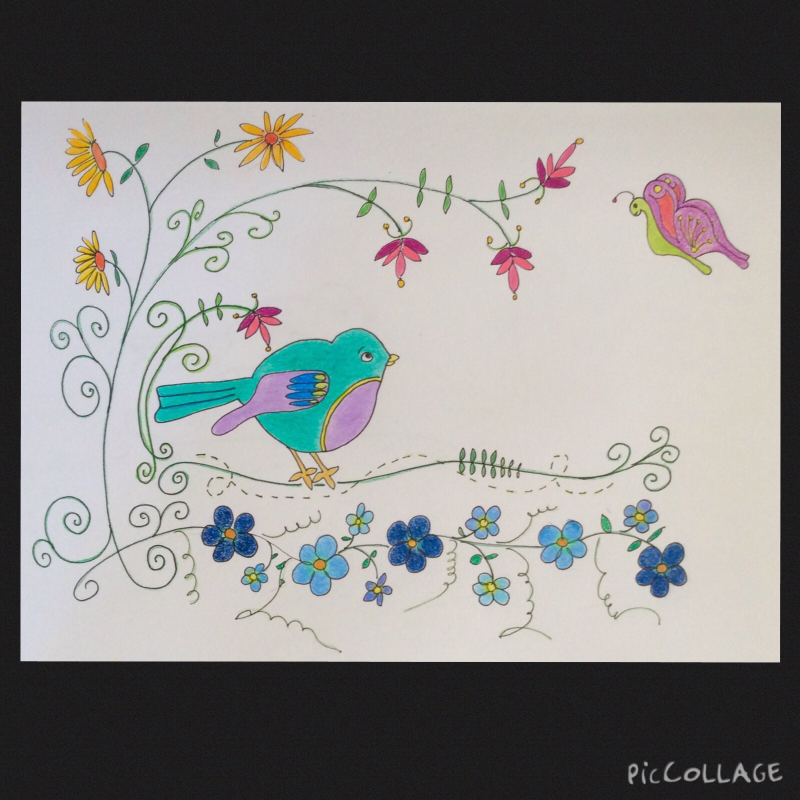 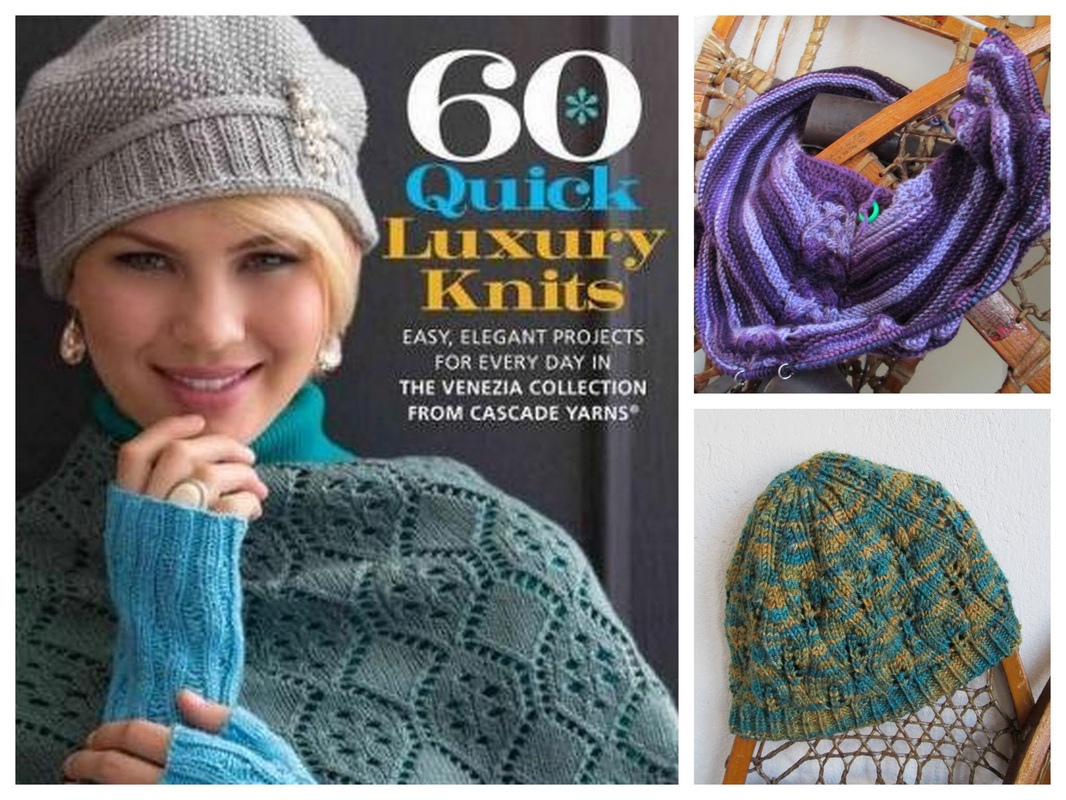 60 Quick Luxury Knits: Easy, Elegant Projects for Every Day in the Venezia Collection from Cascade Yarns Series: 60 Quick Knits Paperback: 176 pages Publisher: Sixth&Spring Books (August 5, 2014) Greetings Friends! As much as I love browsing patterns on the internet, my favorite way to look for new projects is in books. There is something about flipping through the pages that makes me excited about the possibilities. Unfortunately, a lot of the time there are only a few patterns that I might actually make. Now that is okay if I borrowed the book from the library, but if I'm going to buy a book I want to make sure that it has several projects that I'm apt to make - someday. The 60 Quick Knit Series is from the folks at Cascade Yarns and Sixth&Spring Books. is definately worth checking out. I think that there are seven books now. They all have a unifying theme and showcase their family of yarns. Using the recommended yarn is what they hope you will do, but of course you can make appropriate substitutions. Although if you have the opportunity, give their yarn a try! So far from Luxury Knits I have chosen two projects. First I made this hat. The pattern is called Catalpa Hat designed by Anastasia Blaes. I did not have Venzia Sport Multis (merino wool/mulberry silk) yarn that is called for, but I did have an excellent substitute. A hank of the Kangaroo Dyers merino and silk hand dyed Poet Seat Yarn in a fabulous colorway called Sunlight in the Forest. 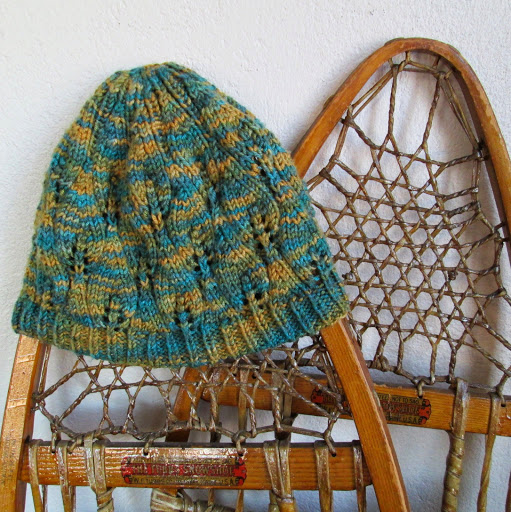 I have to extol the virtues of this hat. I'm not sure if it is the yarn (amazing), the pattern (lovely) or the combination (stunning), but whatever it is, this is officially my favorite hat of the season. It's warm, comfortable and looks great - if I do say so myself. Honestly, there are so many cool patterns in this book I had to try another one. After much deliberation (I have sticky notes on at least 8 projects!) I settled on theCenter Back Cable Shawl by Candace Eisner Strick. I am a huge fan of cables, and this one does not disappoint. Again I had to make a yarn substitution. I'm using Serenity Garden Yarn from Deborah Norville in Crocus. Of course I would love to use merino and silk, but this microfiber is surprisingly nice. It is smooth, has a terrific sheen and is easy to work with. Plus the price makes it an economical option. 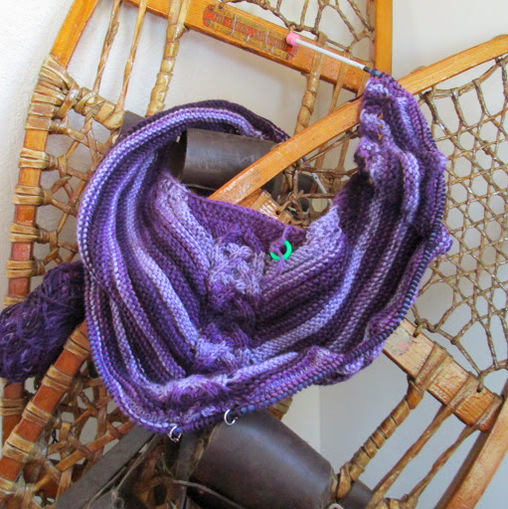 I was a little worried about the color changes, but so far it looks like everything is falling into place. Purple is my favorite color and this one is wonderfully true and rich! It is hard to see in my picture, but the body of the shawl is kind of "ribbed". Alternating (multiple) rows of knit and pearl create a texture that is easy to execute and helps direct focus to the wide center cable. Now if only I could knit faster! I can't wait to finish the shawl so I can wear it and start something else! All of the projects are from different designers. Since everyone has a unique way of writing it could be confusing. Happily the editors have done a great job of bringing continuity to the patterns. I have found them accurate and easy to follow. The photography and layouts are visually appealing making it hard to choose what to make next! In fact, in our knitting group at the library someone just borrowed 60 Quick Knits from America's Yarn Shops (another book in the series). There are so many projects that she wants to make - she decided to buy a copy for herself. I can't think of a better recommendation!. You can find the books in the series online or at your local library. If they're not in your library's collection, ask them if they can get a copy for you. Most libraries are willing and able to help patrons find what they're looking for. Thanks so much for stopping by and spending a bit of your day with me. Until next time friends, Be Blessed and Stitch with Love! 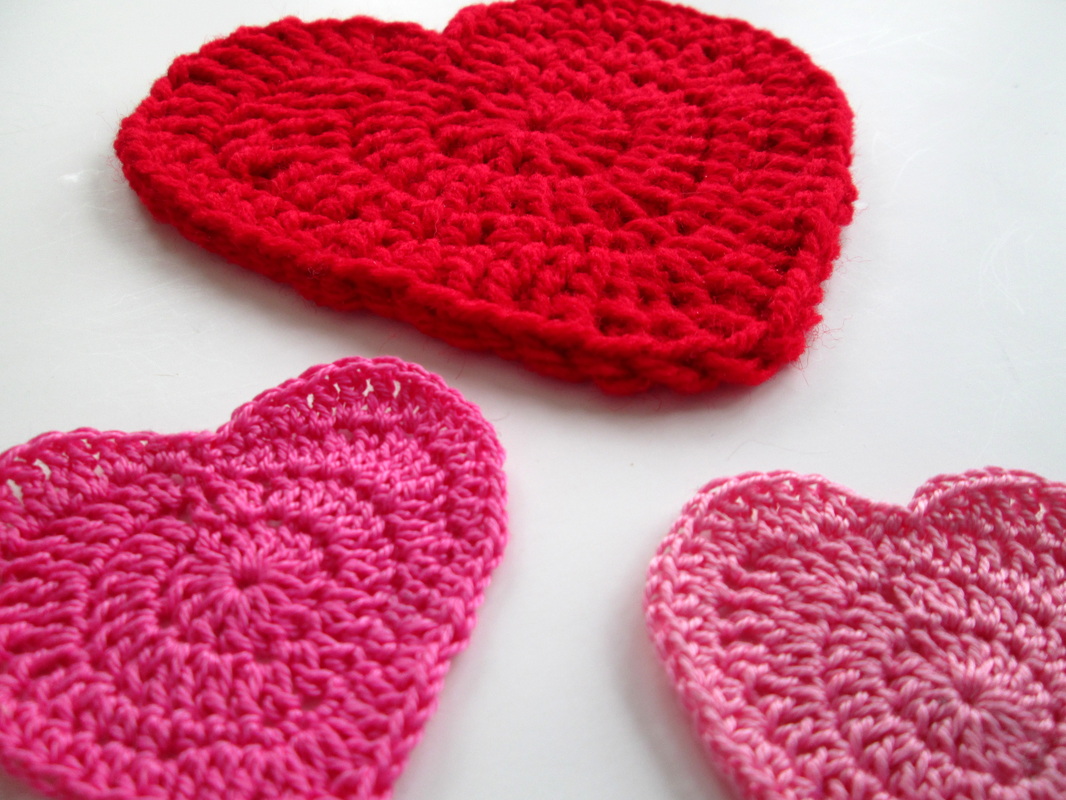 Hello Friends! Is it snowing where you are? Here in north central Massachusetts we are in the middle of the second big storm of the new year (a blizzardette you might call it). Of course snow days mean plenty of time for making. That's why I want to share this sweet little heart pattern with you. Made in just four rounds, you can crochet a whole pile of them in one snowy afternoon. The original pattern was posted a few years agoin this post. I found that no matter how many times I made it, I would loose my place in the pattern. To make it easier, I edited the instructions so they are written out stitch by stitch and line by line. Now it is much more user friendly! These hearts motifs are incredibly versatile and can be made with any yarn / hook combination. I've used worsted wool to make coasters, sewn two together to make sachets, and even made them out of thread and glued them to cardstock to make very special valentines! The possibilities are as endless as your imagination. Give it a try and have some fun! I'd love to see what you come up with. Be sure and share your creations with me on Facebook or Instagram. Thanks so much for stopping by and spending a bit of your day with me. Until next time friends, Be blessed and stitch with love!  Greetings Friends! This is one of my favorite projects, and I know you're going to like it too! I'm all about finding new ways to use what I have around the house. I'm not really a hoarder, but I hang on to a lot of things that I think might have potential - someday. This earring holder is a perfect example of turning forgotten items into something special. For a long time I had the idea about making some sort of holder for all of the earrings that I have.using a picture frame. Writing an article for the Craftsy Blog about different ways that you can display your crochet work gave me a chance to do some experimenting. I tried wrapping string around cardboard and sliding it in a frame, but it didn't have the look I wanted. Eventually I stumbled across a piece of crochet lace. It actually is one of my early pieces of thread work that I had abandoned. A mistake in the border made it unusable for it's original purpose - a pillow top. But, when I held the lace together with one of the old frames I knew I was on to something. The glass was missing and the finish flaking off, but it had an undeniable charm. 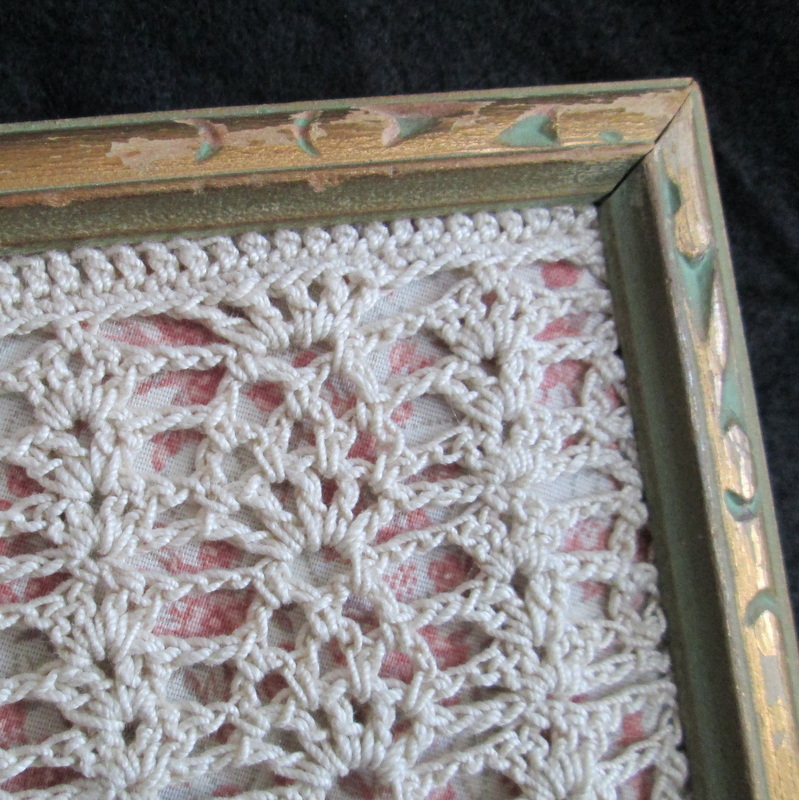 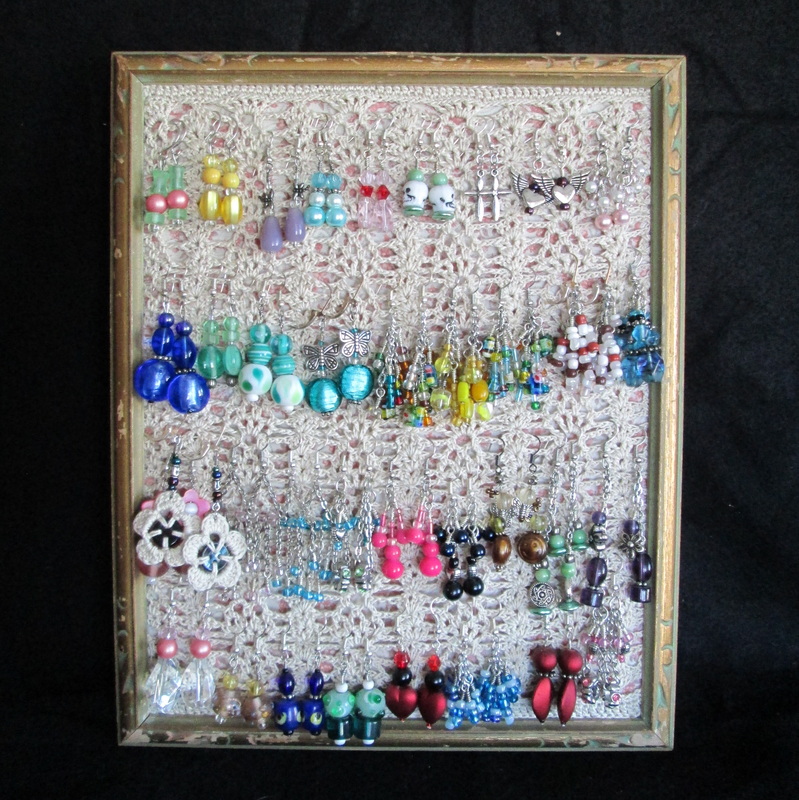 It really was easy to put together. I found a piece of fabric (actually an old skirt) that matched the lace. I wrapped it around a piece of cardboard I cut to fit inside the frame. Then I stretched the lace over the fabric and laid it inside the frame. It fit nice and snuggly. The front looked perfect, but the back was a big mess. No one will ever see it, but things like that really bother me! I secured everything with packing tape. Then I cut a piece of cardboard from a cereal box to cover the back. I used craft adhesive (a super strong epoxy like glue) to attach the cardboard to the frame. I clamped it all together and let it dry overnight. Now I have a lovely place to display all of my earrings. One of my favorite things about making jewelry is having pieces that match or complement pretty much everything in my wardrobe! My shabby chic lace holder now proudly sits on top of my bureau making all my earrings easy to see. Now the hard part is deciding what pair I want to wear! Thanks so much for stopping by and spending a bit of your day with me! Until next time friends, Be Blessed and Stitch with Love! Using things you have at home, make a mini blocking board that's perfect for stiffening your small crochet lace pieces!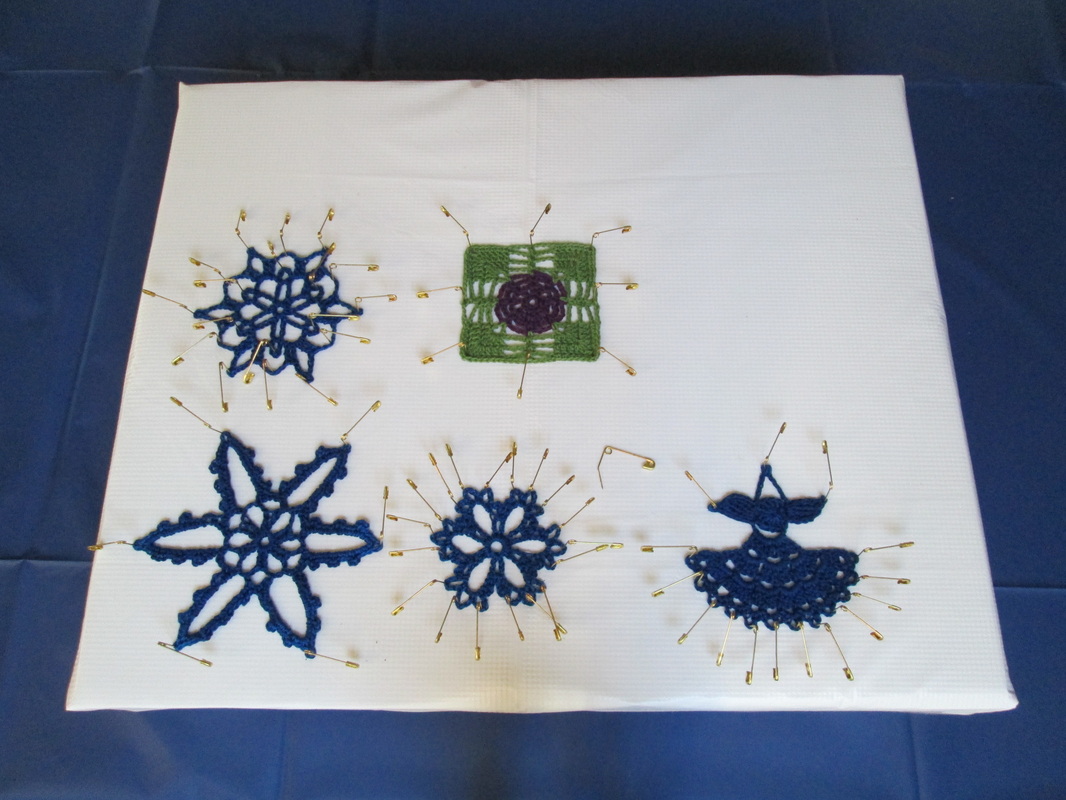 Greetings Friends! Having the right tools is important to any craft or hobby. However, that often means spending money! If you're like me, that's not always an option. and even if you have the means to buy what you need, that doesn't help you when you want it right now! When you're blocking or stiffening crochet lace you don't need a giant blocking board. You also may not want to get the stiffening solution all over your "good" board. Why not make one? I've used this method throughout the years with great results. Here's what you do:: 1) Gather your materials. 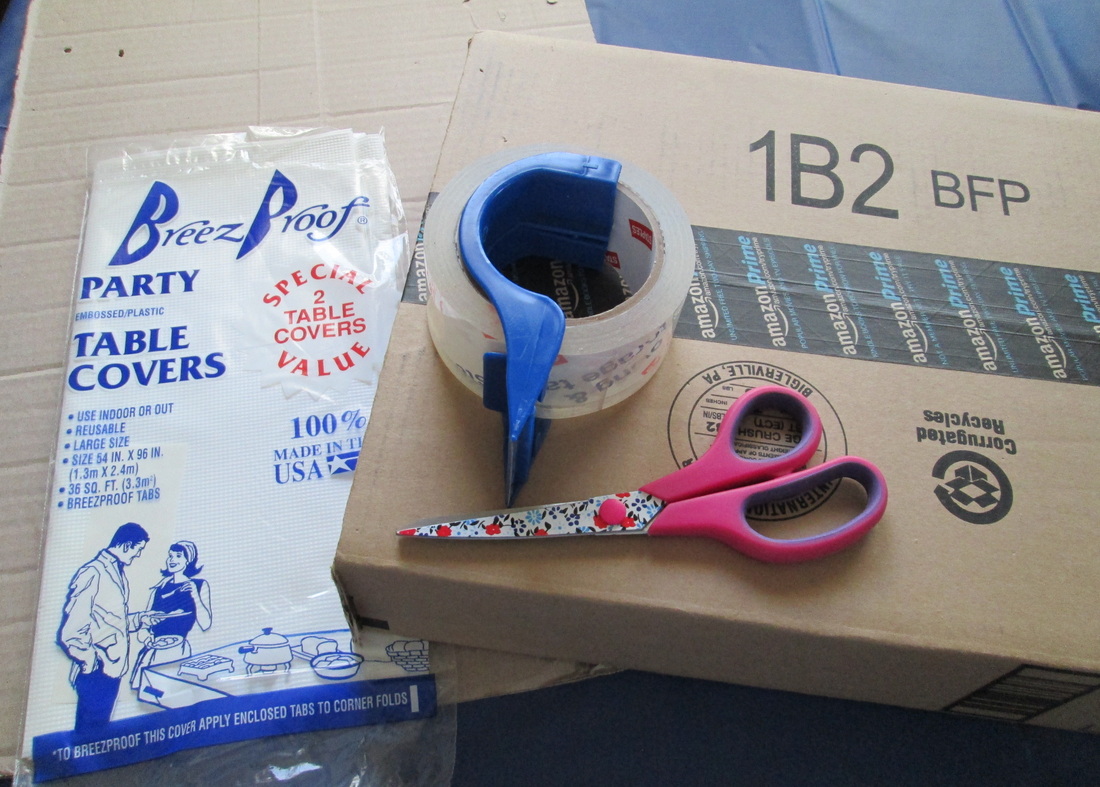 You need: A flat(ish) box - maybe a few inches high. The size of your box, is the size of your board, so consider what you'll be blocking. Some extra pieces of cardboard (I cut up another box). Make sure it's the nice corrugated cardboard, not the flat stuff from a cereal box. Scissors, tape and a disposable plastic table cloth. For some reason I have a stash of these table clothes. Not sure why, but there you go! Don't have one? Don't worry, I've also used aluminum foil, wax paper and plastic wrap. 2) Cut your extra cardboard the same size as your box.
This gives your board stability and makes it easier to push the pins into. I used two layers and then secured them with tape on each side. 3) Wrap your box.
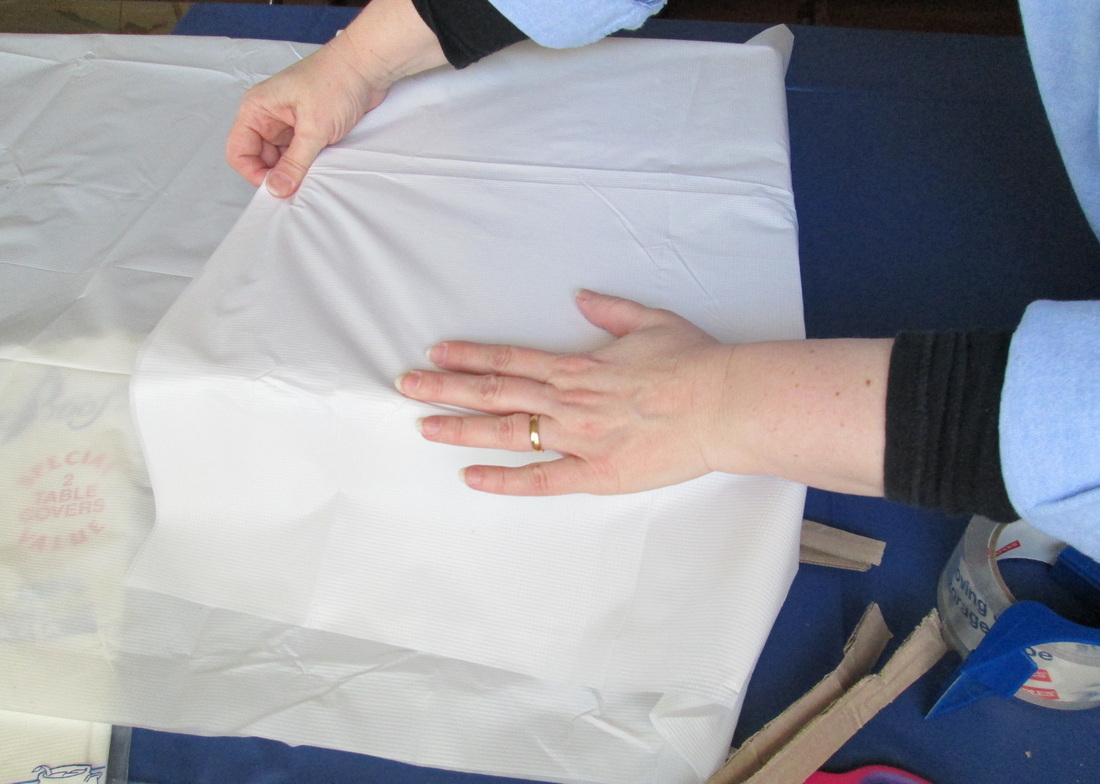
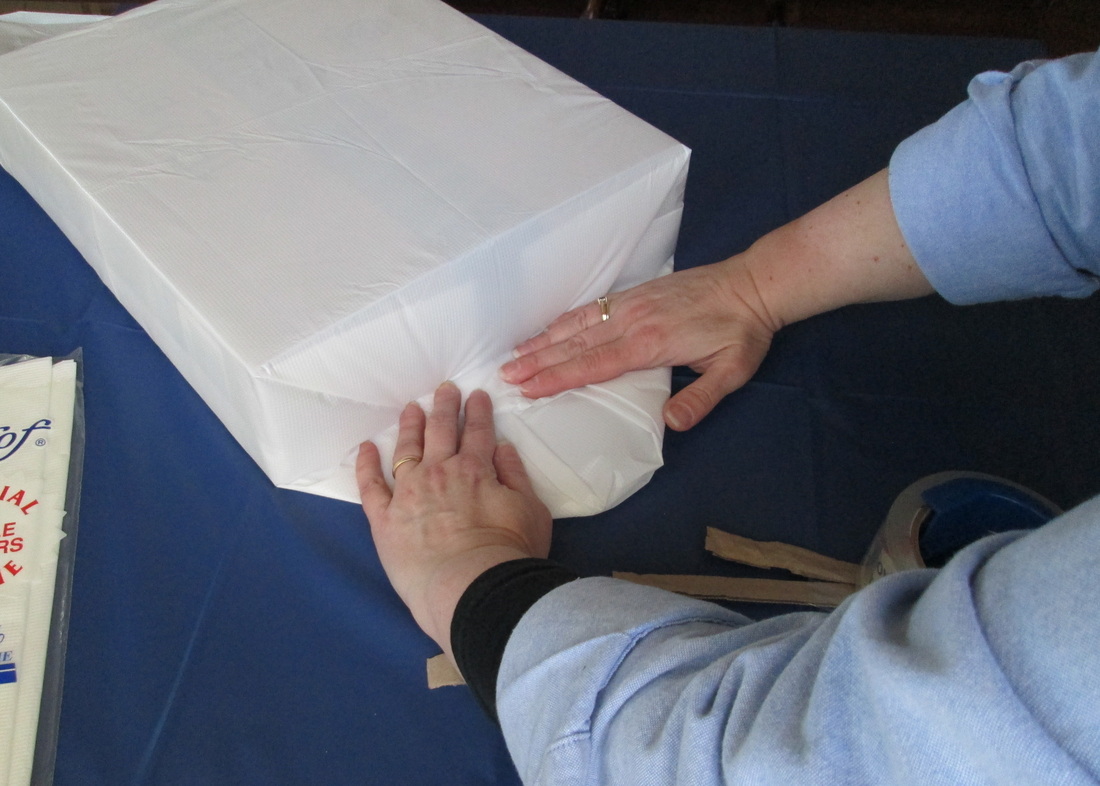
Cut your table cloth so it will cover the box a few times. (If you're using foil, plastic wrap or wax paper use a few layers. They'll last for several uses, just make sure you secure it tightly.) Wrap it up just like a present! Tape the ends firmly and voila! you're ready to get busy blocking those ornaments!
That's all there is to it. I think having the right tools is important, but it's so easy to stress over having the same one that the "professionals" are using. Let's not get caught up in the gadgets! We're creative people, right? and when we can make our own that does the same thing - I say hooray! After all. it's about the making and the end result., not about the tools!
Thanks so much for stopping by and spending a bit of your day with me! Until next time friends, Be Blessed and Stitch with Love!  Look at what you can win! Plus a super secret surprise gift! Greetings Friends! Welcome to the Christmas season! Now that Thanksgiving (in the US) is only a few weeks away we are feeling it in earnest. In this (sometimes) overly politically correct world I often feel afraid to say the "C" word! Since I work with the public, I'm conditioned to say, "Happy Holidays" and "Enjoy the Season"! So boy am I excited to have the opportunity to shout it out loud in today's post about Edie Eckman's new book Christmas Crochet for Hearth, Home & Tree. Rest assured you'll find projects that cross over and would be appropriate in any holiday home, but for the most part this one is about decking the halls for the big day - December 25! What's inside: stockings, ornaments, garlands and more Edie is one of my favorite designers. I've come to rely on her books for their bounty of information and consistent quality. This collection does not disappoint. Although there are only 18 patterns, they lend themselves to being made with different yarns in various colors for unlimited versions of the original. This is a pattern book - not a how to book, and while the lesser known stitches are clearly explained, a basic knowledge of crochet is needed. The Hearth section features 9 unique stocking patterns. It is my experience that many crocheters underestimate their skill level and shy away from anything not labeled "beginner". The small size of these projects offers a great opportunity to be bold and try something new! The Peppermint Pinstripes Stocking has the look of complex colorwork and is actually made using just the single crochet and chain stitch! The Flame Stitch Stocking is intriguing and looks quite complicated, but according to the instructions it is, "easy to learn and works up in a snap!" Here's a look at what I made: I always like to try at least one pattern from a book I'm reviewing. This time I made a few! I started with one of the mini mittens from the Advent Garland. This is such a fun pattern. Mini mittens and stockings to count down the days to Christmas! I found it easy to follow and an excellent way to use bits and scraps of leftover yarn. 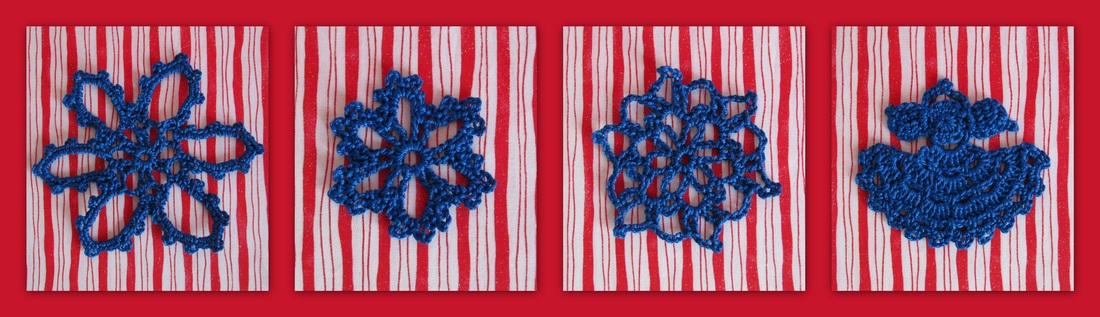 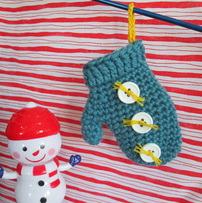 Next I made snowflakes. There are several to choose from. Some are made with thread and others with yarn. This is another example of the flexibility of the patterns. I love to make snowflakes and then stiffen them with glue. I use them as ornaments for the tree, to decorate gifts, or include them with cards. Charts are included with all of the snowflakes, as well as with many other patterns. Finally I made the Small Angel Ornament. Although the pattern calls for 2 strands of extra fine merino held together I opted for thread. As you can see, she came out just fine. A wee bit smaller, but lovely just the same.
Are you ready for some Christmas Crochet? |
I'm Robin and this is  
Click to see what's new on the Craftsy Crochet Blog!
Follow Along
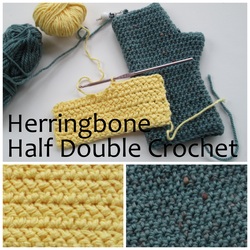
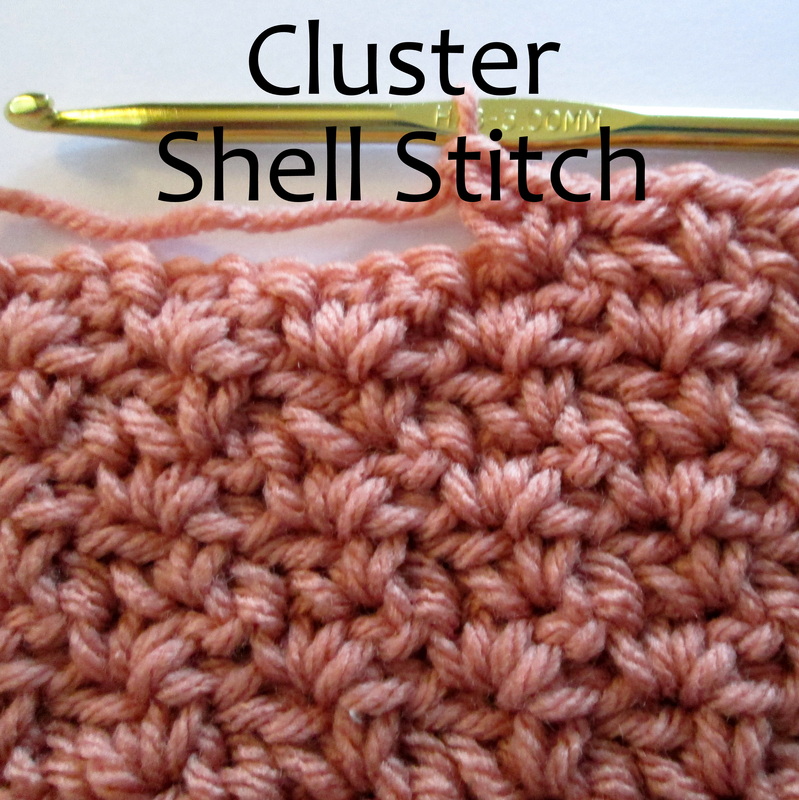
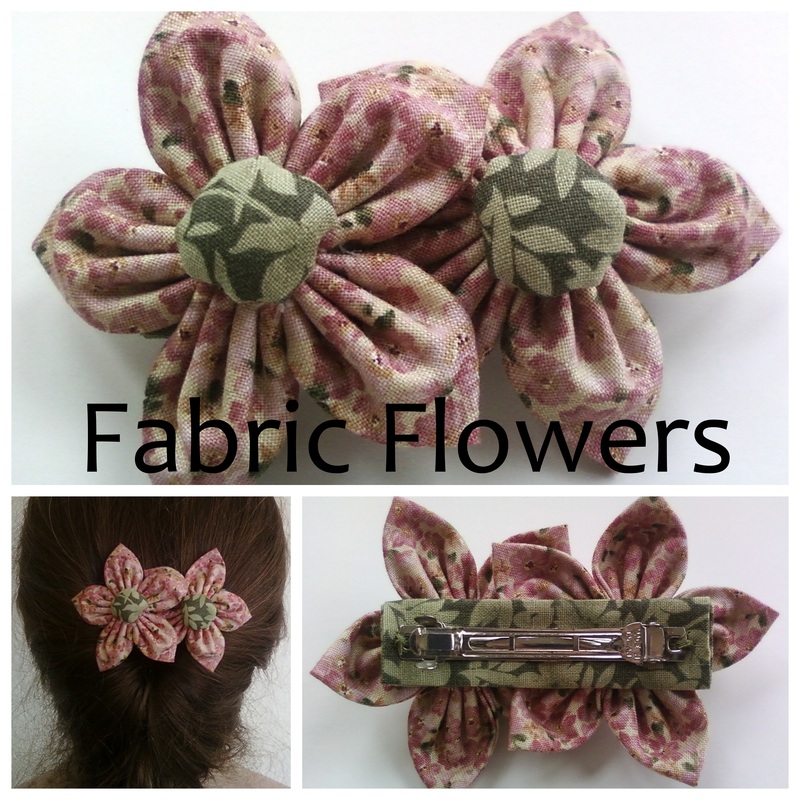
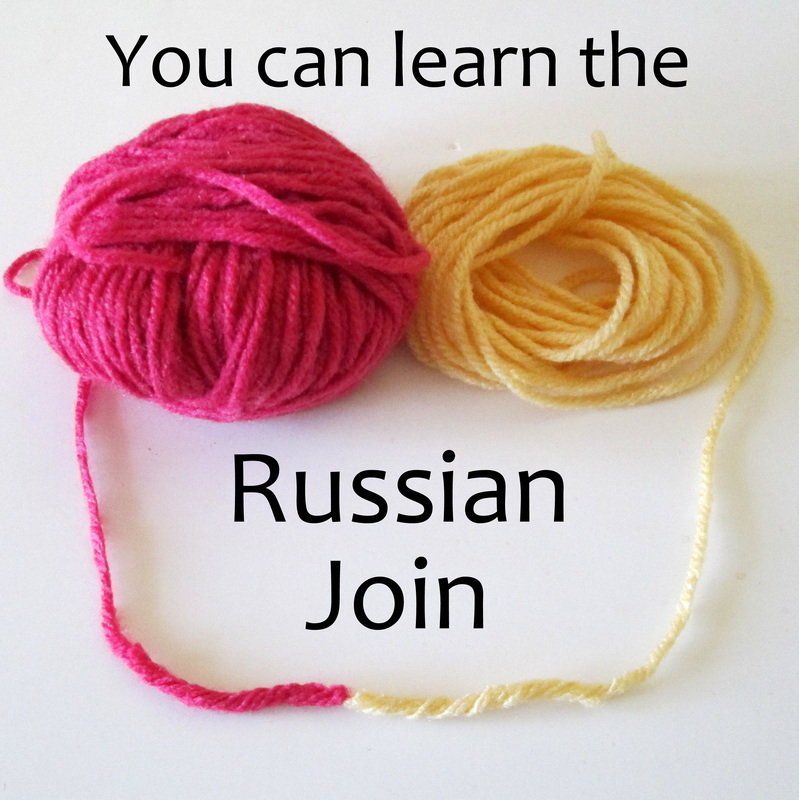
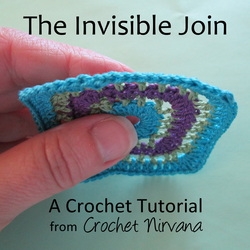
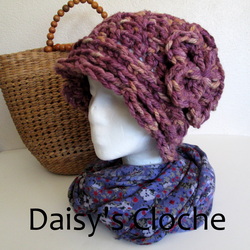
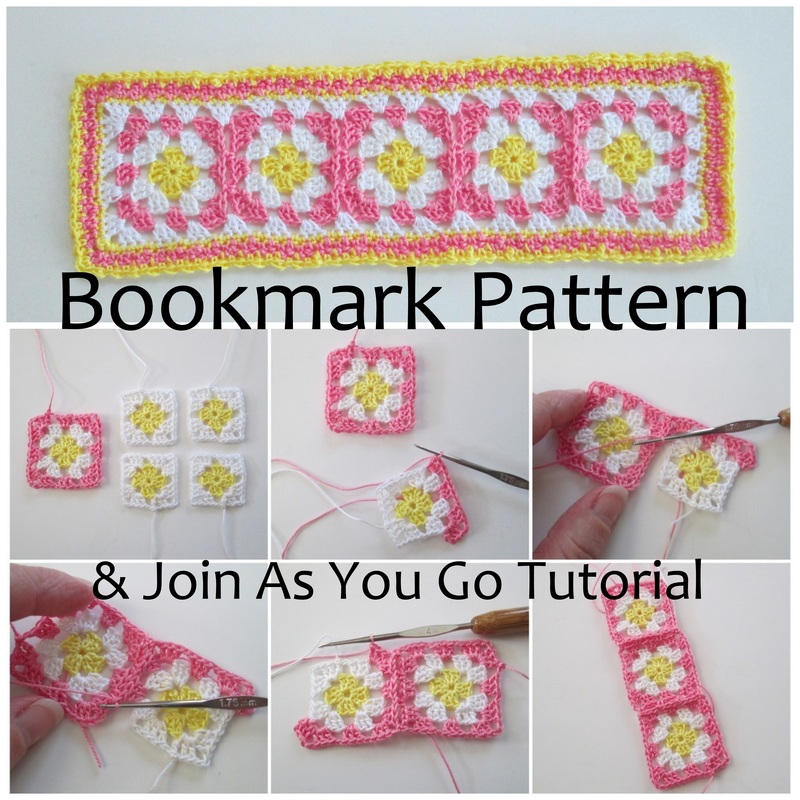
 Tutorials and Patterns


On Instagram 
Look for me, I'm RobinBrz


Places I Post
 Archives
July 2015
Categories
All
 
Thank you for visiting!
My name is Robin. I am a wife, mother and strong believer in the power of faith. I'm a maker, a crafter and an artist. I love exploring new mediums and sharing my adventures with you. Did you enjoy your visit? Let me know by leaving a comment. I love knowing you dropped by, and hope to see you again soon! Be Blessed and Stitch & Read with Love! 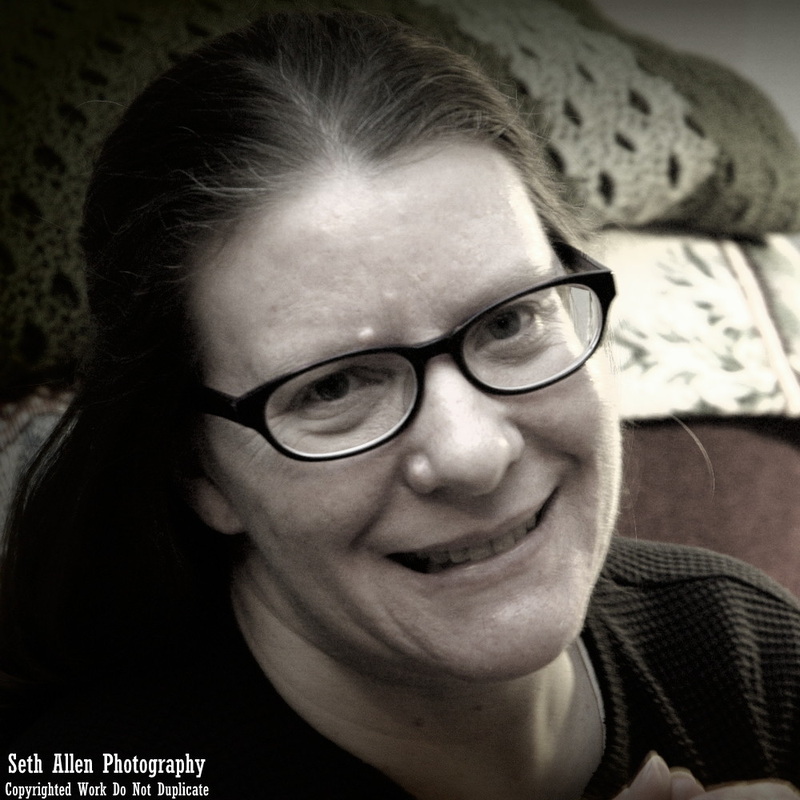
|