|
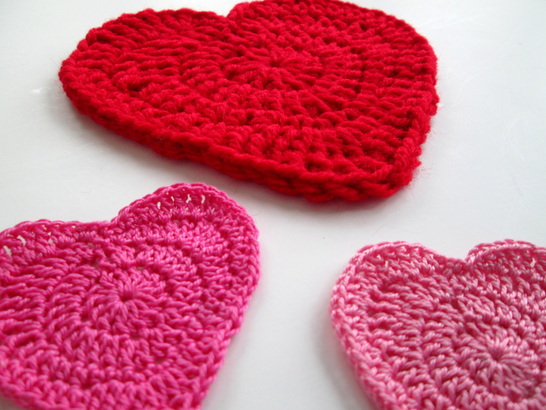
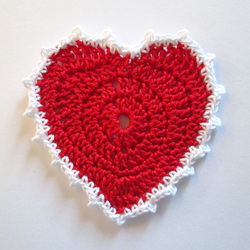
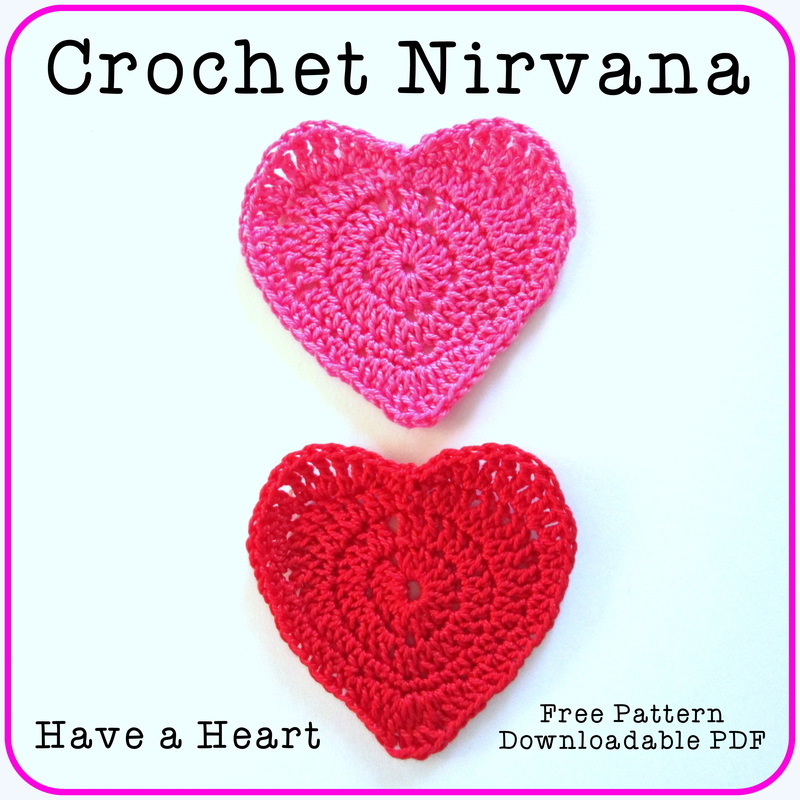
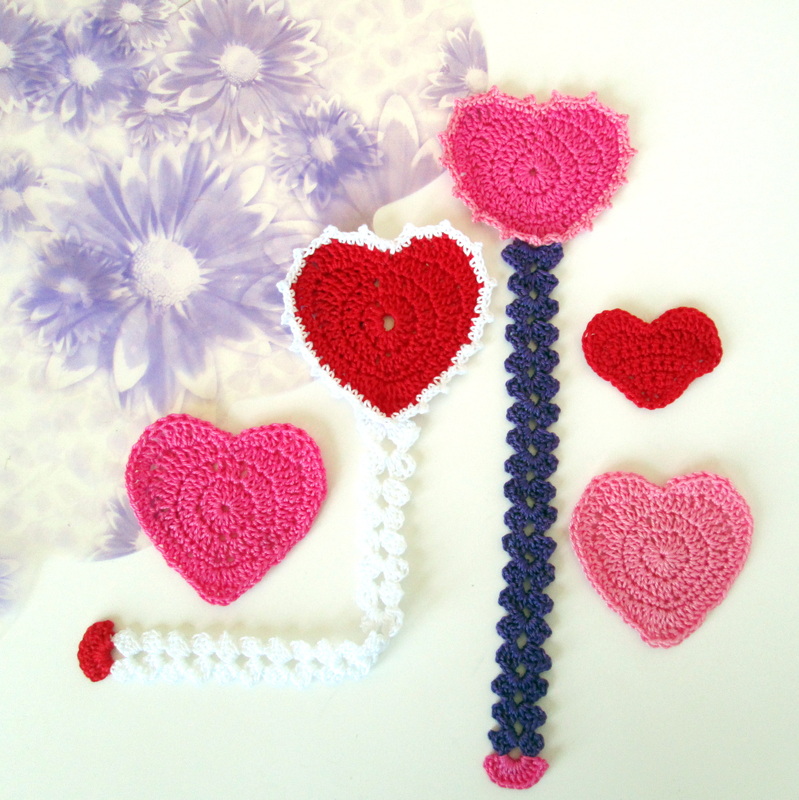
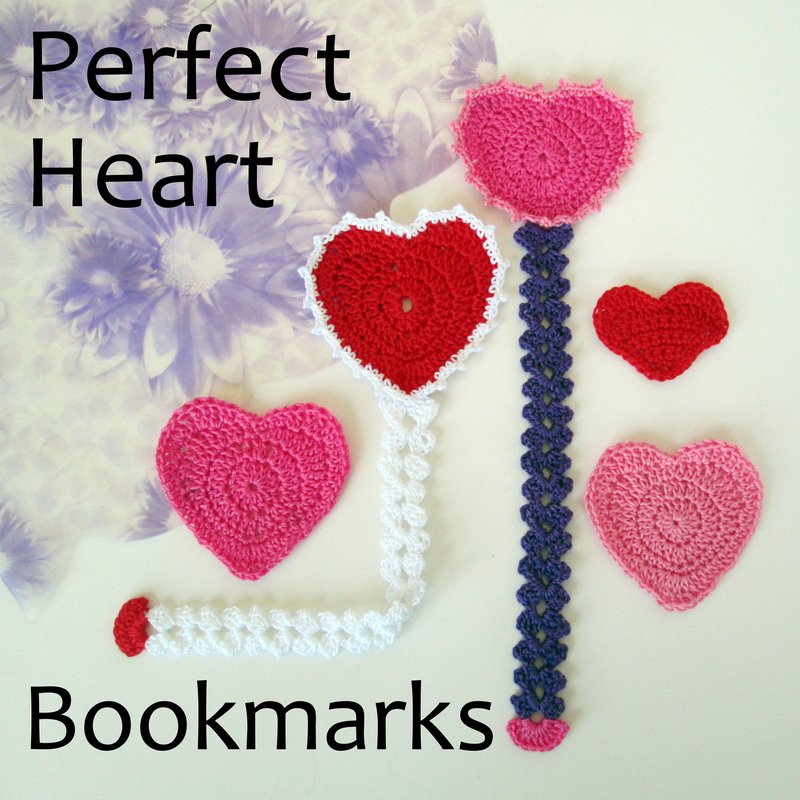
Hello Friends! Is it snowing where you are? Here in north central Massachusetts we are in the middle of the second big storm of the new year (a blizzardette you might call it). Of course snow days mean plenty of time for making. That's why I want to share this sweet little heart pattern with you. Made in just four rounds, you can crochet a whole pile of them in one snowy afternoon. The original pattern was posted a few years agoin this post. I found that no matter how many times I made it, I would loose my place in the pattern. To make it easier, I edited the instructions so they are written out stitch by stitch and line by line. Now it is much more user friendly! These hearts motifs are incredibly versatile and can be made with any yarn / hook combination. I've used worsted wool to make coasters, sewn two together to make sachets, and even made them out of thread and glued them to cardstock to make very special valentines! The possibilities are as endless as your imagination. Give it a try and have some fun! I'd love to see what you come up with. Be sure and share your creations with me on Facebook or Instagram. Thanks so much for stopping by and spending a bit of your day with me. Until next time friends, Be blessed and stitch with love!
3 Comments
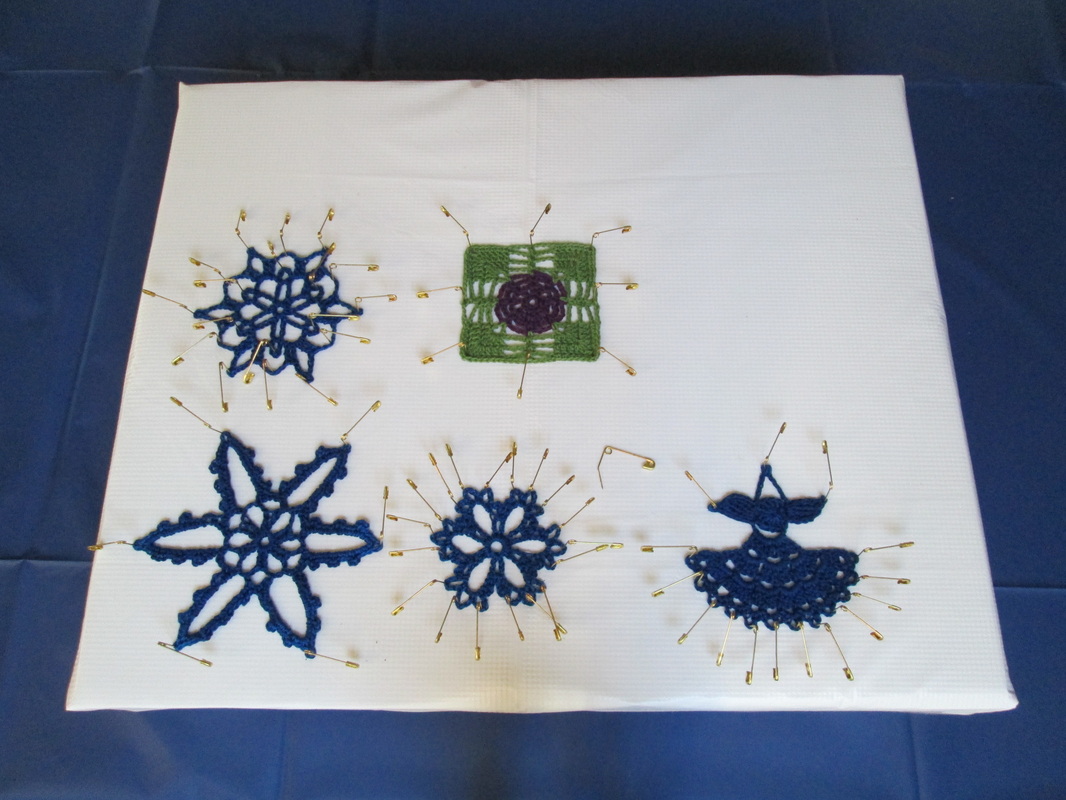
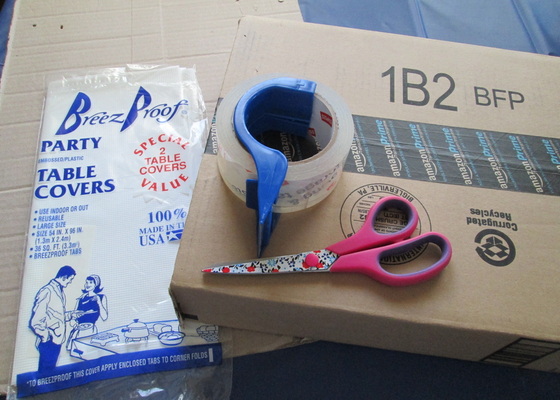
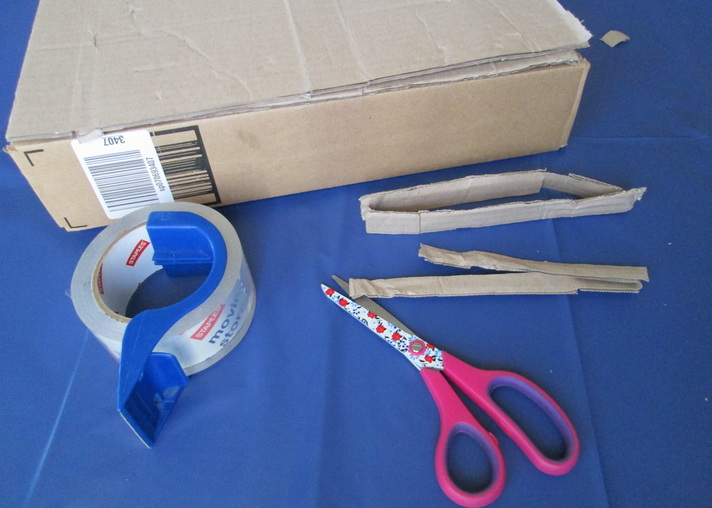
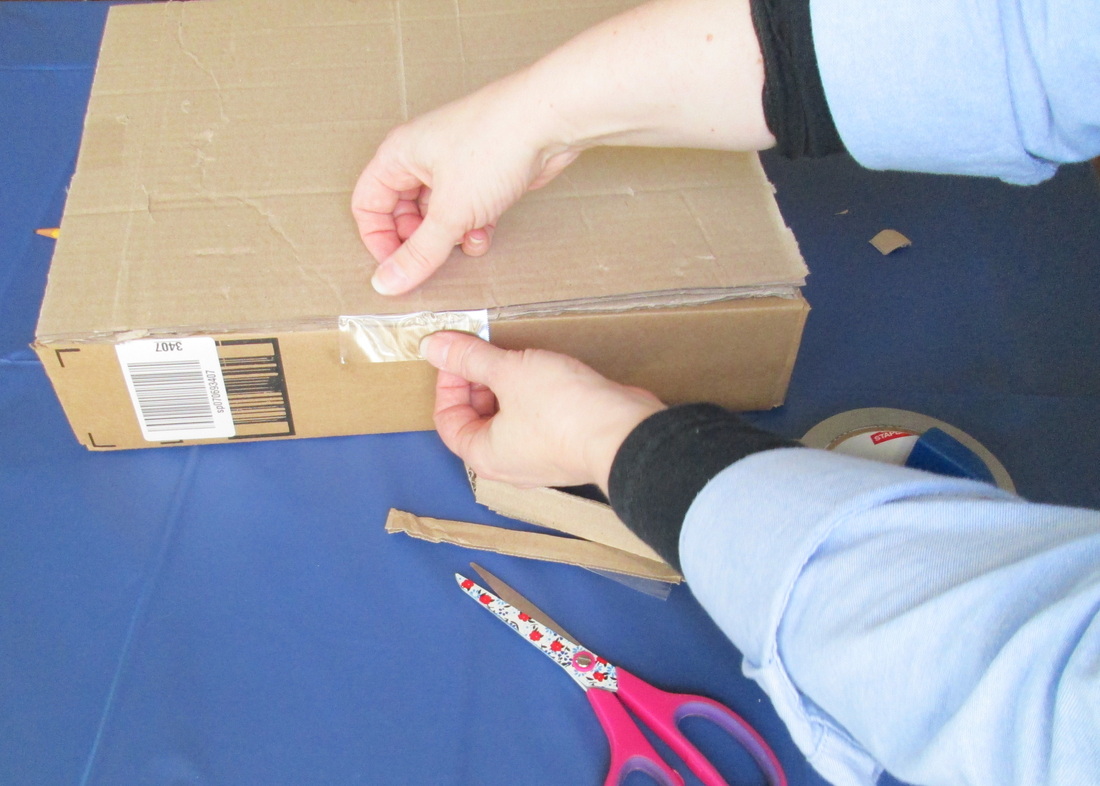
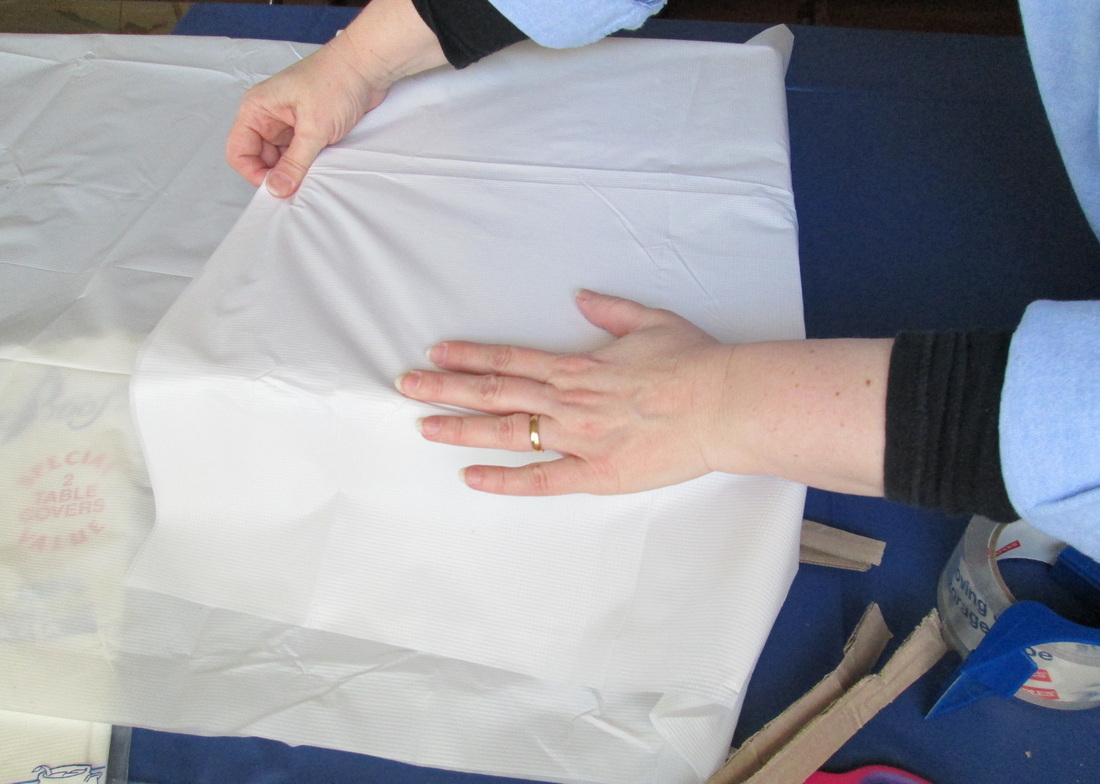
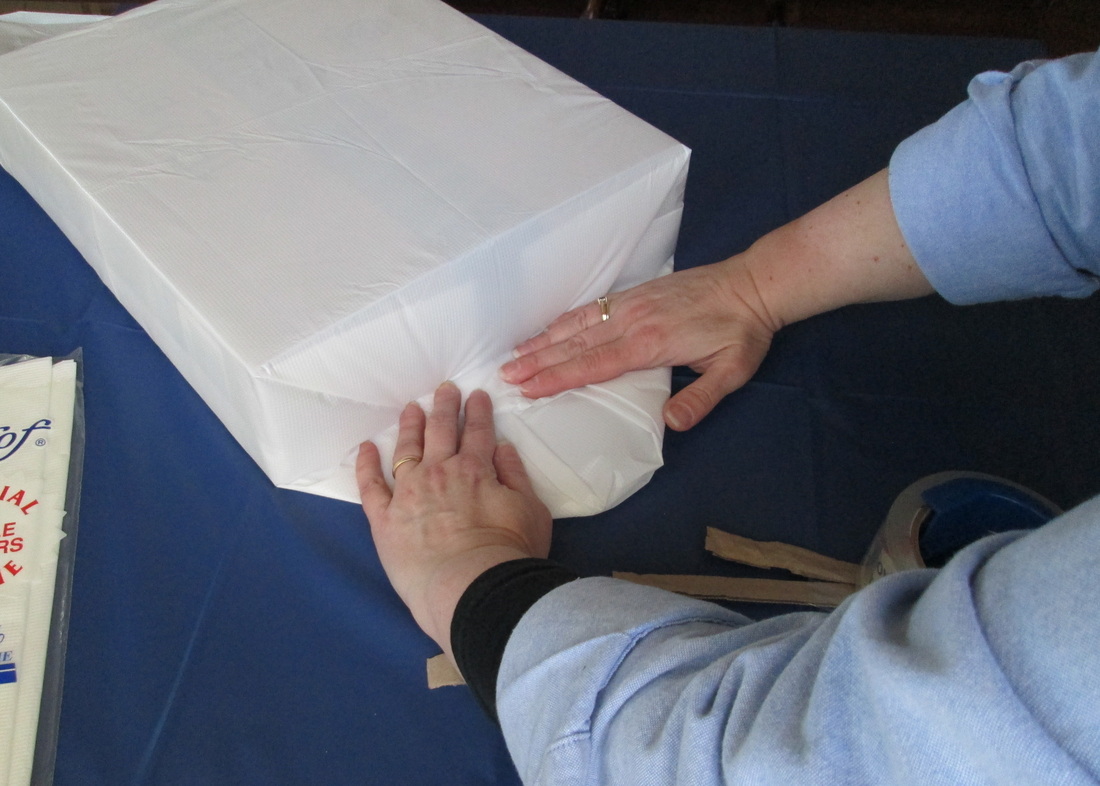
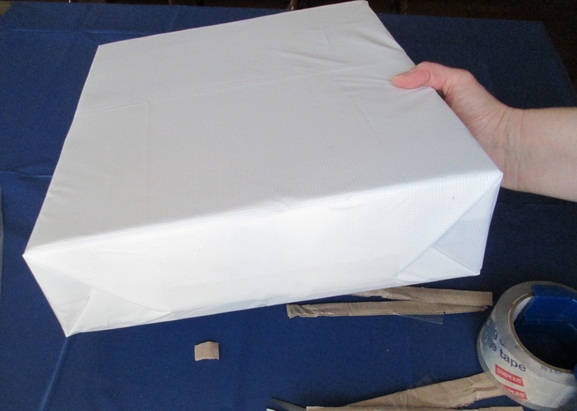
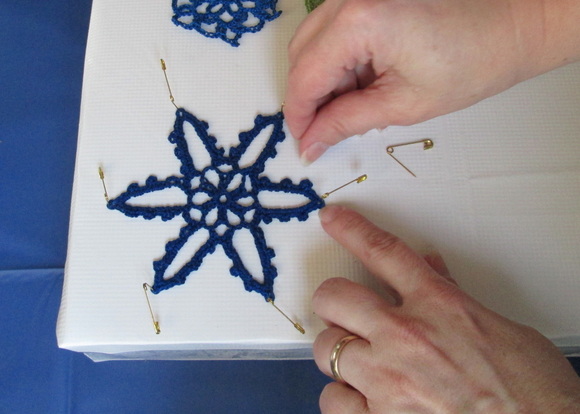
Using things you have at home, make a mini blocking board that's perfect for stiffening your small crochet lace pieces!Greetings Friends! Having the right tools is important to any craft or hobby. However, that often means spending money! If you're like me, that's not always an option. and even if you have the means to buy what you need, that doesn't help you when you want it right now! When you're blocking or stiffening crochet lace you don't need a giant blocking board. You also may not want to get the stiffening solution all over your "good" board. Why not make one? I've used this method throughout the years with great results. Here's what you do:: 1) Gather your materials. You need: A flat(ish) box - maybe a few inches high. The size of your box, is the size of your board, so consider what you'll be blocking. Some extra pieces of cardboard (I cut up another box). Make sure it's the nice corrugated cardboard, not the flat stuff from a cereal box. Scissors, tape and a disposable plastic table cloth. For some reason I have a stash of these table clothes. Not sure why, but there you go! Don't have one? Don't worry, I've also used aluminum foil, wax paper and plastic wrap. 2) Cut your extra cardboard the same size as your box. This gives your board stability and makes it easier to push the pins into. I used two layers and then secured them with tape on each side. 3) Wrap your box. Cut your table cloth so it will cover the box a few times. (If you're using foil, plastic wrap or wax paper use a few layers. They'll last for several uses, just make sure you secure it tightly.) Wrap it up just like a present! Tape the ends firmly and voila! you're ready to get busy blocking those ornaments! That's all there is to it. I think having the right tools is important, but it's so easy to stress over having the same one that the "professionals" are using. Let's not get caught up in the gadgets! We're creative people, right? and when we can make our own that does the same thing - I say hooray! After all. it's about the making and the end result., not about the tools!
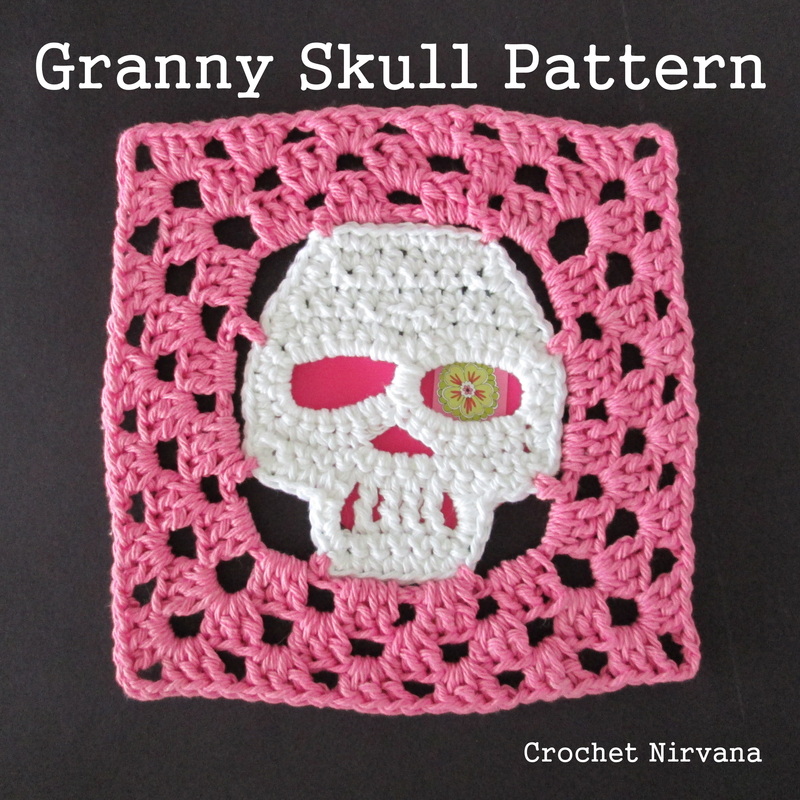
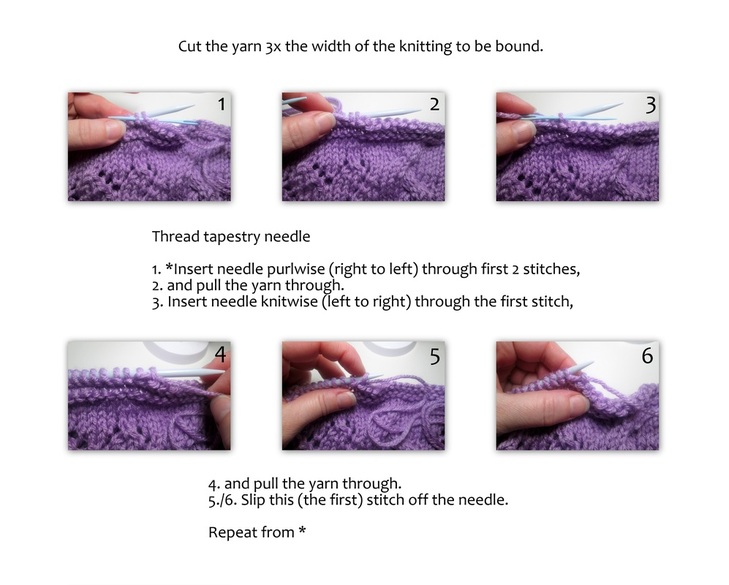
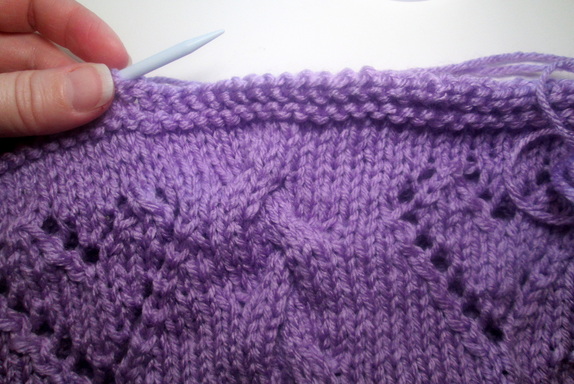
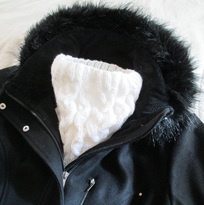
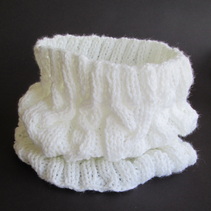
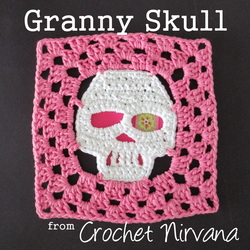
Thanks so much for stopping by and spending a bit of your day with me! Until next time friends, Be Blessed and Stitch with Love! Welcome my little lovelies! I've got a Halloween present for you! That's right, it's a free pattern for this ghoulishly gorgeous Granny Skull Square! Last year when I posted the pattern and photo tutorial for the skull motif I had no idea how popular it was going to be. Without any question it is by far the most visited post on my blog. Who knew there were so many fans of macabre crochet! I suppose it shouldn't surprise me that much. In stores there are skulls on everything from little girl clothes to shower curtains and kitchen accessories! The feedback for the skull motif has been tremendously positive (thanks so much!). Other than a little confusion about making the eyes (work those stitches around the chain - not into it!) the question that I am most frequently asked is, "do you have a square pattern?" Now I can happily answer Yes - I sure do! If you follow me on Instagram, Facebook or any of those other social media worlds, you know that it took a few tries to create a pattern that was good enough for you guys. I feel pretty confident that this one will do the trick. I wanted to make sure it was a universal size that will work with traditional granny squares. That way you can have more options for mixing and matching your designs. So there you have it! Just click on the button below for a downloadable PDF. The pattern will also be available (for free!) on Ravelry and I'll include a link in my sidebar. If you have any questions or something about the pattern is confusing, please let me know. I did the editing myself and mistakes are certainly possible! I hope that you enjoy the Granny Skull. I'd love to see your finished squares. Please feel free to share them on my Facebook page or tag me on Instagram (I'm RobinBrz). You can also use the hashtags #crochetskull, #crochetnirvana, #robinbrz. Thanks so much for stopping by and spending a bit of your day with me! Be Blessed and Stitch & Read with Love! Greetings! Being a new(ish) knitter, there are plenty of things that I'm still learning. Binding off (or casting off if you prefer) is one of those things. I've learned how to do a traditional bind off - where you knit (or purl) a stitch, then pass one over and drop the stitch off the needle. For some reason though, my bind offs are always loose. I've tried using smaller needles, but I still can't get it just right. It's a challenge because not only are my edges ending up floppy, I can never tell how big my item is going to be when I'm finished. When I crochet I don't have any of this trouble. I can see just what size my item is going to be, and I know exactly what my finished edge is going to look like. It's comforting. With knitting it's more of a leap of faith! Here's the thing. I really enjoy knitting and I know that with practice I'll improve, but I needed a plan! If you've been here before, you know that I'm all about trying new things. I figured that maybe a different binding off technique would give me the finish I was looking for. I remembered downloading a free ebook from Knitting Daily that had to have the answer. (If you're not familiar with Knitting Daily I urge you to check them out. The have a bounty of free ebooks available - on all kinds of topics!) That's where I found the sewn bind off. The book says that it creates a very elastic edge that is ropy in appearance, much like a purl row. Perfect the cowl that I was making as a Christmas present!
On another note, I'd like to thank all of you who participate in my giveaways. I'm blessed to receive review copies from various publishers and they are kind enough to provide me with copies to share with you. Giving books (and other goodies) away is such a great feeling. I love reading your comments and getting to know you through Facebook, your blogs, Etsy shops and all the other ways we connect! I hope that you'll come back and visit again - I've got several amazing new titles that I know you're going to love!
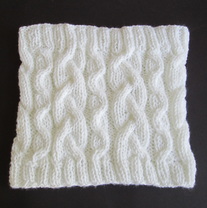
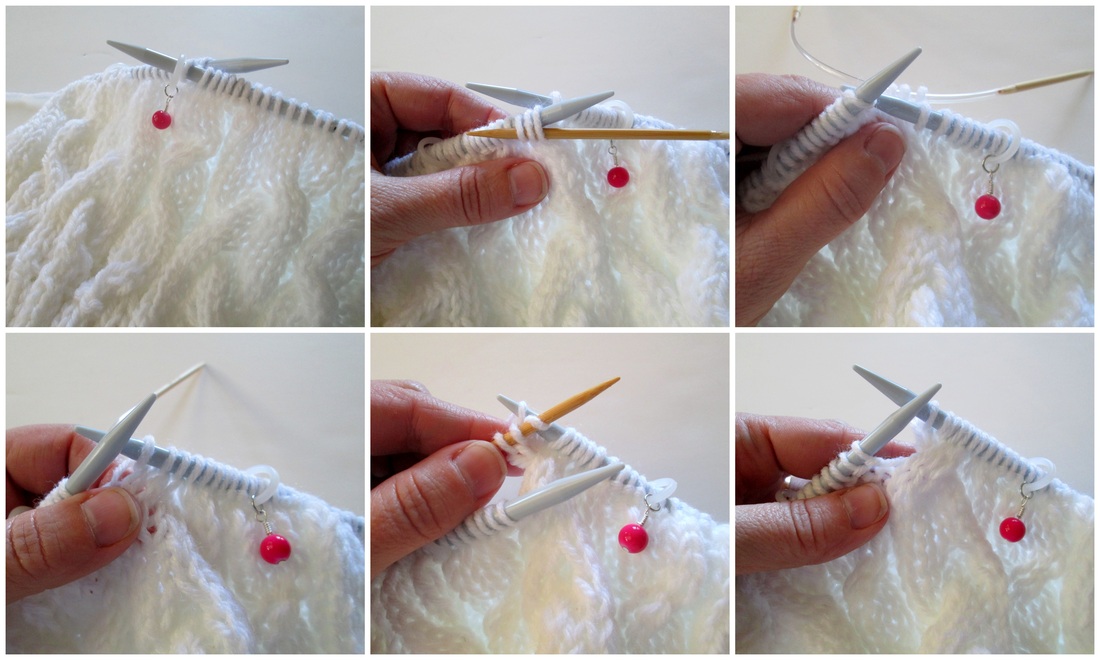
Thanks so much for stopping by and spending a bit of your day with me! Until next time friends, Be Blessed and Stitch & Read with Love! 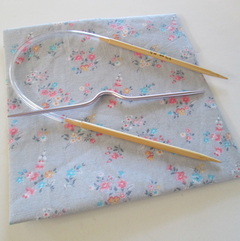 Which one makes cables easier? Which one makes cables easier? Greetings Friends! Are you afraid to try knitting cables? You love the way they look - the texture and motion they give to garments, but the idea of adding another needle into the mix is more than you're willing to attempt? Fear no more!! For I was once like you! Timid and leery of a third needle for stitches to slip off of. Because really, how would I possibly fix that kind of mistake when it takes every once of concentration to pick up a dropped stitch in a simple knit row? The skills required to make cables are basic. It's no more than slipping stitches and knitting (and sometimes purling). The tricky part is wielding that third needle. It's typically a three step process: 1) Slip the stitches onto the cable needle and hold it in back (or in front) of the body of the project. 2) Knit the required number of stitches (according to the pattern) using the main set of needles (making sure the slipped stitches on the cable needle stay in back or in front of the project). 3) Knit the slipped stitches from the cable needle to the main needle. That's it. Piece of cake right? I know you may not believe me yet, but I promise you can do it. The two biggest challenges I have with cables are making sure the stitches don't slid off, and actually knitting from the cable needle. While working on this cowl I had an ah-ha moment. I was looking through my supplies for a larger cable needle (I have several that were given to me when I started knitting) and I came across my 12 inch circular bamboo needles. Honestly these needles haven't been good for a whole lot (they're too small for most projects and the short needles are tedious to work with). But I thought why not use it instead of the short slippery metal cable needle? Ah-ha! 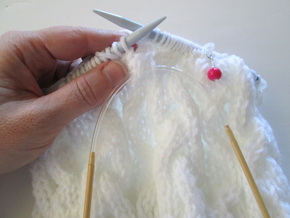 Here my stitches happily hang! Here my stitches happily hang! Right away I knew I was onto something. Once you slip the stitches onto the circular needle you can just let it hang in back or in front of your project. No more worrying about dropping stitches! When you're ready to knit the slipped stitches just slide them up to the tip of the needle and you're in business. I find that it really works like a dream. There was some concern that the hanging circs. would get in the way, and I imagine if you don't have a short stubby pair of 12 inchers that could be a problem. For me the piece of mind that I get from not worrying about dropping stitches is worth it. Don't have circular needles? I've been told that using a bamboo double pointed needle is a much better option than a slippery metal cable needle. The other part of cables that took me some time to master is the language. Cable abbreviations seem confusing. The first time I saw C6F and C6B I was stumped. Now that I understand the construction of cables it makes perfect sense. Here's what I learned. Basic cables are formed when you work stitches in front and in back of other stitches. The C tells you you're making cables, the number is how many stitches you'll be using in total and F or B lets you know where to hold your slipped stitches. So C6F is a Cable worked over a total of 6 stitches, holding slipped stitches in Front. That means that you will slip 3 stitches onto your cable needle and let it hang in front of your main body of work. Knit 3 from your main needles, then knit the 3 slipped stitches. C6B is a Cable worked over a total of 6 stitches, holding slipped stitches in Back. So that means you slip 3 stitches and let them hang in back of your main body of work. Knit 3 from your main needles, then knit the 3 slipped stitches.
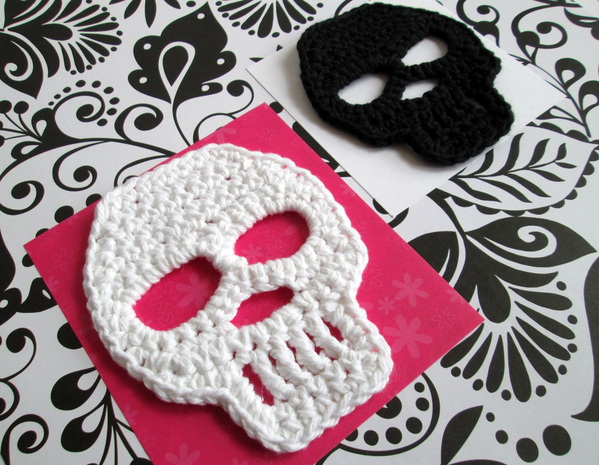
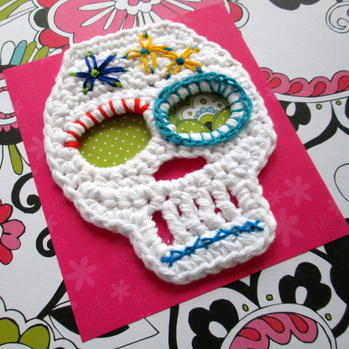
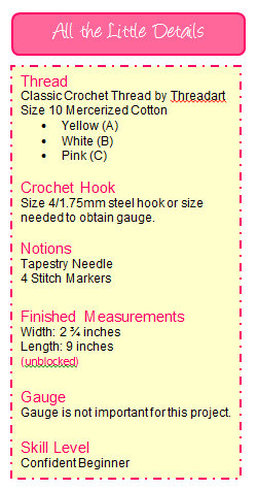
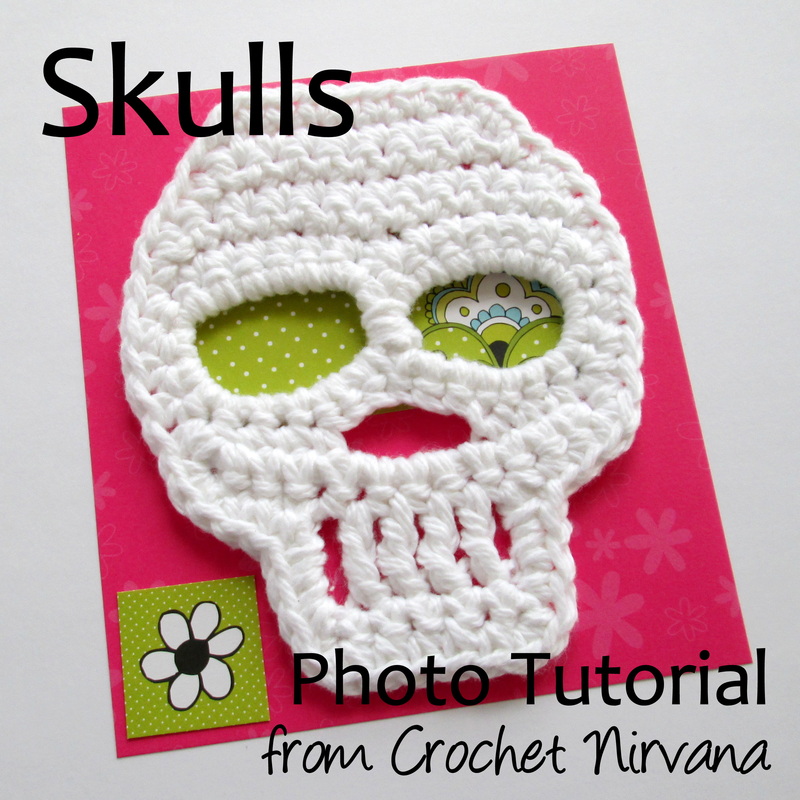
Like everything in knitting, cables come in many shapes and sizes. They can be classically simple or wonderfully complex. Personally they are one of my favorite fabrics. I love the texture and movement they bring to any garment. My desire to create cables is one of the reasons that I learned to knit! Using the short circular needles instead of a standard cable needle has really been a breakthrough! I still have plenty to learn, but understanding the language and how they're made makes me feel like I can tackle more complicated patterns with much more confidence! So what do you think? Are you ready to give cables a try? I hope you do. And for my knitting friends who are well versed in the ways of the cable, I would love to hear from you! What kind of cable needle do you use? Do you have any tricks or tips to share? One last thing, I'm looking for my next cable project and welcome any pattern suggestions you might have. Thanks so much for stopping by and spending a bit of your day with me! Until next time friends, Be Blessed and Stitch & Read with Love! Greeting Friends! It's October already! Wow! For so many reasons this is my favorite time of year. New England foliage and the brisk, refreshing weather rank at the top of the list, but so do the bounty of holidays: Halloween, Day of the Dead, I Love Yarn Day, and my birthday! I try to come up with an October project that embraces all of these favorite things. Last year I filled our house with little pumpkins. (Check out the post, and the link to the super easy pattern!) This year's inspiration comes with a story. Last year I signed up for an account with Stumble Upon. As instructed, I selected several categories I was interested in (crochet, knitting, photography, nature etc.). Like Pinterest, these were the topics that I would see when visiting their website. I did a bit of stumbling (that's what they call it), and promptly forgot about it. Because really, how many social networks can I be a member of ? Anyway, I must have signed up for emailed "highlights" because about once a month I'll get a message with links to what's hot in my categories. Usually I just glance, but recently something caught my eye. It was a skull scarf and a series of pictures showing how to make the skull. Cool. This is something I'm willing to stumble over to! After 15 frustrating minutes of trying to remember which version of my username and password I used I finally made it to the page. As it turns out, it was just a jpeg - with no link to the website or person who contributed it. But that's okay, because I just wanted to print the picture and try making the skull. Printing proved another challenge and required saving the image to my desktop and printing from there. I'm not so thrilled with my stumbling experience, but I am glad they delivered the skull picture to my inbox. I made the skull according to the pattern. It came out okay, but as I was making it I was thinking of all the things that I would do differently next time. After a few hours of trial and error I came up with my version of the skull - and this is what I am sharing with you today. Because next to pumpkins, what can be better in October than skulls!?! However, I realize that if it hadn't been for the creative person who posted their skull scarf on the internet, I wouldn't be sharing my version with you today. The original picture has a watermark on it for a face book group: ClubeDasCrochedeiras. After much searching, I was able to locate them and the original picture! It appears that the group is Portuguese. While I wasn't able to figure out exactly who posted the pattern, I was able to reach out to the group and say thank you. I know that there are only so many ways that you can make a skull motif, and that nobody would have ever known if I just posted my version without this story. But I know, and even though I could have come up with the pattern on my own by looking a pictures on the internet, someone in Portugal gave me a good foundation and made it a whole lot easier, and for that I am thankful! And so my dear friends, here in my version of the skull motif. I've been having a great time making them. Once you've done a few they're super quick. Like all motifs there are lots of ways you can use them. Link them together like our Portuguese friends to make a scarf, use them as coasters, hang them in your window as spooky decorations or just make them because they're fun. No matter what you do with them - Enjoy!! The Pattern 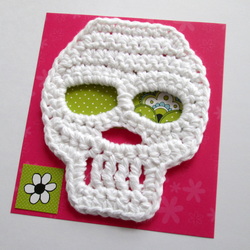 I used worsted weight cotton and an f/5 - 3.75mm hook for the white skull. I've made several and prefer this combination. The finished size is about 3 3/4" x 5". The cotton has nice structure for this kind of motif. However, use whatever you have on hand. Skulls are a great stash buster!! The first one I made was a little messy, by the fourth one I had the pattern memorized and they came out neat and even! Step 1: Ch 14, sl st in beg ch to form loop. Step 2: Ch 14 (again), sl st in 14th ch from hook to form another loop. Now you should have 2 loops that look like the number 8 or a pair of glasses. Step 3: Work 18 sc evenly around the first loop, then work 18 sc evenly around the second loop. Step 4: Using the yarn tail left at the end of the starting chain, wrap it snugly around the space between the eyes 3 or 4 times. Secure the end by pulling it through the loop you make while wrapping. This gives your skull a nice finished look. Now you’ll be working in rows to create the Top of the Skull above the eyes (the forehead!) Set Up Row: Sl st in the next 7 sts. This will get you from between the eyes to the top edge so you can start working in rows. Row 1: Ch 1, turn. 14 sc across top of eyes. Row 2: Turn (don’t ch 1), skip 1st sc, 12 sc across, leave last sc unworked. Row 3: Turn (don’t ch 1), skip 1st sc, 10 sc across, leave last sc unworked. Row 4: Turn (don’t ch 1), skip 1st sc, 8 sc across, leave last sc unworked. Row 5: Turn (don’t ch 1), sc in each sc across. (8 sc) Stop here and use stitch marker to hold your place. Cut yarn leaving about 36 – 48 inches. After finishing the lower portion of the skull you’re going to come back to the marker and use the extra long yarn tail to create the border around the skull. You can fasten off after Row 5 and the reattach the yarn for the border, but if you do it this way there are fewer knots and tails to weave in. Bottom of the Skull (the nose and teeth) Turn the skull upside down. Find the center under the eyes, count 7 stitches right and join the yarn in that stitch. Row 1: Sc in same st as join and in next 3 sc, ch 4, skip 6 stitches, sc in next 4 sc. (8sc, ch4 sp) Row 2: Ch 1, turn. 4sc, 4sc in ch 4 sp, 4 sc. (12 sc) Row 3: Turn (don’t ch 1), skip 1st sc, sl st in next 2 sc, ch 4 (counts as 1 tr ch), tr ch in next 5 sc, leave last 3 sc unworked. (1 unworked, 2 sl st, 6 tr ch, 3 unworked = 12 sts) Row 4: Ch 1, turn, sc in each tr ch across , sc in top of ch 4. (6 sc) Fasten off. Border around the Skull Go back to the top of the skull where you left off (at the stitch marker). Ch 1, then evenly sc all the way around the skull. Work 2 sc into the corners at the cheeks and bottom of the jaw for smoother transitions. (52 sc) Finish off with the invisible join or with a sl st into the starting ch. Weave in the ends, and lightly block to the correct shape. Enjoy!!
But first I decided that I should probably know just a little bit more about the tradition. I'm happy to report that the skulls are used as a way to recognize and remember loved ones who have passed on. Day of the Dead is celebrated in central and southern Mexico on November 1 & 2. The indigenous people believe that the gates of heaven are opened at midnight on October 31, and the spirits of all deceased children are allowed to reunite with their families for 24 hours. On November 2, the spirits of the adults come down to enjoy the festivities that are prepared for them. The sugar skulls, which are often adorned with the name of the deceased, are part of the alters that families prepare in anticipation of their loved ones visit. If you'd liked to read more about this interesting tradition visit MexicanSugarSkulls.com.
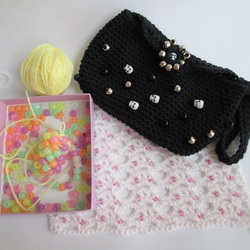 Hi there! One of the things that I really enjoy about crochet is learning new things. So when the folks at Annie's Catalog contacted me a few months ago and asked if I was interested in reviewing one of their on-line classes I jumped at the opportunity! If you're not familiar with Annie's they're a cornerstone in the crafting industry. Their first catalogs were mailed to homes in 1975 and crafter's have been turning to them for patterns, supplies and instruction since. There are on-line classes for crochet, knitting, card & paper crafts, quilting, sewing and beading & jewelry. In each category you'll find several different topics to choose from. The classes range in price from $19.95 to $24.95. Once you pay for your class, it's yours forever. You can access it as many times as you want, anytime you want. I chose Crocheting with Beads. It's something that I've been wanting to try and this was the perfect opportunity. The class includes the video instruction which is broken down in segments for each technique and project. It has a total running time of just over an hour. There is a downloadable / printable PDF file that contains the pattern for each of the projects. There is something called "My Notebook" which allows you to record your own notes as your watching and practicing. I used this are to keep track of what yarn and hook I was using and what kind of beads I chose. I also used it to note the projects I liked the most and the things that I had trouble with. There is also a place to "Ask the Instructor" with several FAQs that get immediate responses. I did ask a question that wasn't on the list. Later the same day I received an email letting me know that Ellen had answered my question! I logged back into my class and sure enough there was my response! That's pretty cool. Overall the course is easy to access and I had no trouble navigating through it or downloading my patterns. Now, let me tell you about the class. First of all, it's very well done. The audio and video are clear, the instructor, Ellen Gormley, is easy to listen to and does a great job showing you what to do and how to do it. Like many of you, I've watched plenty of videos on YouTube and while the intention may be good, the end result often leaves a lot to be desired and you can never be sure of what you're going to get. I feel confident that all of the videos in Annie's series are the same caliber as this one. In this class there are 6 projects. Ellen shows you how to make each one of them from beginning to end. Each one uses a new beading skill. Every skill is demonstrated step by step using heavier yarn and large pony beads. By practicing with the bigger beads you can really get the hang of it before switching to the smaller beads the pattern calls for. In addition to beading, other techniques like joining motifs as you go, making button holes and using jewelry notions are also covered in detail. So what did I make? After watching the video all the way through, I decided that I was going to try to make the beaded bracelet which is basically a tube with a bead in every stitch. It's the second project in the class and Ellen made it look so easy!! Actually, the technique itself wasn't too bad with the pony beads - but I know myself well enough to realize that I needed to start with a different project. No sense in getting frustrated right off the bat. Next I decided to try the beaded scarf. This is the third lesson. Again the technique was easy to pick up. I really liked that I could start and stop as much as I wanted. After making one pattern repeat with the pony beads I got started on my scarf. I didn't have the yarn the pattern called for so I made do with what I had on hand. This was much easier going! The hardest part (most tedious?) part was stringing the beads. Mainly because I didn't have the right tools. I think with the proper weight yarn and beading needle it would be much faster. I haven't finished the scarf, but after completing about 2 dozen rows I was ready to try something else. Not because I didn't like it, but because I wanted to actually finish something to show you!! 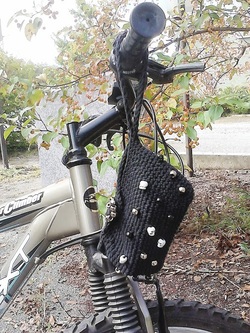 Which brings me to my final project - the Wristlet Clutch. How cute is this?! This is actually the first project in the class and as it turns out the one that I should have started with! It's a small project and if you want you can use pony beads like I did. We have a big pile of these wonderfully fun skull beads. John has been making stitch markers with them, but I was able to grab a few in order to make my bag. As with my previous class experience, this technique was a snap to master. Ellen shows you how to do everything from making the handle and the button hole to creating the button itself! I made this little beauty in two afternoons and everything about it was fun and easy. The best part was putting it to use! I often ride my bike to the country store and I always have to make sure I have pockets. Not any more!! Now I just slip my little bag over my wrist and I'm good to go! There are 3 more projects that I haven't tried yet. The beaded shawlette uses the "hooked on" technique. I'm looking forward to seeing the difference between pre-stringing them vs. adding them as you go. I feel confident that I'll be able to follow other patterns that include beading, especially knowing that I have my class available to me if I need a quick refresher.
In case you're wondering, Annie's hasn't paid me for my endorsement. I was given the class in exchange for my honest review. That's it. Happily this is a fun and informative program that I feel good about recommending. Especially if you take advantage of the coupon code they gave me to share with you! Just click here and you can take 50% off any of their on-line classes. Now that is a great deal. Unfortunately, the code expires soon so you have to act fast. The good thing is once you pay for it you can watch it whenever you want - so even if you don't have time right now, it will be ready for when you do.
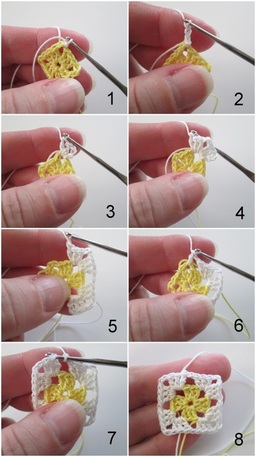
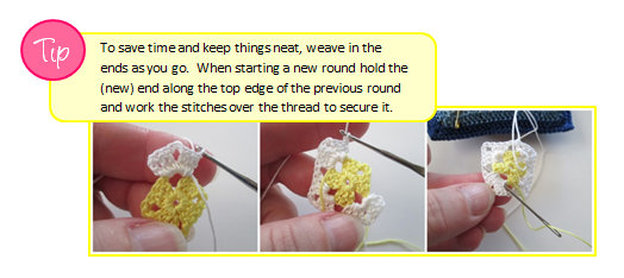
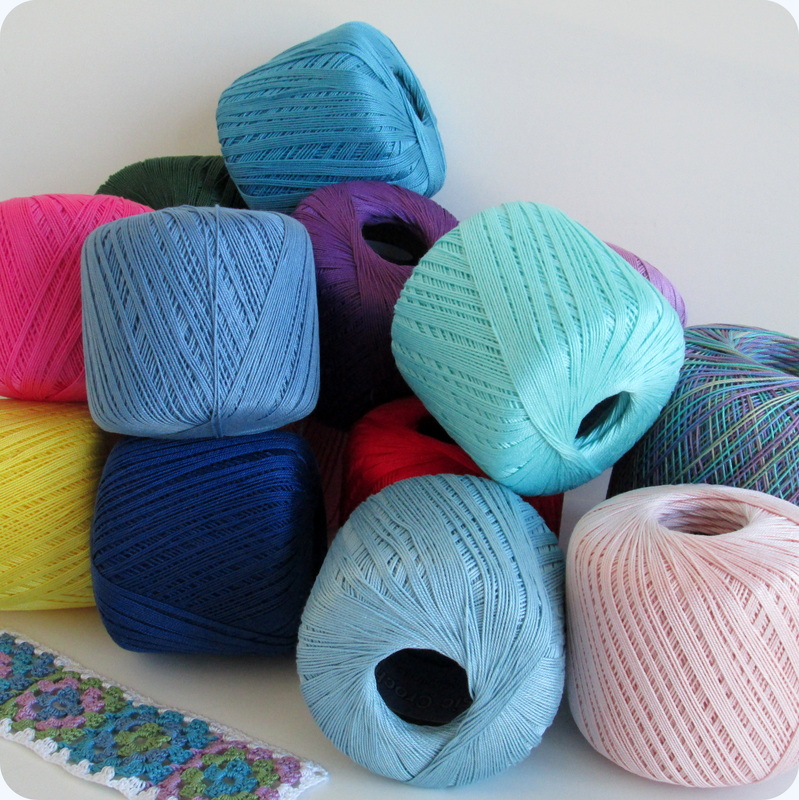
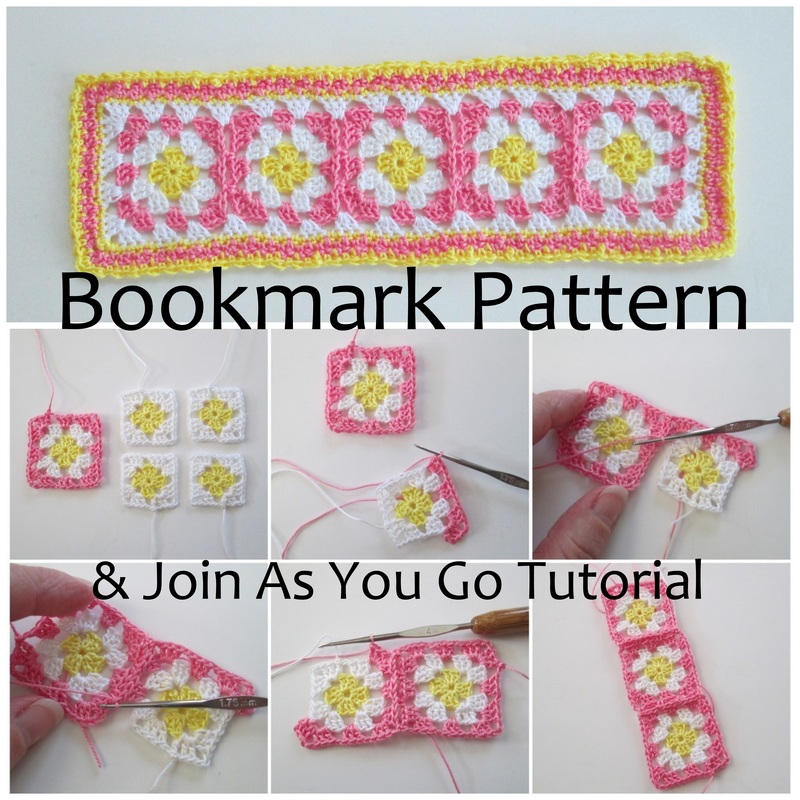
Thanks so much for stopping by and spending a bit of your day with me. Until next time friends, Be blessed and stitch & read (& bead!) with love! 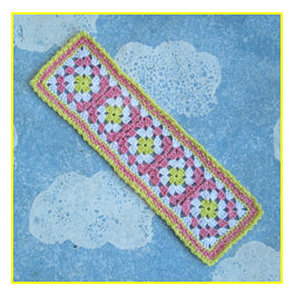 Working with thread can seem intimidating. I know the first time I picked up a tiny steel hook and #10 cotton thread I thought isn’t thread for sewing?! I felt out of my element. There were a few rough moments, I won’t kid you, but with a little perseverance I discovered the magic feeling you get when bits of thread suddenly come together into a recognizable work of art that you created! As an avid reader, bookmarks always seem in short supply at our house. How better to combine my two passions than by designing a pattern for thread crochet bookmarks! For the thread newbies out there I’ve taken lots of pictures to show you how it’s done. If you’re very new to crochet, and have never made a granny square before I do recommend that you make a few with worsted weight yarn and an H hook before you try the thread. As long as you’re comfortable with basic crochet techniques, and know the standard stitches than you should have no problem entering the wonderful world of thread. 1. Don't be afraid! I know the hook and thread seem impossibly small, but give it a chance. 2. All projects look messy and are hard to hold/work during the first few rows or rounds. Keep going and it will come together. 3. Always work in good light and when you're not tired. 4. Many patterns for yarn can be adapted to thread, and doilies are always in fashion. 5. Take the time to use an invisible join instead of a slip stitch to join rounds. 6. Use standing stitches to start rows/rounds instead of starting chains. 7. Learn the join-as-you-go technique for motifs and grannies. 8. Weave in ends as you go. 9. If your hook is too thin to hold comfortably try wrapping the end with scrap yarn for an easy custom handle. 10. Blocking and stiffening your finished project are worth the time. The Classic Granny Square Bookmark Pattern
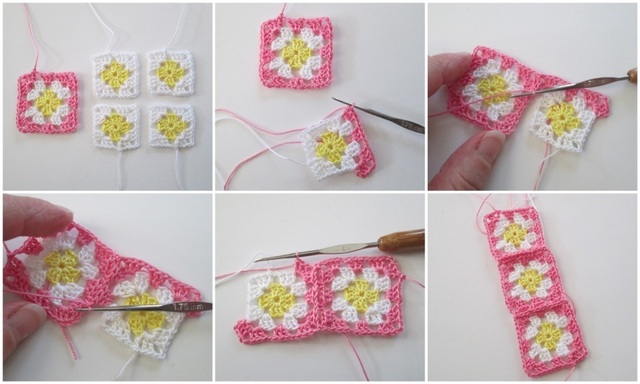
Rnd 3: Join C in any ch2 corner sp. (ch3, 2dc, ch2, 3dc) in same ch2 sp, ch1. * 3dc in next ch1 sp, ch1, (3dc, ch2, 3dc) in next ch2 corner sp, ch1. Repeat from * 3 times. 3dc in last ch1 sp, ch1. Join with sl st to starting ch3. Fasten off. Joining Rnd 3: Join C in any ch2 corner sp. (ch3, 2dc, ch2, 3dc) in same ch2 sp, ch1. 3dc in ch1 sp, ch1. (now we start the joining edge) 3dc in ch2 corner sp of working square, ch1, sc to join in any ch2 corner of finished square, 3dc back in same ch2 corner sp of working square. Sc to join in first ch1 sp of finished square. 3dc in ch1 sp of working square, Sc to join in next ch1 sp of finished square. 3dc in ch2 corner sp of working square, ch1, sc to join in next ch2 corner sp of finished square, 3dc back in same ch2 corner sp of working square, ch1. (join is finished) 3dc in next ch1 sp, ch1. (3dc, ch2, 3dc) in next ch2 corner sp, ch1, 3dc in last ch1 sp, ch1. Join with sl st in top of starting ch3. Fasten off. Attach remaining squares in the same fashion.
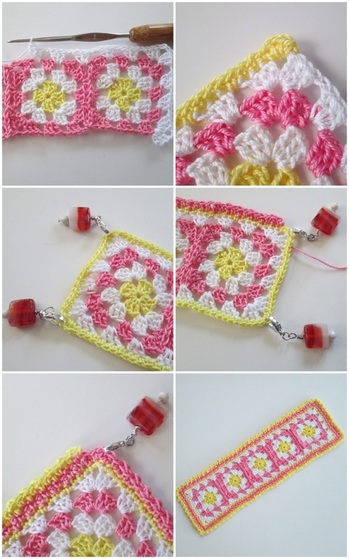
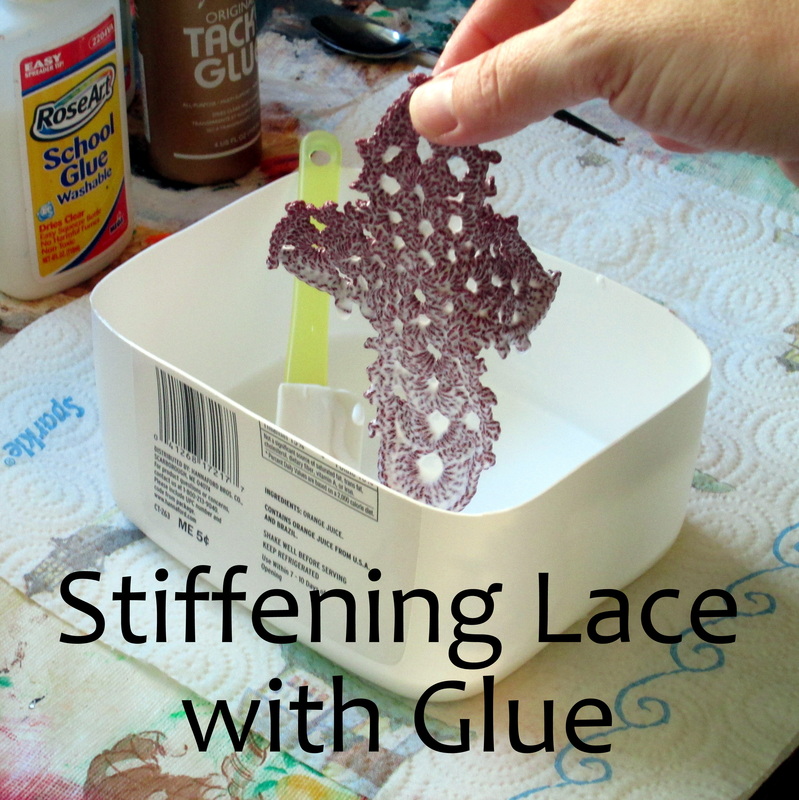
Thanks so much for stopping by and spending a bit of your day with me. Be sure to check back for the final installment in my working with thread mini-series. I'll show you how to stiffen your bookmark and other thread projects using plain old white glue. For your convenience I've included a downloadable copy of the pattern, just click on the link below and enjoy!
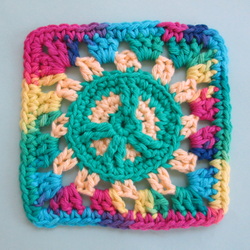
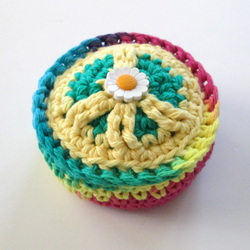
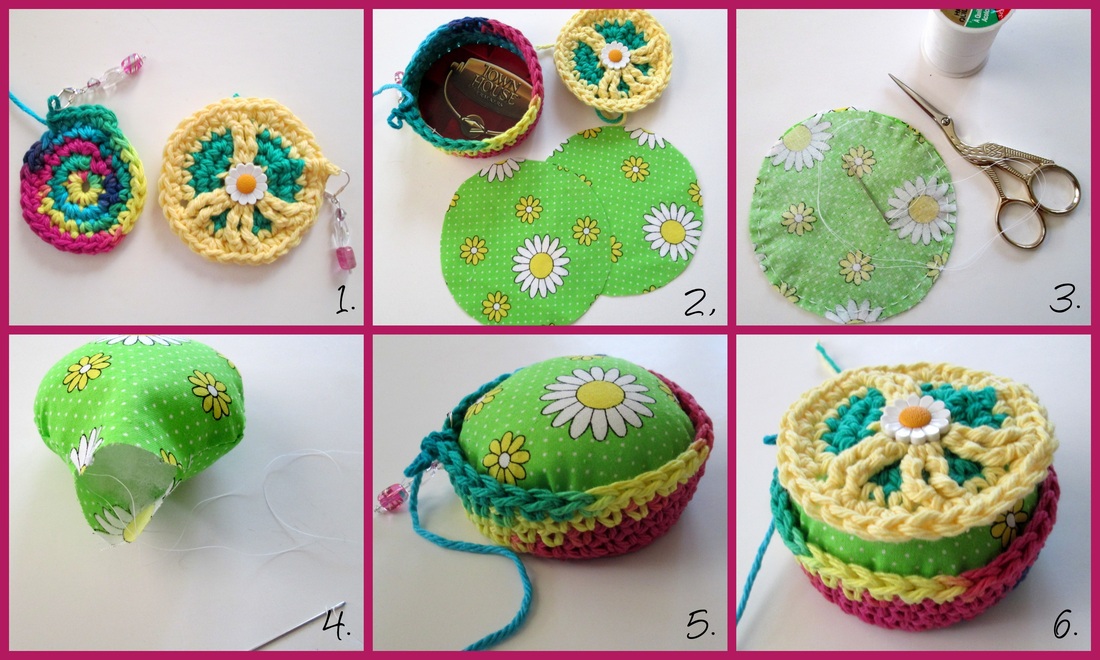
Until next time friends, Be Blessed and Stitch & Read with Love! Greetings Friends! Last week one of the projects that I showed you was the totally groovy peace sign granny square from Petals to Picots. My mission was to turn it into a pincushion for lovely young lady named Phoenix who volunteers at our library. As you can see it was a terrific success and I'm overjoyed with the results. It's a simple project that came together in just a few hours. I made mine using Sugar 'n Cream Cotton in Sunshine, Hot Green and Psychedelic and a G hook. Here's how: 1. Using the granny square pattern, make just the peace sign. For the base make a basic circle working in continuous rounds moving the stitch marker after each round. 2. When it's the same size as the peace sign work one round into the front loops only. That forms the little edge and allows you to start working up. Work 4 more continuous rounds making it about an inch and a half tall. Don't finish off. To give it a bit more structure using the peace sign as a template, cut a piece of cardboard to fit snugly in the bottom. To make the cushion, using the cardboard circle as a guide, cut 2 pieces of fabric about a 1/2 to 3/4 of an inch larger than the cardboard. 3. Put the wrong sides of the fabric together and using a basting stitch sew around the circle. Leave 1/4 inch seam allowance and an 1 1/2 - 2 inch opening. Leave the needle and thread attached. 4. Turn the circle right side out and stuff with fiber fill. Over stuff so it's nice and firm and puffy. Fold the edges of the opening in and stitch closed. 5. Plump up your cushion and stuff it into the base. It should fit snugly. You could stop right here and have yourself a great little pincushion. In fact, that's exactly what we're going to be making at the next YA craft class at the library! 6. To finish, attach the peace sign to the base by single crocheting through the back loops of the base and the front loops of the peace sign. Fasten off and weave in the end.
Well that it'll do it for me today. I have all kinds of projects to share with you so please stop back and visit again. Thanks so much for spending a bit of your day with me,
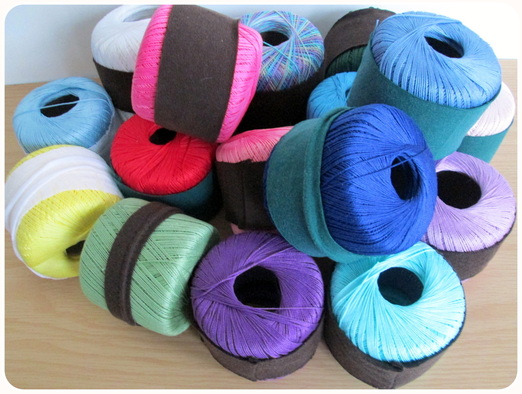
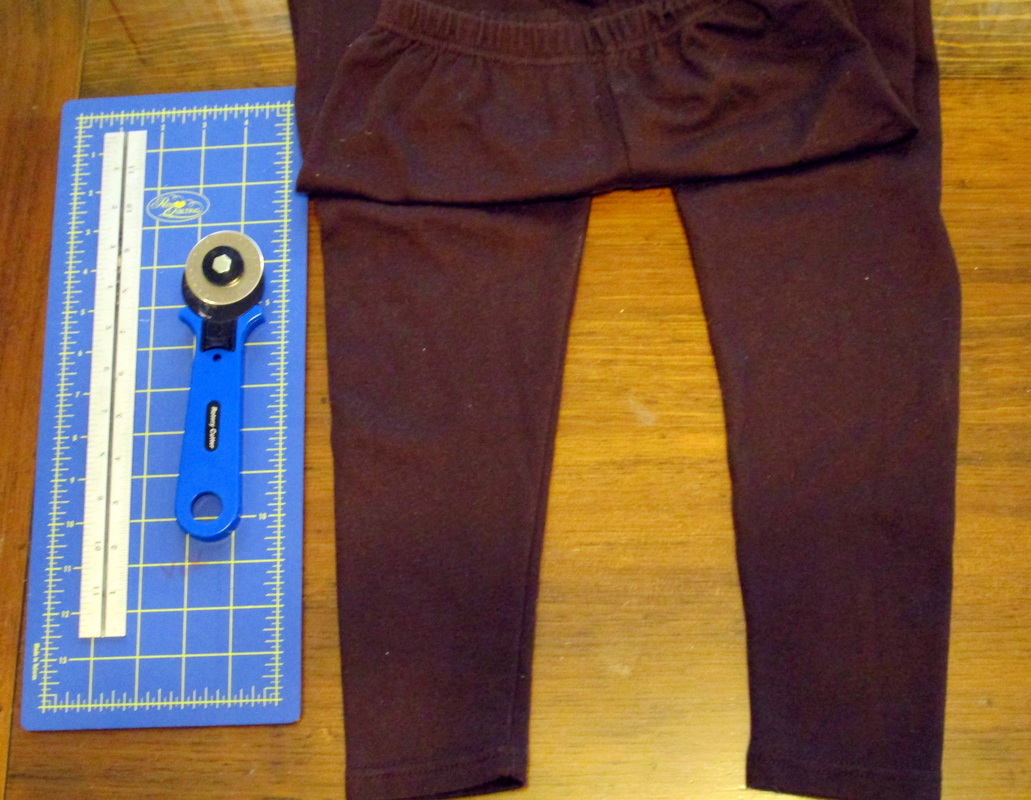
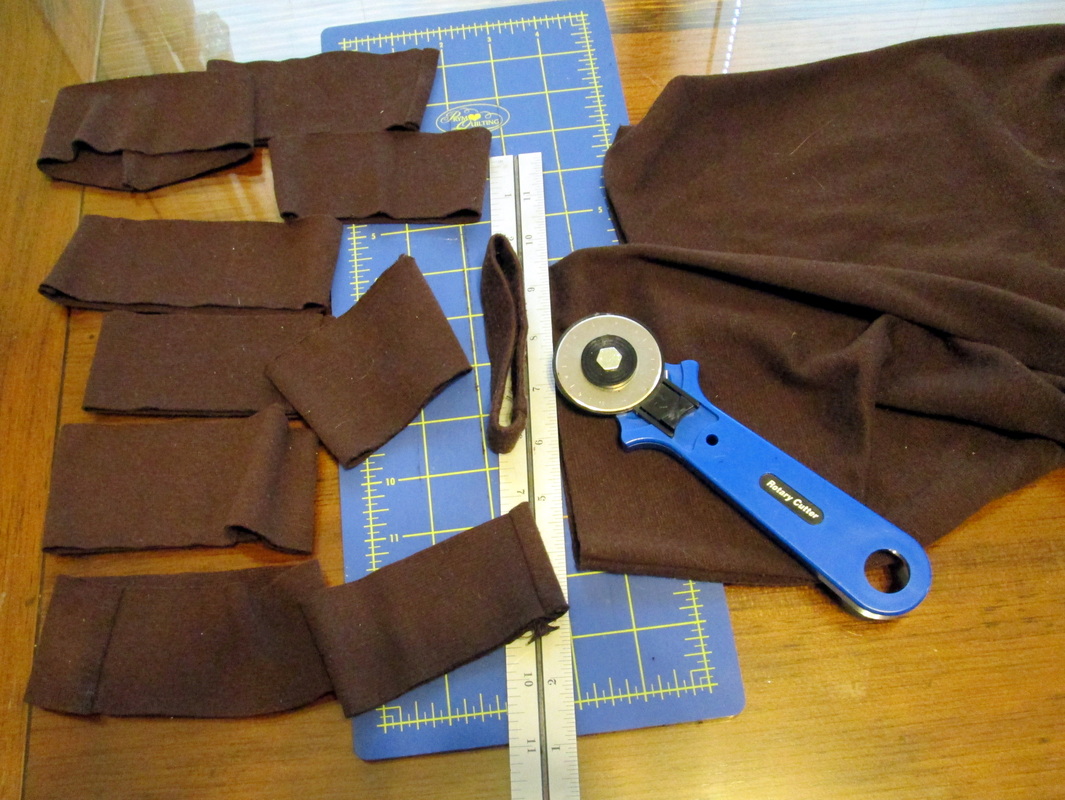
Until next time friends, Be blessed and stitch & read with love! I'll show you how I did it without spending any money |
I'm Robin and this is Click to see what's new on the Craftsy Crochet Blog!
Follow Along
Tutorials and Patterns
On InstagramPlaces I Post
Archives
July 2015
Categories
All
Thank you for visiting!
My name is Robin. I am a wife, mother and strong believer in the power of faith. I'm a maker, a crafter and an artist. I love exploring new mediums and sharing my adventures with you. Did you enjoy your visit? Let me know by leaving a comment. I love knowing you dropped by, and hope to see you again soon! Be Blessed and Stitch & Read with Love! |
