|
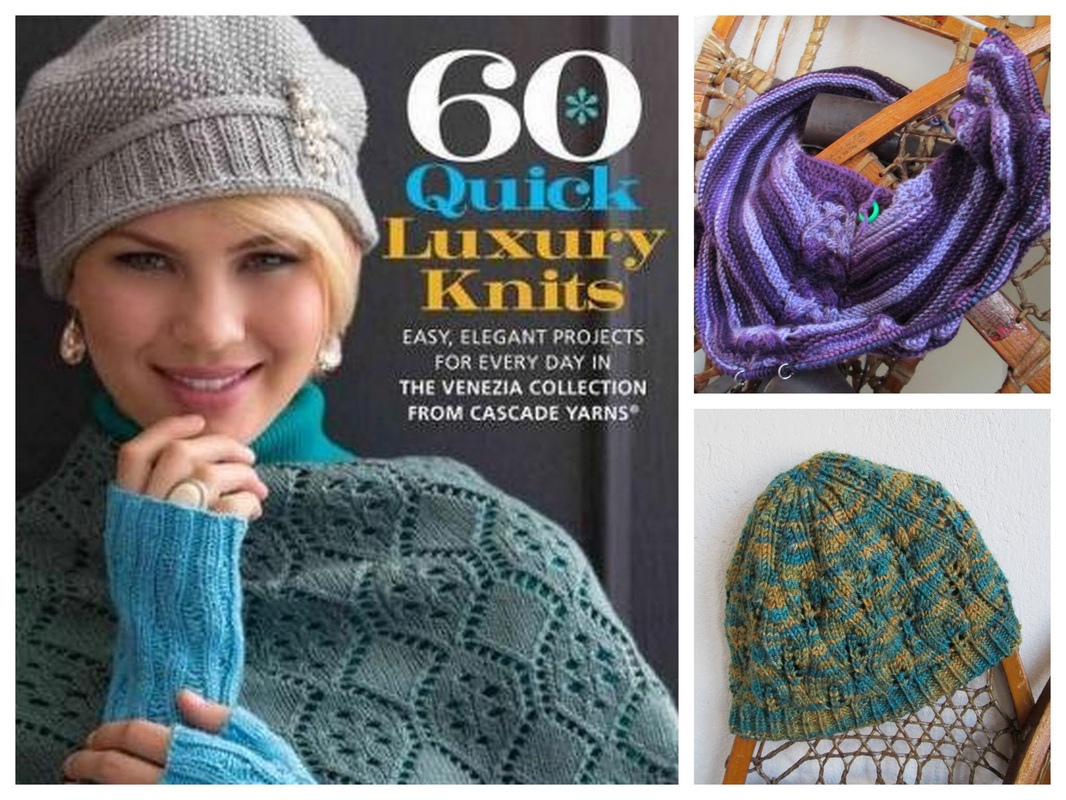
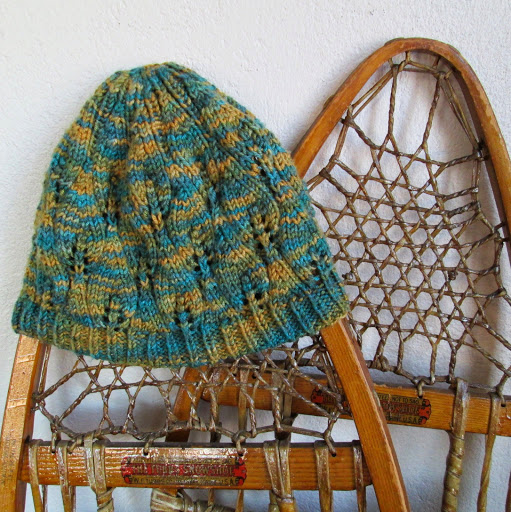
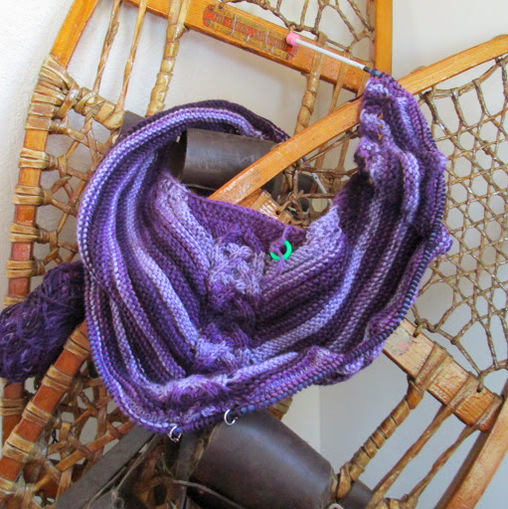
60 Quick Luxury Knits: Easy, Elegant Projects for Every Day in the Venezia Collection from Cascade Yarns Series: 60 Quick Knits Paperback: 176 pages Publisher: Sixth&Spring Books (August 5, 2014) Greetings Friends! As much as I love browsing patterns on the internet, my favorite way to look for new projects is in books. There is something about flipping through the pages that makes me excited about the possibilities. Unfortunately, a lot of the time there are only a few patterns that I might actually make. Now that is okay if I borrowed the book from the library, but if I'm going to buy a book I want to make sure that it has several projects that I'm apt to make - someday. The 60 Quick Knit Series is from the folks at Cascade Yarns and Sixth&Spring Books. is definately worth checking out. I think that there are seven books now. They all have a unifying theme and showcase their family of yarns. Using the recommended yarn is what they hope you will do, but of course you can make appropriate substitutions. Although if you have the opportunity, give their yarn a try! So far from Luxury Knits I have chosen two projects. First I made this hat. The pattern is called Catalpa Hat designed by Anastasia Blaes. I did not have Venzia Sport Multis (merino wool/mulberry silk) yarn that is called for, but I did have an excellent substitute. A hank of the Kangaroo Dyers merino and silk hand dyed Poet Seat Yarn in a fabulous colorway called Sunlight in the Forest. I have to extol the virtues of this hat. I'm not sure if it is the yarn (amazing), the pattern (lovely) or the combination (stunning), but whatever it is, this is officially my favorite hat of the season. It's warm, comfortable and looks great - if I do say so myself. Honestly, there are so many cool patterns in this book I had to try another one. After much deliberation (I have sticky notes on at least 8 projects!) I settled on theCenter Back Cable Shawl by Candace Eisner Strick. I am a huge fan of cables, and this one does not disappoint. Again I had to make a yarn substitution. I'm using Serenity Garden Yarn from Deborah Norville in Crocus. Of course I would love to use merino and silk, but this microfiber is surprisingly nice. It is smooth, has a terrific sheen and is easy to work with. Plus the price makes it an economical option. I was a little worried about the color changes, but so far it looks like everything is falling into place. Purple is my favorite color and this one is wonderfully true and rich! It is hard to see in my picture, but the body of the shawl is kind of "ribbed". Alternating (multiple) rows of knit and pearl create a texture that is easy to execute and helps direct focus to the wide center cable. Now if only I could knit faster! I can't wait to finish the shawl so I can wear it and start something else! All of the projects are from different designers. Since everyone has a unique way of writing it could be confusing. Happily the editors have done a great job of bringing continuity to the patterns. I have found them accurate and easy to follow. The photography and layouts are visually appealing making it hard to choose what to make next! In fact, in our knitting group at the library someone just borrowed 60 Quick Knits from America's Yarn Shops (another book in the series). There are so many projects that she wants to make - she decided to buy a copy for herself. I can't think of a better recommendation!. You can find the books in the series online or at your local library. If they're not in your library's collection, ask them if they can get a copy for you. Most libraries are willing and able to help patrons find what they're looking for. Thanks so much for stopping by and spending a bit of your day with me. Until next time friends, Be Blessed and Stitch with Love!
2 Comments
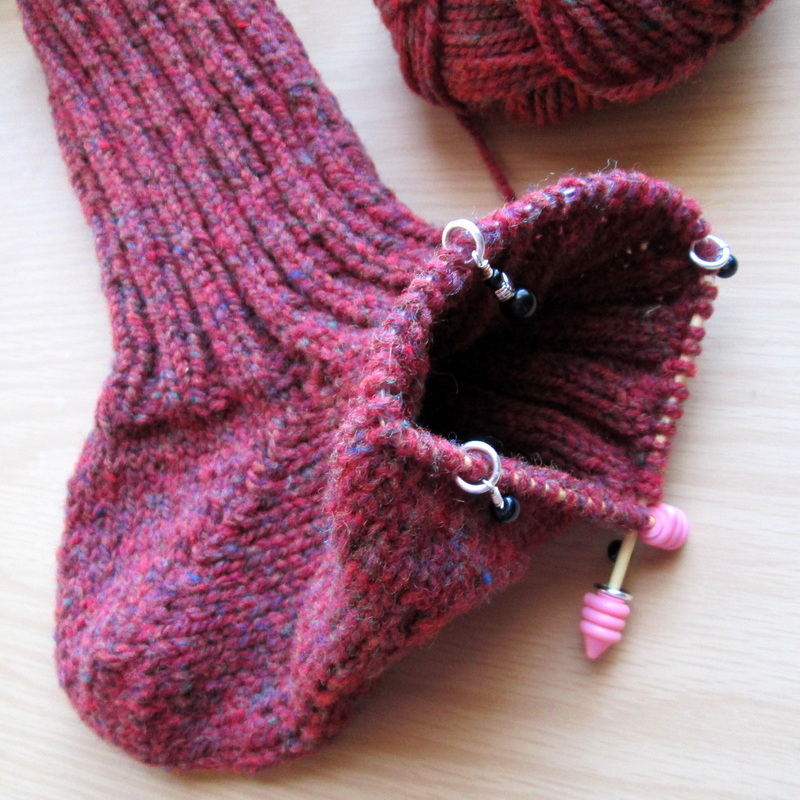
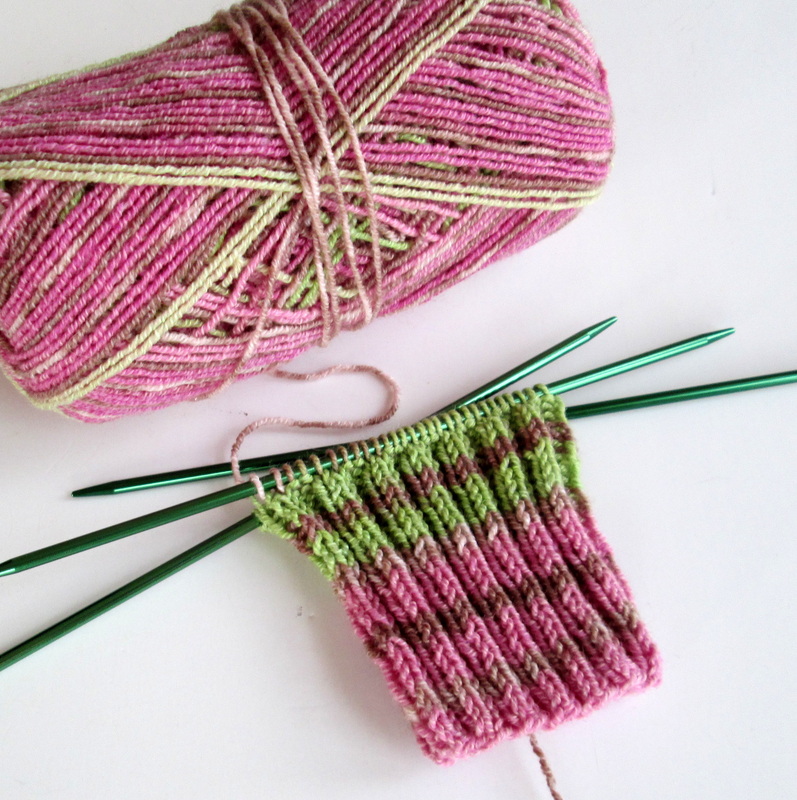
Greetings Friends! Let's talk about socks. Generally speaking we don't give them much thought. Lot's of people wear the same style every day. I am a white cotton gym sock. My husband is a wool boot sock and my son is a black cotton dress sock. We are dedicated to our styles and because of our commitment it is the one thing we don't have to worry about when getting dressed each morning (hooray!). So while consistency does have it's advantages, I'll openly admit that it is boring (boo!). Hand knit socks however, are not. The assortment of specialty yarns geared specifically for our feet are fabulous! You can find bright colors, light colors, self striping, ombre, jacquards, fair isle, heathered, and sparkles. Hand spun, hand dyed and hand painted in nearly any fiber or combination of fibers you can name! Then of course there are the patterns. On Ravelry alone there are nearly 30,000 matches for the search "knit socks"! Wow! It only makes sense that there are a variety of different techniques for turning yarn into fashionable footwear. Like all things in knitting, one way is not better than the other, or the "right" way to do it. It all comes down to what works best for you and the sock you're making!
There is one more technique that I've come across. The magic loop uses just one long (40 inch) circular needle. In fact, there is even a way to knit two socks at the same time using this method! When I first started knitting I thought that might be easier for a beginner. You know, get them both done at the same time and then you don't have to worry about the dreaded second sock syndrome. Turns out I was wrong. I didn't know enough about the basics of sock construction and I wasn't confident enough in my skills to be sliding stitches around and pulling needles from one side to the other! It was a disastrous undertaking that ended with some choice words and a knotted mess of yarn. I haven't given up on the magic loop, and I still think there is wisdom in the two at once philosophy, especially for someone like me who has a hard time finishing all the things I start!
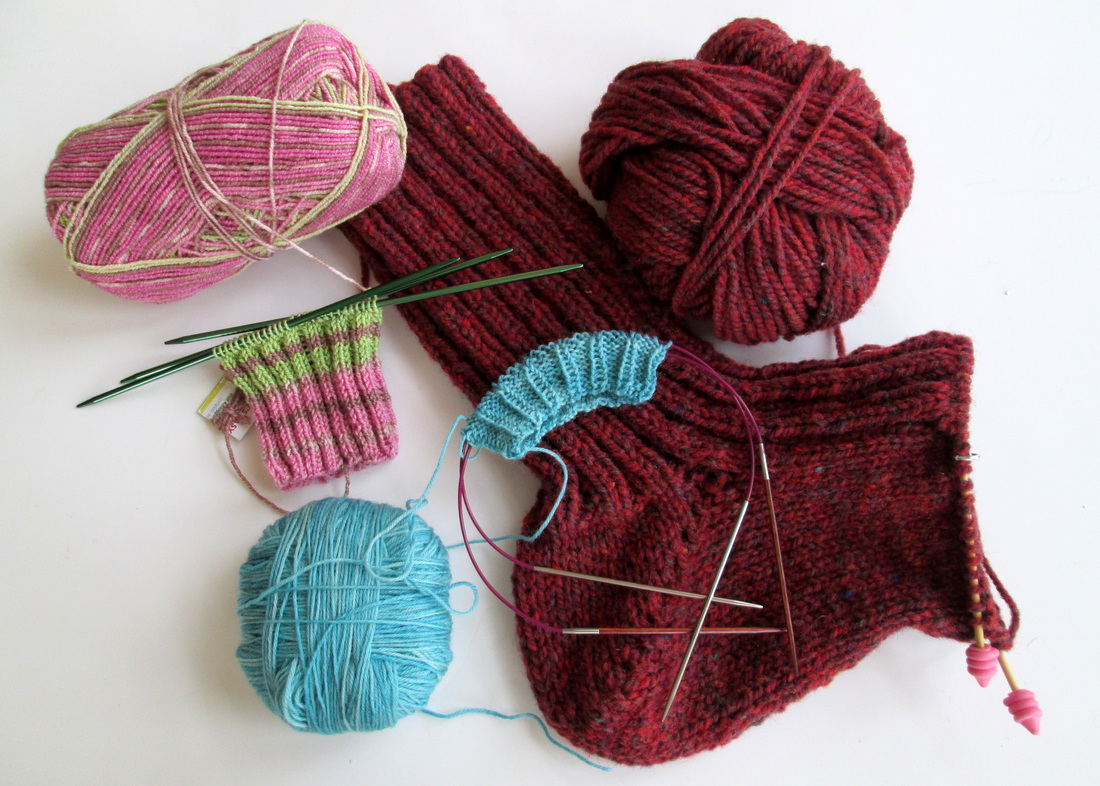
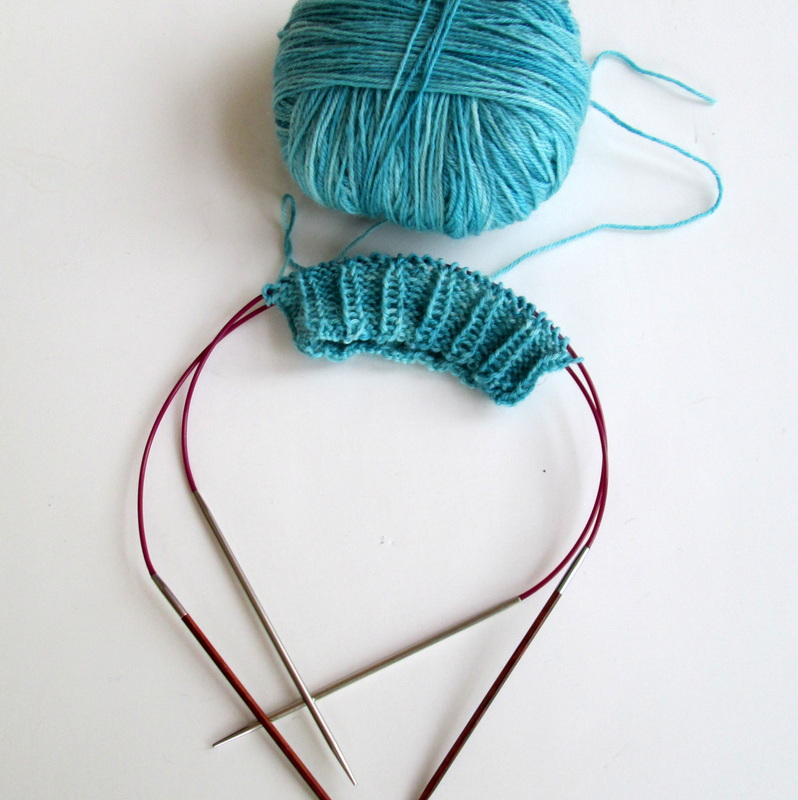
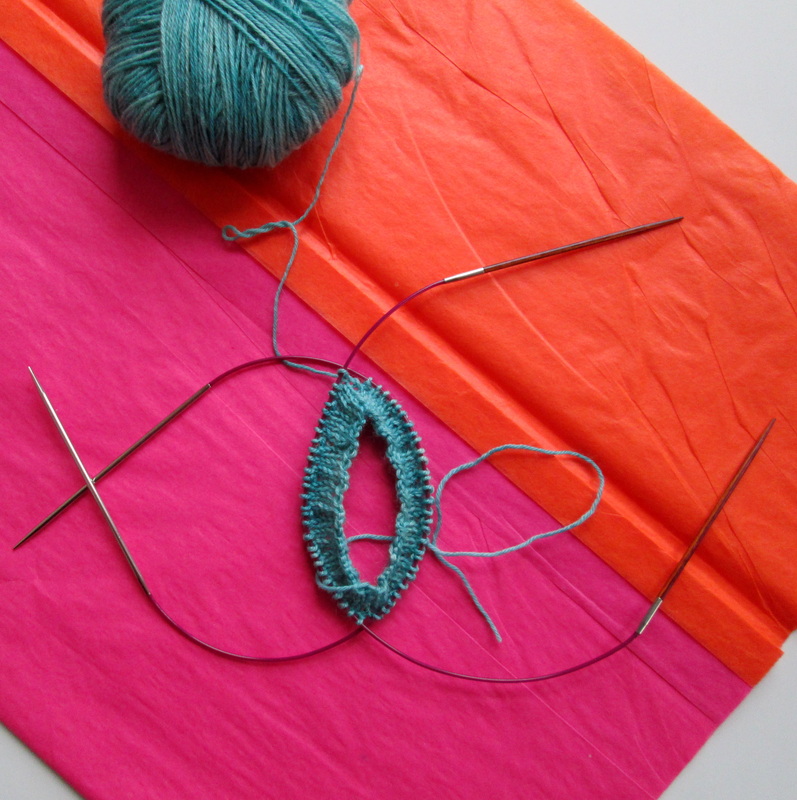
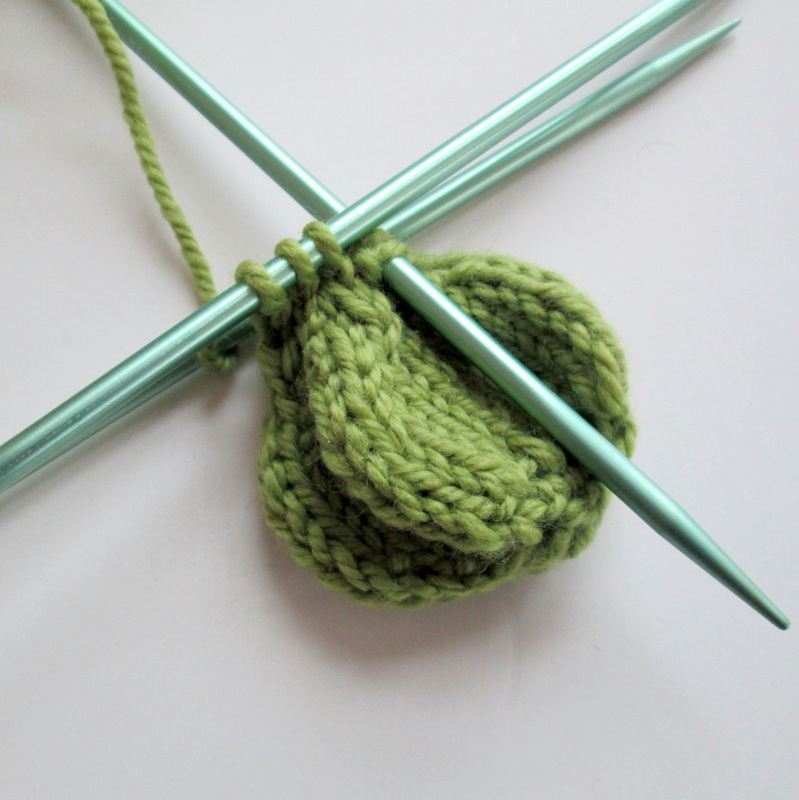
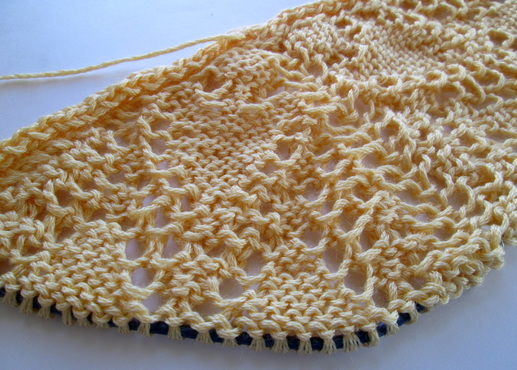
I'm not sure which of these I'll finish first. I've been plugging away at all of them everyday. I like having a variety of different projects all set and at the ready. Plus socks are great on the go. I can toss any one of them in my bag and not worry about having a pattern or keeping track of where I am on a chart. Did you have any idea that there were so many ways to make socks? And we didn't even talk about the actual construction techniques (like top-down, toe-up and flat) or the many kinds of heels and toes you can make! With such a variety of options it's understandable why knitting socks is so popular. There really is something for everyone. Thanks so much for stopping by and spending a bit of your day with me! Until next time friends, Be Blessed and Stitch & Read with Love! Greetings! It's a well established fact that I have crafting ADD. I am physically unable to to work on one project at a time. I don't think that I have ever finished anything without starting something new or spending time with a WIP. It's fine with me. It works. My husband doesn't understand - just like he doesn't understand why I insist on leaving the house at the very last minute - no matter where I'm going (I'm not usually late, but I am never early!) As I was gathering the pictures for this post it dawned on me that my insatiable desire to try new things is actually good for me. Every time a publisher sends me a book to review it's an opportunity to feed my need. What I mean is ... if I were to only work on one thing at a time from start to finish it would take me ages to prepare for a review. Working on multiple projects at the same time lets me get a feel for the patterns and in turn the books much more quickly while at the same time stimulating my creative serotonin. It's my happy way of multitasking! Let me show you what I'm working on today: A basic ankle sock from Happy Feet, a book devoted totally to tootsies! I'm giving the two circ method a try and hoping that I have finally found the right project for this pretty yarn I won from Danielle at A Stash Addict well over two years ago (more about that later!) Next up is a little knit pear pincushion from 50 Pincushions to Knit & Crochet. It's my first attempt at knitting something small and round(ish). My initial impression: crocheting small round things is way easier! And to wrap it up for today it's the Triangle Tulip Shawl from Lovely Knitted Lace. I'm quite pleased with my progress on what the book describes as a "perfect pattern for beginners". The first pattern I tried was a scarf using the yarn from A Stash Addict. Turns out I'm not quite ready for knitting nupps with skinny yarn and tiny needles!!
Of course there are more, but we can talk about those another time! Thanks so much for stopping by and spending a bit of your day with me. Until next time friends, Be Blessed and Stitch & Read with Love!
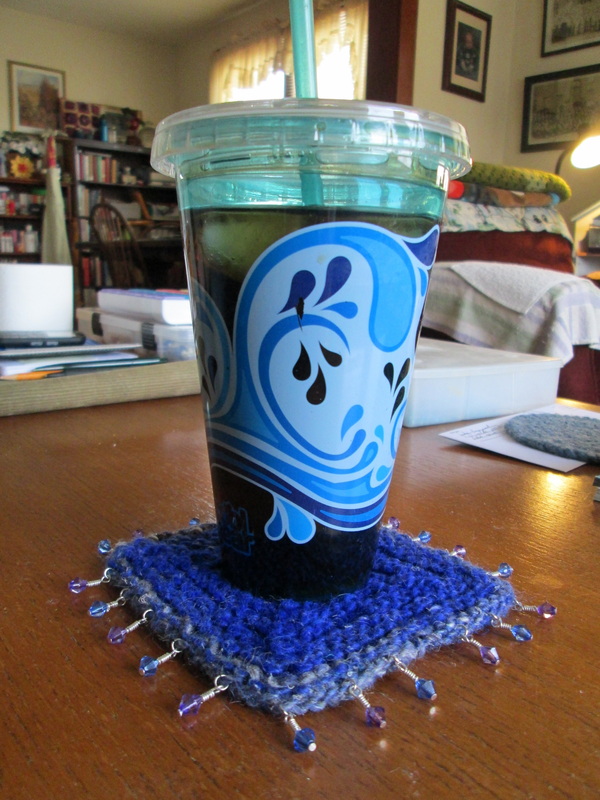
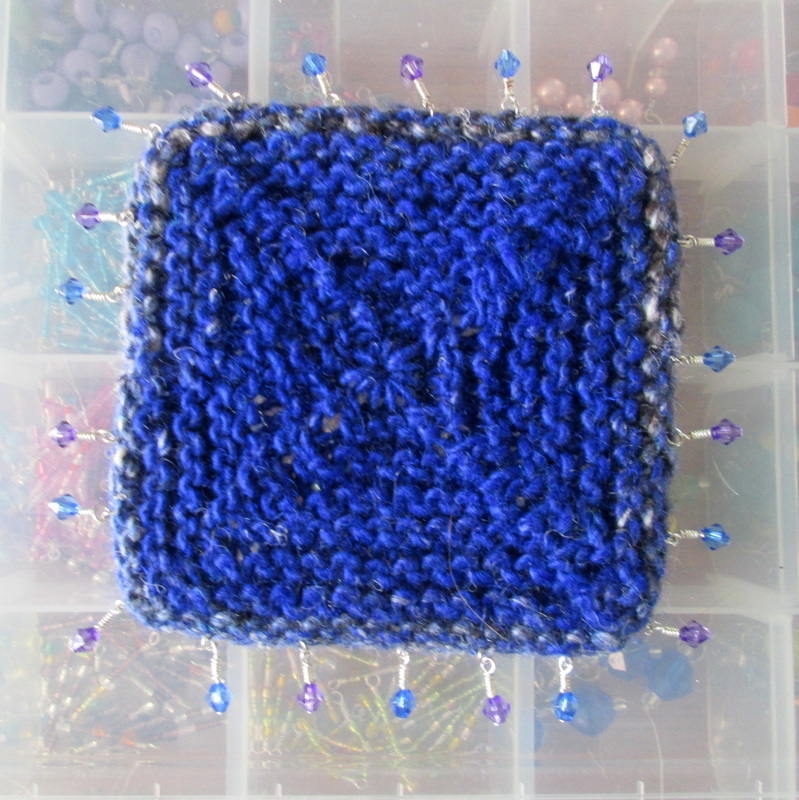
Additional fuel for my short attention span is my love of books. Pattern books to be specific. Not only do I receive terrific titles in the mail for review, but working at the library I can not resist browsing the catalog and borrowing anything - make that everything - that strikes my fancy! That's where I came across this quick and interesting project. In One-Skein Wonders; 101 Yarn-Shop Favorites I found Knitted Coasters with Charms. I thought that it would be a great way to combine John's beading with my knitting.
This is just a peek at one of the many projects that's been keeping me busy. I've been doing a whole lot of crafting, and not very much blogging. Time to get back in swing! I used to wonder what I was going to write about, not any more! I've got plenty of finished projects, works in progress plus don't forget the books to review and giveaway. I think you're going to be seeing a lot of me!
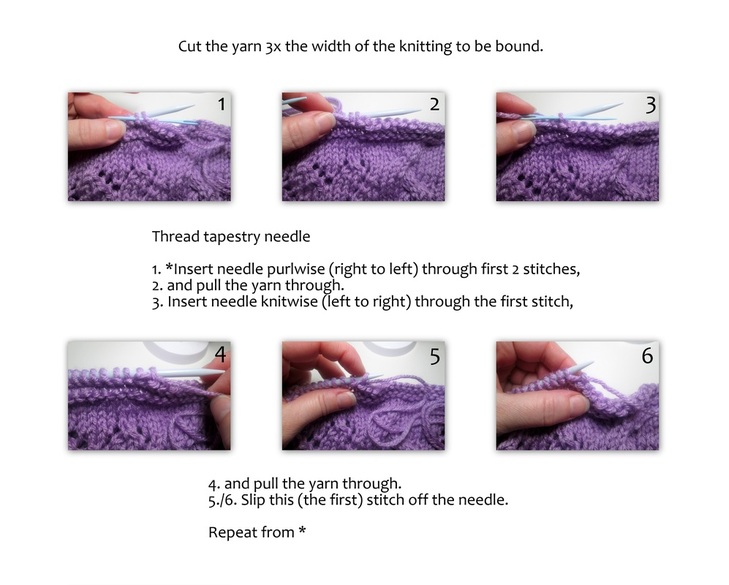
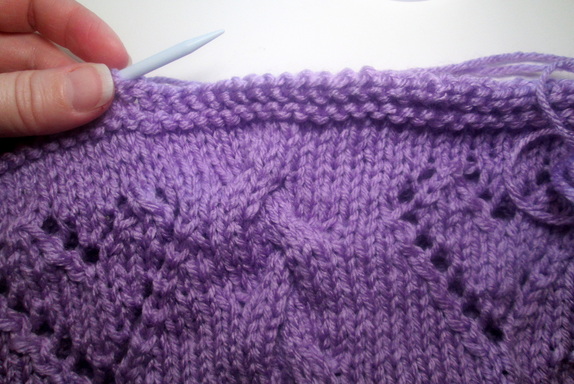
Thanks so much for stopping by and spending a bit of your day with me. Until next time friends, Be Blessed and Stitch & Read with Love! Greetings! Being a new(ish) knitter, there are plenty of things that I'm still learning. Binding off (or casting off if you prefer) is one of those things. I've learned how to do a traditional bind off - where you knit (or purl) a stitch, then pass one over and drop the stitch off the needle. For some reason though, my bind offs are always loose. I've tried using smaller needles, but I still can't get it just right. It's a challenge because not only are my edges ending up floppy, I can never tell how big my item is going to be when I'm finished. When I crochet I don't have any of this trouble. I can see just what size my item is going to be, and I know exactly what my finished edge is going to look like. It's comforting. With knitting it's more of a leap of faith! Here's the thing. I really enjoy knitting and I know that with practice I'll improve, but I needed a plan! If you've been here before, you know that I'm all about trying new things. I figured that maybe a different binding off technique would give me the finish I was looking for. I remembered downloading a free ebook from Knitting Daily that had to have the answer. (If you're not familiar with Knitting Daily I urge you to check them out. The have a bounty of free ebooks available - on all kinds of topics!) That's where I found the sewn bind off. The book says that it creates a very elastic edge that is ropy in appearance, much like a purl row. Perfect the cowl that I was making as a Christmas present!
On another note, I'd like to thank all of you who participate in my giveaways. I'm blessed to receive review copies from various publishers and they are kind enough to provide me with copies to share with you. Giving books (and other goodies) away is such a great feeling. I love reading your comments and getting to know you through Facebook, your blogs, Etsy shops and all the other ways we connect! I hope that you'll come back and visit again - I've got several amazing new titles that I know you're going to love!
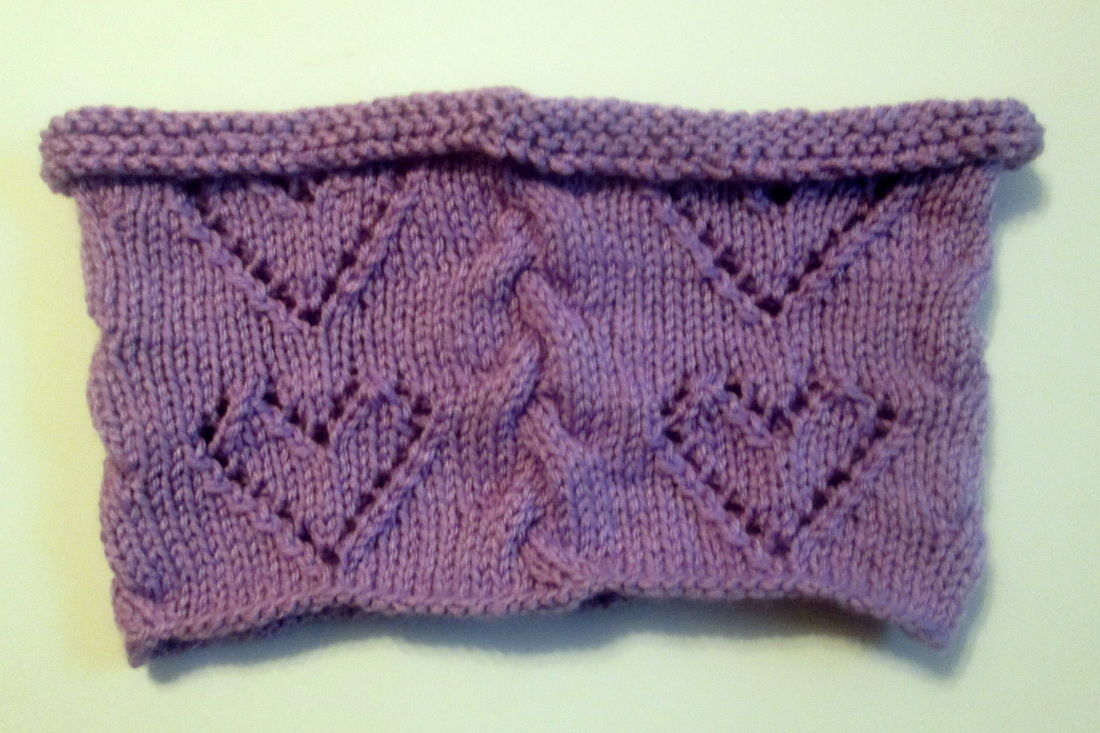
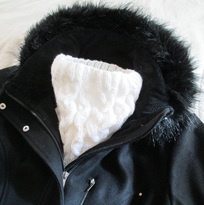
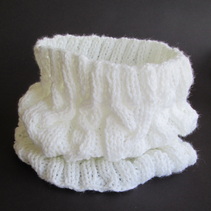
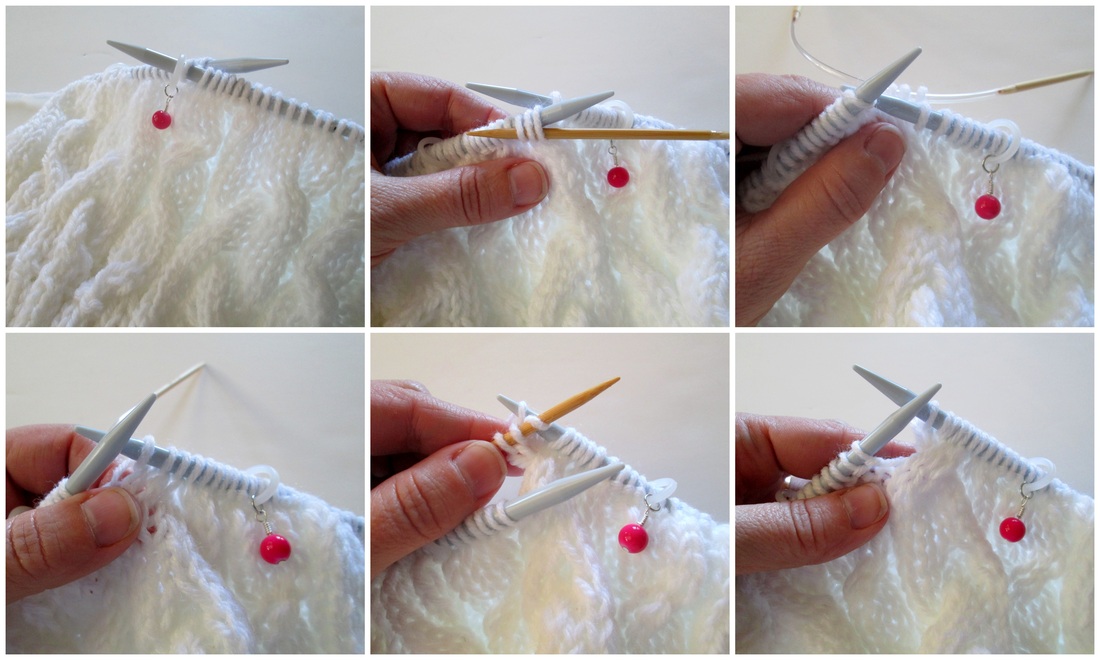
Thanks so much for stopping by and spending a bit of your day with me! Until next time friends, Be Blessed and Stitch & Read with Love! Greetings Friends! Usually I like to write about good things, you know - projects that have worked out well. Pretty things that I've made or tips that I've figured out to help make things easier for us. I don't often write about - or read about - projects that have gone wrong! In fact, when I was planning my posts this one was supposed to be about a super cute hearts and cables cowl. It still is about the cowl - just not the super cute part... Let me tell you what happened: I have been knitting for less than a year - I cast on my first swatch last February 21, 2013. (I only know that because of the blog - before I looked I thought it had been a few years!) Anyway, in that time I have done a lot of knitting, and I really like it! Most everything that I've made has come out nicely, and I'm continuing to stretch myself and try new things. So after making a very lovely cowl for my mother-in-law for Christmas I decided to do a little (more) pattern modification. I guess I was feeling pretty confident. In my mind I could see a Valentine cowl with cables & hearts - that look like X's & O's. For this new project I took the basic size (cast on 100 stitches) and the hearts repeating 4 times around then added the cables, a sewn bind off, and a crocheted trim around the bottom. Unfortunately, things didn't turn out the way I planned. I'm not sure if it's my inexperience or if it's just the nature of knitting, but I'm never really sure exactly what is going to happen when I bind off. Seeing the project off the needles for the first time is always a surprise - and after all that work, the last thing that I want is to be disappointed - which seems to happen most when working in the round. This cowl is the perfect example of thinking that everything was going along splendidly only to find out that it wasn't! It doesn't look too bad in the picture, but in real life the bottom is a good 2 inches smaller than the top and the top edge rolls down hiding the pretty hearts and cables. I didn't even bother with the bottom trim because I knew it never was going to be what I had hoped! 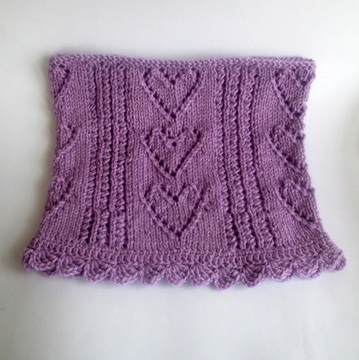 My version of the Sweetheart Lacy Cowl by Cheryl Murray. My version of the Sweetheart Lacy Cowl by Cheryl Murray. Take a look at the first cowl. It's the Sweetheart Lacy Cowl by Cheryl Murray from the book 50 knitted gifts for year-round giving. It's beautiful right? I followed the pattern for main body, but changed the top to the sewn bind off. I also decided to crochet the bottom edge instead of knit the edging and then sew it on as the pattern indicated. The main difference between this one and "mine" with the cables is well - the cables. I also only did two repeats of the hearts and included a few more rows between them to space them out a bit. So what have I learned and what comes next? I've learned that knitting in the round allows you to avoid seaming, but prevents you from getting a good look at the real size of the item. That I need to practice binding off - so that one day my tops and bottoms will be close to the same size. And I've learned that even small changes to a project - like a few extra rows here or there can sometimes end with unexpected results! I've also learned that I don't run into these kind of challenges when I crochet. If I start with 100 stitches in the round and end with 100 stitches I'm certain that my bottom and top will be the same size. I also don't have to worry about what the project really looks like - because you can see the whole thing. Does this mean that I'm going to stop knitting? No way! I love knitting and I really do love a challenge! So far I've tried the traditional bind off and the sewn. I know that there are still more out there - and eventually it will all come together! In the mean time - adding crochet edging helps - and so does using a little clear elastic to firm up an unruly top! Will I keep making changes to the patterns? Of course I will. It's a way to express my creativity and continue to grow as a fiber artist. When I first started crocheting I never would have dreamed of doing something different from what the pattern said - now I use them as a guide. As a framework to help be build and shape new projects. What will become of the cables and hearts? I think that they look good together and that there is potential. Maybe a scarf? Ribbing is always an option to give stability to the body of the cowl and stop the top from rolling down. And finally I'm thinking that I should just let it rest while I work on something else! We all need a little space one in a while - especially after things go wrong! Thanks so much for stopping by and spending a bit of your day with me. Until next time friends, Be Blessed and Stitch & Read with Love! 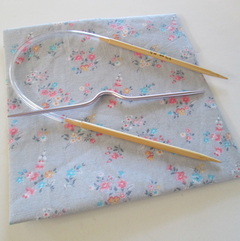 Which one makes cables easier? Which one makes cables easier? Greetings Friends! Are you afraid to try knitting cables? You love the way they look - the texture and motion they give to garments, but the idea of adding another needle into the mix is more than you're willing to attempt? Fear no more!! For I was once like you! Timid and leery of a third needle for stitches to slip off of. Because really, how would I possibly fix that kind of mistake when it takes every once of concentration to pick up a dropped stitch in a simple knit row? The skills required to make cables are basic. It's no more than slipping stitches and knitting (and sometimes purling). The tricky part is wielding that third needle. It's typically a three step process: 1) Slip the stitches onto the cable needle and hold it in back (or in front) of the body of the project. 2) Knit the required number of stitches (according to the pattern) using the main set of needles (making sure the slipped stitches on the cable needle stay in back or in front of the project). 3) Knit the slipped stitches from the cable needle to the main needle. That's it. Piece of cake right? I know you may not believe me yet, but I promise you can do it. The two biggest challenges I have with cables are making sure the stitches don't slid off, and actually knitting from the cable needle. While working on this cowl I had an ah-ha moment. I was looking through my supplies for a larger cable needle (I have several that were given to me when I started knitting) and I came across my 12 inch circular bamboo needles. Honestly these needles haven't been good for a whole lot (they're too small for most projects and the short needles are tedious to work with). But I thought why not use it instead of the short slippery metal cable needle? Ah-ha! 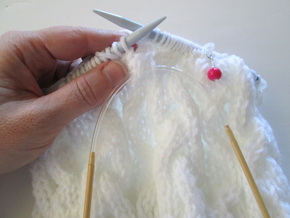 Here my stitches happily hang! Here my stitches happily hang! Right away I knew I was onto something. Once you slip the stitches onto the circular needle you can just let it hang in back or in front of your project. No more worrying about dropping stitches! When you're ready to knit the slipped stitches just slide them up to the tip of the needle and you're in business. I find that it really works like a dream. There was some concern that the hanging circs. would get in the way, and I imagine if you don't have a short stubby pair of 12 inchers that could be a problem. For me the piece of mind that I get from not worrying about dropping stitches is worth it. Don't have circular needles? I've been told that using a bamboo double pointed needle is a much better option than a slippery metal cable needle. The other part of cables that took me some time to master is the language. Cable abbreviations seem confusing. The first time I saw C6F and C6B I was stumped. Now that I understand the construction of cables it makes perfect sense. Here's what I learned. Basic cables are formed when you work stitches in front and in back of other stitches. The C tells you you're making cables, the number is how many stitches you'll be using in total and F or B lets you know where to hold your slipped stitches. So C6F is a Cable worked over a total of 6 stitches, holding slipped stitches in Front. That means that you will slip 3 stitches onto your cable needle and let it hang in front of your main body of work. Knit 3 from your main needles, then knit the 3 slipped stitches. C6B is a Cable worked over a total of 6 stitches, holding slipped stitches in Back. So that means you slip 3 stitches and let them hang in back of your main body of work. Knit 3 from your main needles, then knit the 3 slipped stitches.
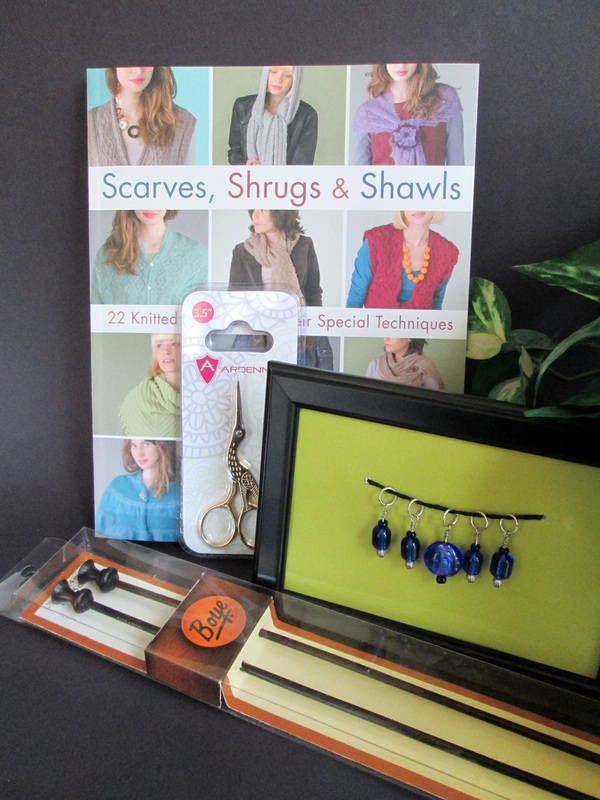
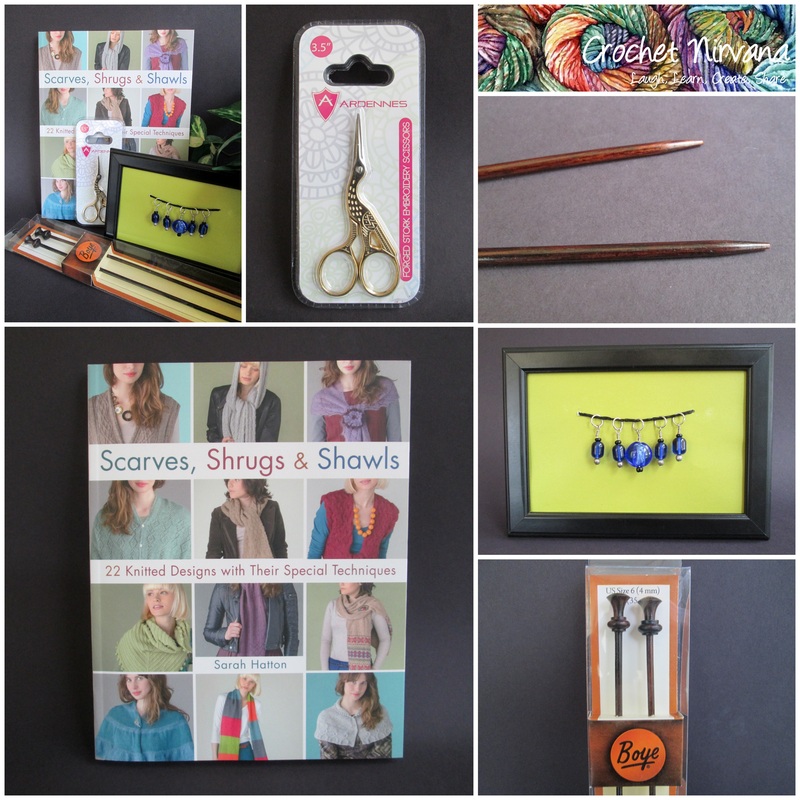
Like everything in knitting, cables come in many shapes and sizes. They can be classically simple or wonderfully complex. Personally they are one of my favorite fabrics. I love the texture and movement they bring to any garment. My desire to create cables is one of the reasons that I learned to knit! Using the short circular needles instead of a standard cable needle has really been a breakthrough! I still have plenty to learn, but understanding the language and how they're made makes me feel like I can tackle more complicated patterns with much more confidence! So what do you think? Are you ready to give cables a try? I hope you do. And for my knitting friends who are well versed in the ways of the cable, I would love to hear from you! What kind of cable needle do you use? Do you have any tricks or tips to share? One last thing, I'm looking for my next cable project and welcome any pattern suggestions you might have. Thanks so much for stopping by and spending a bit of your day with me! Until next time friends, Be Blessed and Stitch & Read with Love!  Join the Love Affair with Yarn! Guest Post by Author and Yarn Enthusiast Betty Hectman A lot of people are going to be celebrating I Love Yarn Day on October 11. According to the Craft Yarn Council there are over 50 million people of all ages who knit, crochet or otherwise work with yarn. And it’s no wonder. It’s not just the destination of getting a scarf or sweater; the journey is full of benefits. Knitting and crocheting are great anxiety busters, offer something productive to do while waiting and can be a social outlet when done with a group. Want to Join in? Getting Started It’s great if you have a friend or family member to teach you, but if not, there are other options. Check out your local yarn store. According to Lisa Garcia of the Close Knit Circle yarn shop in Tarzana California, for a nominal fee they will teach someone to knit or crochet. In addition with a yarn purchase comes the invitation to hang out at the group table in the store and get help on a project. Some of the craft stores like Michael’s or Jo-Ann’s offer group lessons. Try your local community college. Pierce College in Woodland Hills, California offers yarn craft classes as part of their extension program. *Your local library is another spot to check out. Many have groups that welcome sharing their skill and experience with new members. If you’re more of a do it yourselfer, it is possible to learn on your own. There are numerous books on the market, but Betty Hechtman, author of two yarn related mysteries series suggests doing what she did and trying a kids’ kit. “I found that the instructions were broken down into easy to follow steps with lots of illustrations. And if the instructions would work for a ten-year-old, I figured they would work for me. I learned how to crochet granny squares with a kit meant for kids and it changed my life.” First Projects Don’t defeat yourself by choosing something too complicated for a first project. Also, it is best to stick with easy to work with yarn like basic worsted weight. A scarf is a great project to start with using either this free knitting pattern or this free crochet pattern. Both use only the most basic techniques. The Beauty of Handmade Every knit or crocheted item has its own story. The experience of picking the yarn, making the project and what was going on in your life are all woven into the stitches. Remember that what makes handmade items special is they look like real hands made them. That means there might be a wiggly stitch here and there, but just look at it as part of the tale. About Betty Hechtman Betty Hechtman is the author of “Yarn to Go,” the first book in the Berkley Prime Crime Yarn Retreat mystery series, as well as the author of the best-selling Berkley Prime Crime Crochet mystery series. The eighth book, “For Better or Worsted,” comes out in November. She has also written newspaper and magazine pieces, short stories and screenplays as well as a children’s culinary mystery. She has a bachelor of fine arts degree and has been active in handicrafts since she was a small child. Hechtman divides her time between Los Angeles and Chicago. I hope you enjoyed Betty's post! I couldn't agree with her more. In fact, I learned how to crochet by checking out children's books from our library. And when I needed more help I turned to our resident experts - The Knit Wits, who have been meeting on Wednesdays at the library for years! The comment following the * is mine. I had to mention the library, not just because I work there, but because they're such a great resource in so many communities Thanks so much for stopping by and spending a bit of your day with me. Until next time friends, Be Blessed and Stitch & Read with Love! 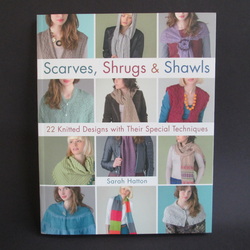 Scarves, Shrugs & Shawls: 22 Knitted Designs with Their Special Techniques by Sarah Hatton St. Martin's Griffin February 26, 2013; 136 Pages Scarves and wraps are the perfect canvases for experimenting with new stitches and practicing new techniques. From well-respected Rowan Yarn designer Sarah Hatton with Sharon Brant as the technical editor, Scarves, Shrugs & Shawls offers over twenty easy-to-make and fun-to-wear designs that explore a range of knitting techniques—from gorgeous textured and cabled stitches, to intricate openwork and lace patterns, to interesting and appealing shaping. A gallery of designs features the garments photographed in full color and includes a helpful and inspiring "How to Wear It" section, showcasing the myriad ways to wrap your shawl, twist your neck warmer, or tie your scarf. Making these popular accessories even more versatile so you can wear them over and over, and still keep them looking fresh! (from Amazon.com) Greeting Friends! Welcome to a new review and an awesome giveaway. First, let me tell you about the book. As most of you know I'm a lover of books - that includes all kinds from fiction to dictionaries and everything in between. As a crocheter and more recently a knitter I love browsing through the pages of pattern books looking for projects and inspiration. Having checked out many titles from our library I fancy myself a bit of a connoisseur. So how does Scarves, Shrugs & Shawls measure up? On a scale of 1 - 10 I give it a solid 8. The book is set up in sections. Right away I was drawn in by the full page photographic spreads featuring each item. So often in pattern books you get one little picture. Not here. After you've had a chance to view each piece from a variety of angles it's on to the patterns. Again there are more (different) pictures that really show you what you're making. Along with the line by line instructions charts have been included allowing you to use whichever format you prefer. Now I haven't made any of these items, so I can't speak to the accuracy or ease of following the patterns, but I did read through several and it appears that they are well laid out and complete. As the publisher promises, there are a variety of different techniques featured in the patterns providing an opportunity to try new things. As a beginner I feel like several of the patterns are more advanced than I am, however the technique section at the back of the book seems to offer good insight on the skills needed by covering everything from how to avoid holes when doing two handed fair isle work, how to string beads using a needle and thread, to making a no-turn bobble. I'd say the projects are best suited for those with knowledge of the basic skills and some experience under their belt. A confident beginner should be able to handle many and might be inspired to give some of the more complicated designs a try. Intermediate and advanced knitters will be pleased with the options available. There really is something for everybody. I'd say my favorite part is the "How to Wear It" section. What a brilliant idea! As a scarf and shawl enthusiast I'm always struggling to find new and interesting ways to wear them. While this section is showcasing the garments from the book they make it easy to see how it would work on any item of similar shape and dimension. In addition to the pictures they tell you what to do to achieve each look! For the fashionably challenged like me this is important! The paperback book is nicely bound and lays open fairly easily. It's 9.7" x 9" size makes it big enough to see things clearly, but small enough to fit in your bag if you wanted to take a project on the go. I like the matte finish of the pages, too. Overall I think this is a well done book that any fan of shoulder and neck wear would be happy to have in their collection! Now, for the fun part - the giveaway!! I love giving things away! I'm so blessed and thankful to the people at St. Martin's who send me all kinds of books to review. It only seems right that I spread the joy and share them with you. I've been collecting little trinkets to put together a fun knitting prize package. In addition to the book, there are stork scissors!! These are a classic item and a huge favorite of my Facebook friends. This pair is 3.5" tall making them perfect for home or on the go in your travel bag. I have a 5" pair that I use every day - they cut beautifully! Next I found a pair of Rosewood knitting needles from Boyd. They're US size 6 and 14" long. They're quite lovely and while I've never tried them, I know that my Rosewood crochet hooks feel warm and natural and seem to get better every time I use them. Finally there is a set of handmade cobalt blue glass stitch markers. They're one of a kind and will help you keep your place in style! So there you have it! All the tools you need - just add your favorite yarn and you're on your way to knitting nirvana!! Enter now for your chance to win! Thanks so much for stopping by and spending a bit of your day with me. I hope that you'll take a moment and throw your name in the hat. I've tried to come up with lots of different ways to enter giving you plenty of options. This time I'm opening the drawing to everyone everywhere! If I can send you mail through the US Post Office than you're welcome to enter. If you're a crocheter and are feeling left out - don't! I've got something special planned for you coming up towards the end of the month! I promise you're going to love it!
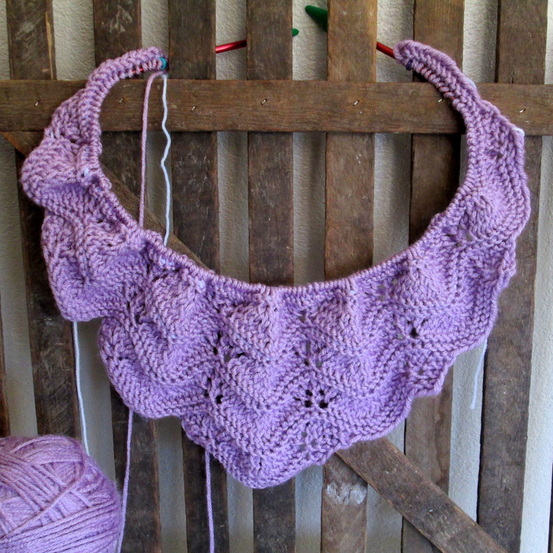
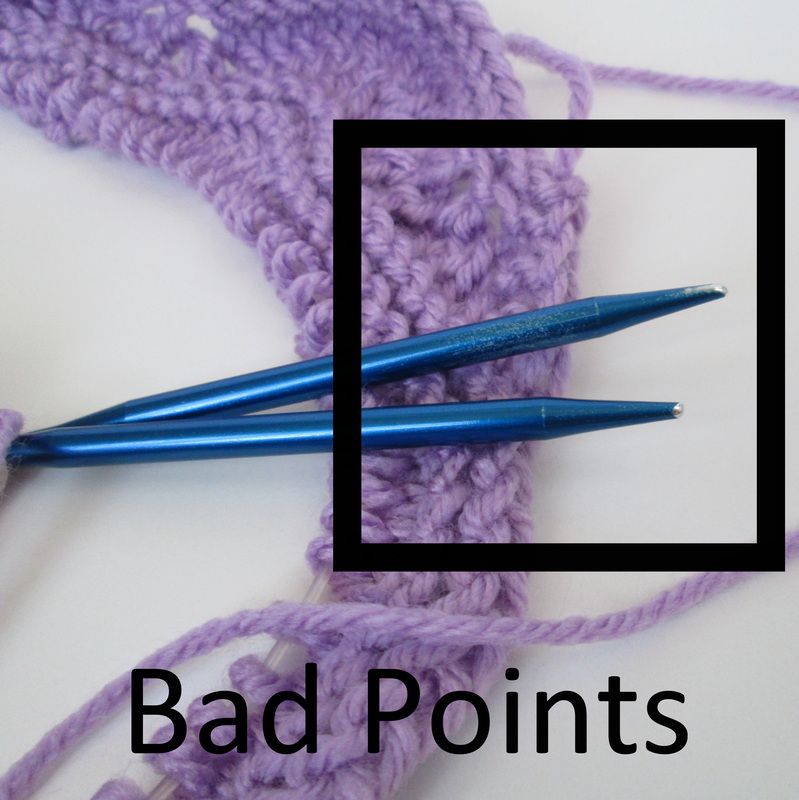
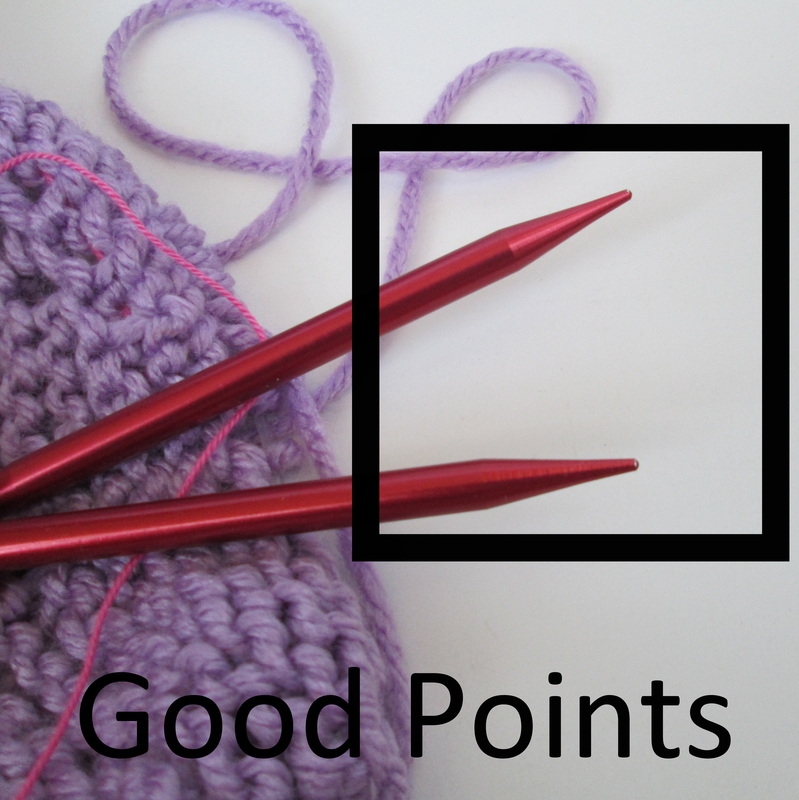
Until next time friends, Be Blessed and Stitch & Read with Love! A lacy shawl teaches a lesson about using the right tools. Greetings Friends! The recent break in the hot weather has me thinking about fall (my favorite of all the seasons)! One of the best things about the cooler weather is wearing wraps and shawls. I have several that are crochet, but none that are knit. For the past year or so I've been pinning and bookmarking patterns for the someday when I'd finally give knitting one a try. It's been a while since I picked up the needles so I figured now is a good time to work on my skills. If you remember, I've only been knitting for less than a year, and my entire repertoire includes one pair of socks, a small stuffed baby toy, a few pairs of fingerless mitts, oneleg warmer and a scarf and hat that are still in progress. (I have issues with finishing I know!) I sifted through the mass of beautiful patterns and finally settled on one called Blossoms by the Brook. It's quite lovely and looks like it will keep me interested and be a good way to practice lacy techniques. It calls for worsted weight yarn and since I have a bounty of acrylics in pretty colors I decided that's what I'll use. Normally I'll pick a fiber that feels better next to the skin, but since this is my first attempt it seems the wiser choice to use something economical. If all goes well then a knit shawl in gourmet yarn is in order, but for now I'll stick with the cheap seats! I have a fair collection of knitting needles. However, with the exception of a pair of dpn's I bought to make John's socks they've all been donated. Which means that lots of them have been very well used. Many of my crochet hooks came to me the same way and they've always treated me well. I have learned that all hooks are not created equal and to use the same one throughout a project, but I've never had one not work properly because of it's age. So when I picked out the size 8 circulars that the pattern calls for I didn't think twice about their condition. I used the long tail cast on and set to work. The first row is usually tight and hard to pick up, but once I get past that the tension evens out and I can get a good rhythm going. So why after 4 or 5 rows was I still struggling so much?? That's when I took a closer look at the tips of my needles. Well how about that! The finish was worn off and it's clear that these babies have knit a lot of stitches! What was once a fine chiseled tip is now blunt and dull! Of course I don't have another pair that size so I had to decide if I want to go up or down. I chose bigger needles figuring that with the worsted yarn the larger stitches would improve the drape of the fabric. Wow! What a difference! Now I get it. I had the right tool but it's worn condition made it so hard to work with that I could probably use chop sticks with better results! And so I've learned a valuable lesson. Make sure your tips have good points. For a moment I thought that I had lost my knitting mojo, but once I got going with a healthy set of needles it was smooth sailing. The larger size has helped with the drape and the pattern is proving to be a fun as I hoped. Now that I'm nearly half way done I'm already picking out the "nice" yarn I'm going to use for my next knit shawl! I'm sure that you seasoned knitters know exactly where I'm coming from, and may have even enjoyed a chuckle at my naivety! Somewhere deep in the recesses of my brain I know that I've read about points and lace needles and what makes for good easy knitting, I just got so caught up in the excitement of the project that I never even considered that I might have dull needles! Crochet and knitting are activities that you really learn by doing. Books and videos are definitely helpful but the real knowledge comes from taking the yarn in hand and getting to it. One of my biggest knitting fears is having to rip out my work, that's why I'm using life lines. It's another valuable lesson I learned "on the job". Yes, it's a bit tedious but I'd much rather take the time to run a safety line than have to leave in a mistake (never!) or start over!
So there you have it. Check your tips! Working with dull points is frustrating and time consuming. Don't let shabby equipment ruin your knitting experience. Thanks so much for stopping and spending a bit of your day with me. Until next time friends, Be blessed and stitch & read with love! |
I'm Robin and this is Click to see what's new on the Craftsy Crochet Blog!
Follow Along
Tutorials and Patterns
On InstagramPlaces I Post
Archives
July 2015
Categories
All
Thank you for visiting!
My name is Robin. I am a wife, mother and strong believer in the power of faith. I'm a maker, a crafter and an artist. I love exploring new mediums and sharing my adventures with you. Did you enjoy your visit? Let me know by leaving a comment. I love knowing you dropped by, and hope to see you again soon! Be Blessed and Stitch & Read with Love! |
