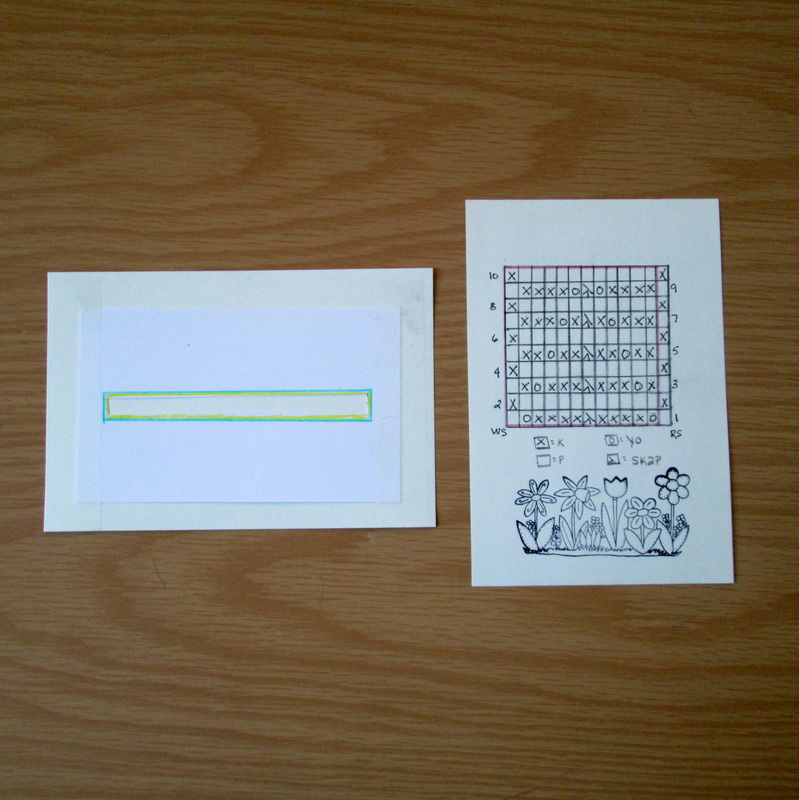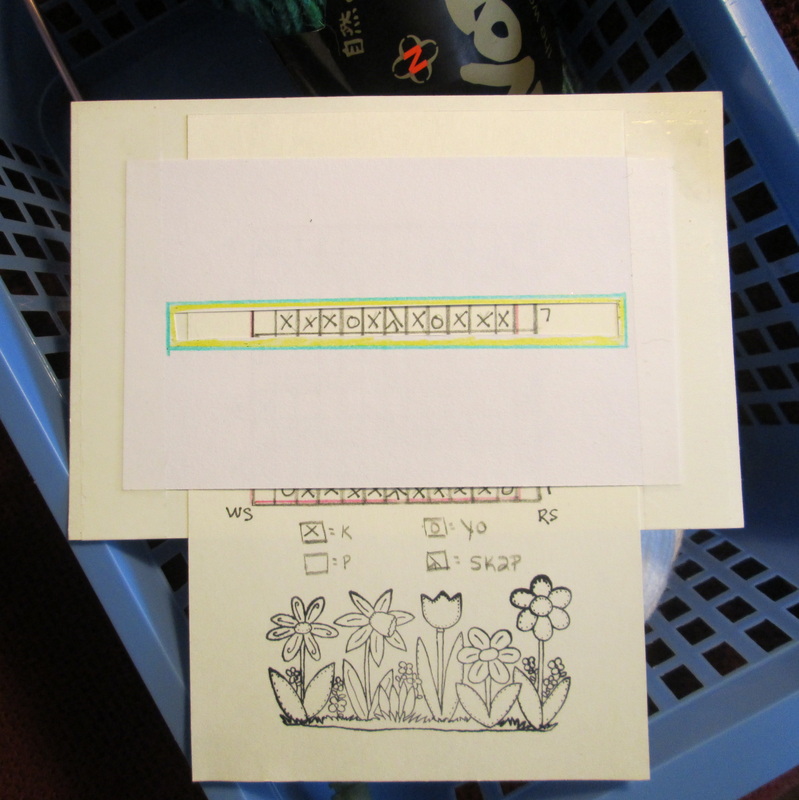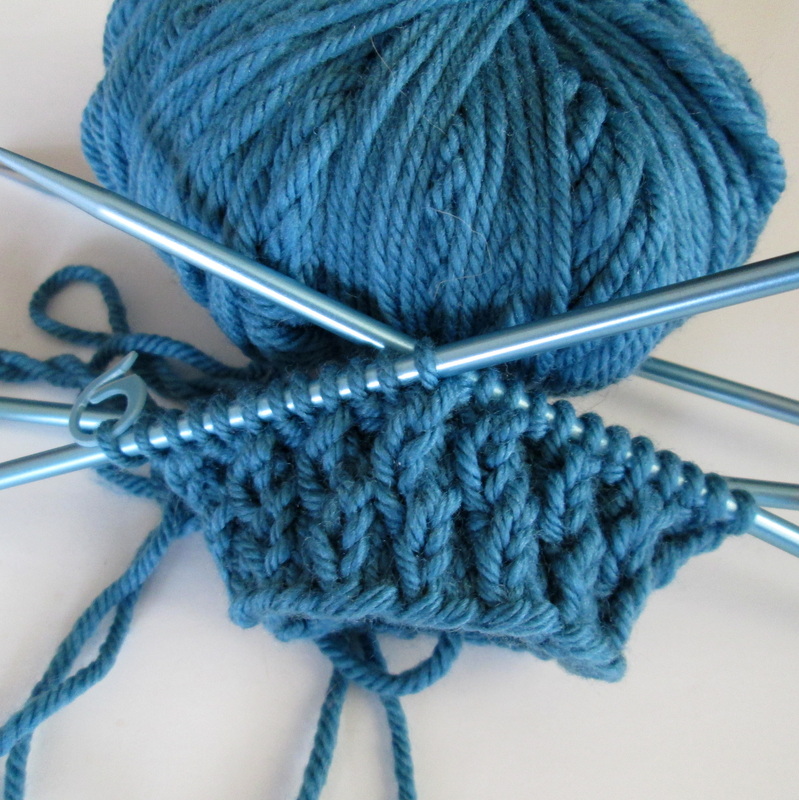
Greetings! I'm trying something new. Knitting lace. Guess what? It's kind of hard. Well the stitches aren't that hard. Making sure that you do the right number of them in the right order is a little hard. But for me, the really hard part is keeping those pesky stitches from sliding off the needles! Because when one does, I'm sunk. I've read about ways to correct mistakes, and even had a limited amount of success if I'm just knitting or purling. But when it happens on something like this I have no idea what to do and my only solution is to just start over. It's not a pretty picture. I've learned that if I knit when I'm tired I make mistakes. So now I knit during the day and crochet at night. Because if I make a mistake in crochet it is SO MUCH EASIER to fix! There's no comparison really. I did discover a way to keep track of which row/stitch I'm on. Check it out. I saw this on Facebook a few weeks ago and had to give it a try.
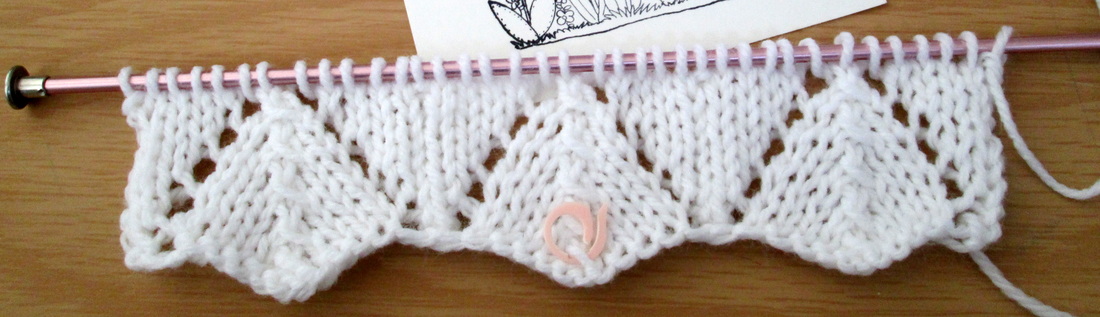
All it took was (2) 4"x6" postcards and (1) 3"x5" postcard, a little scotch tape and an x-acto knife. The hardest part was making sure that I copied the chart correctly! I've found it to be a brilliant solution that works like a charm! I totally recommend giving this a try. The project that I'm gearing up for is the Earflap Hat from the book Knit Noro: Accessories. I know hat season is just about over, but I want a small project that will teach me some new knitting skills. This one seems just right. It uses yarn overs and a knit and pass over technique that creates the center of each triangle. I often avoid swatching, but this time it seemed extra important. Once again I'm glad that I took the time. Not only did it help me determine what size needles to use, but it let me practice the stitches and get comfortable with the flow of the pattern. Now when I get started on the hat I'll know how to do it and what things should look like!  Plus I don't have any extra Noro, and if I remember from the one time I used it, it doesn't like being frogged.
Now, about that problem of making mistakes, and not being able to fix them... I've read about knitters who use lifelines when working on difficult patterns. By threading a piece of yarn through your project at intervals you create a safe zone. If you do make a mistake you can pull the work out back to the lifeline instead of having to go back to the beginning. Sounds like a great idea to me! Now at least I can have a little piece of mind, because let's be honest - I'm going to make a mistake or two or three! I also found that placing a stitch marker after every pattern repeat helps. It's kind of tedious, but I know that between each marker I should have 12 stitches. If I make sure each repeat is done correctly than I know that the row has been done the right way. Plus, it's (usually) easier to fix a mistake that's only a few stitches back. So what about you? Do you have a trick for keeping your place in the pattern, or for fixing those pesky dropped stitches? I'd love to hear what you do to make your knitting go more smoothly! Well folks, the swatching is done and the charts are in their handy dandy holders so I guess that means it's time to cast on! Wish me luck! Did I mention that this is also my first knit hat? I'm either adventurous or foolish - time will tell which! Thanks so much for stopping by and spending a bit of your day with me. Until next time friends, Be blessed and stitch & read with love!
3 Comments
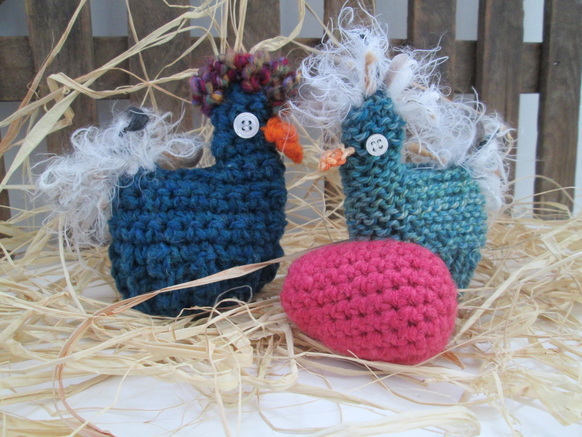
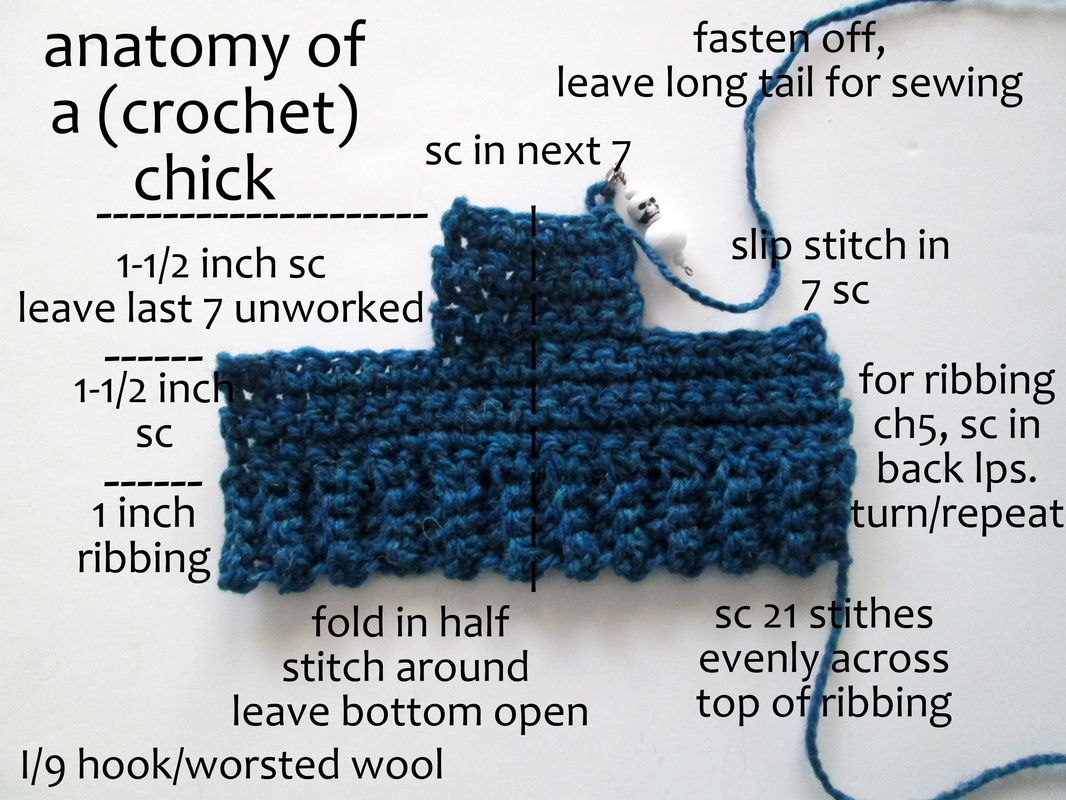
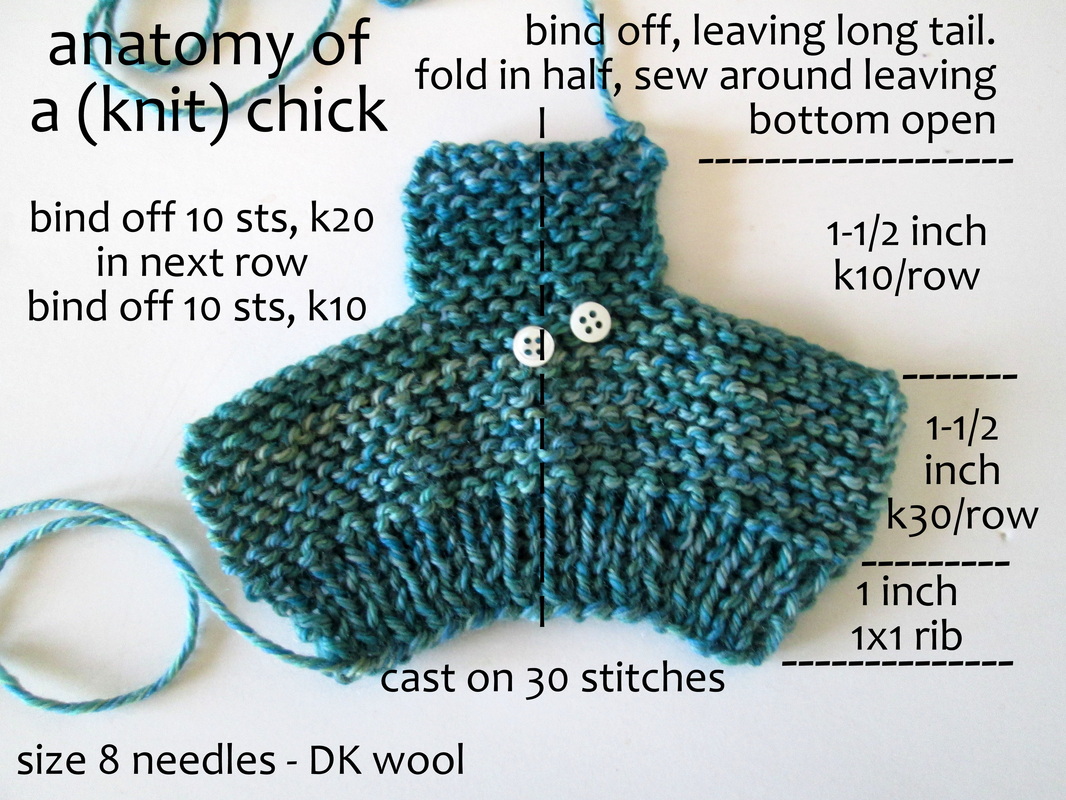
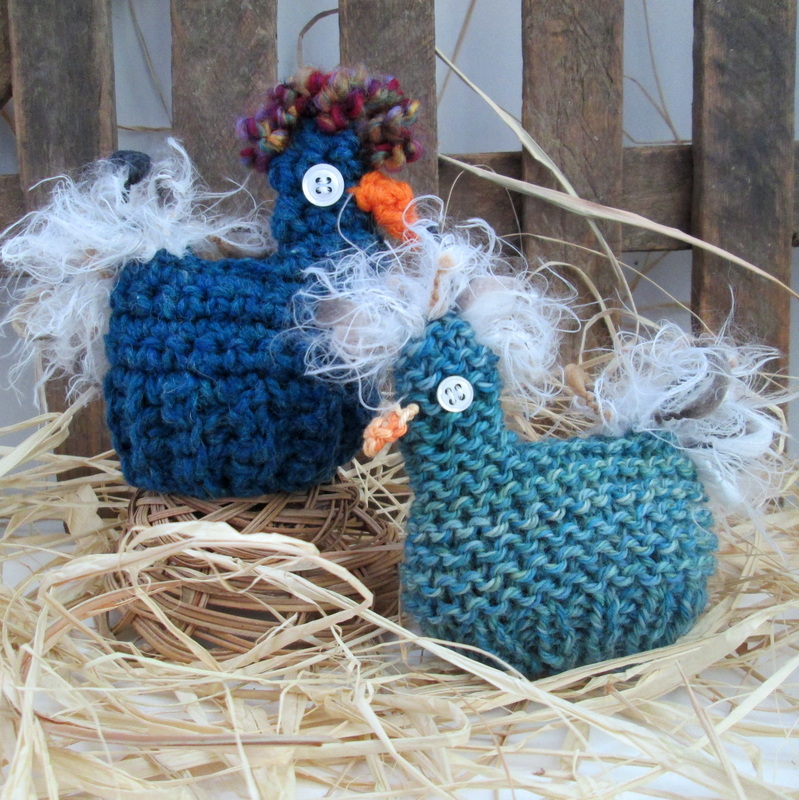
After looking over the pattern I realized that it would be a snap to covert to crochet. Isn't it something what a difference a year makes? How cool that I would be able to make these available to anyone who wants to make them!! Now no one has to be left out! As it happens, they are very easy to make no matter which technique you use. I made both of these and the egg in one evening. The ribbing on the knit version is snugger (is that a word?) so, to make the crochet ribbing tighter I ran a basting stitch around the bottom and pulled it in a little. Problem solved!
Embellishing them was fun too. At first I wasn't sure what to do. Since I don't have chickens the picture that came to mind was Fog Horn Leg Horn (we're big Looney Tunes fans here!) Anyway, I found this fuzzy, furry yarn (which I've could never figure out what to do with), and sort of stitched it in loops. I think the effect is great! I'm not crazy about the beaks though. In fact the knit chick had a "beak job" because the original one made her look like some sort of prehistoric monster chick, okay I'm overreacting a bit but it did look funny. Next time I might try a piece of felt instead. You really can let your imagination run wild or go for the simple look and make them in your favorite colors. No matter what you do, I'm sure that they will look terrific. 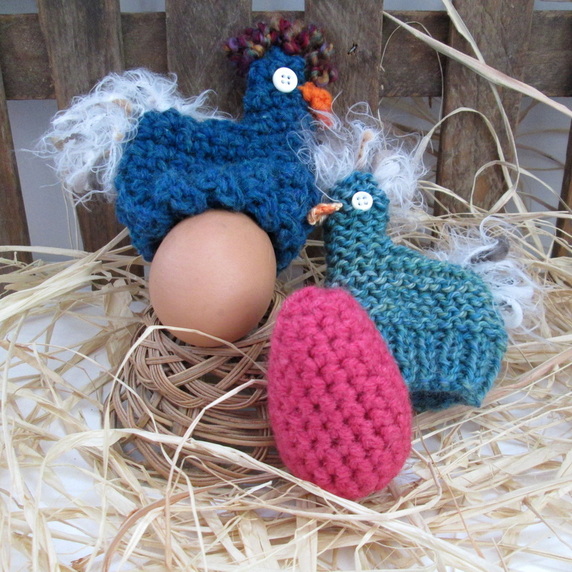
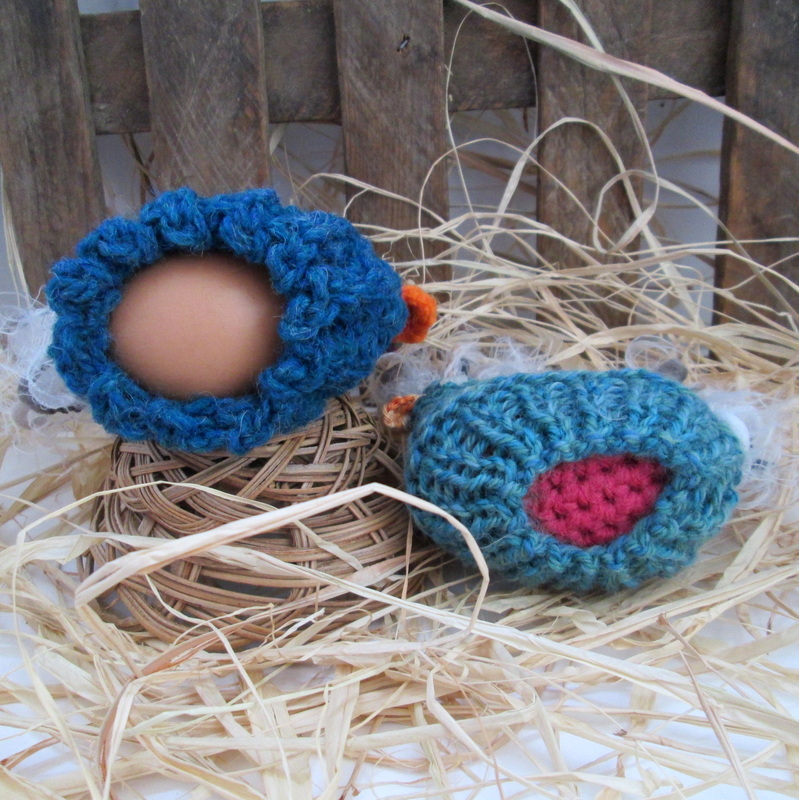
I love that they sit atop the eggs. For me that's why I found them so endearing. I'm not sure what it is about little "surprises" like that make me say, "aaawwwhh", but I can't help myself! They're a perfect fit for the crochet eggs, or you can fill a plastic egg with candy for a super sweet treat. I'm including a downloadable PDF of the crochet pattern that you might find useful as well as the egg pattern. I didn't bother to write out the knit pattern. I was able to follow the diagram, and I'm sure you can too. With any of them, please let me know if you have questions. I'm new to pattern writing, and apologize in advance for any mistakes or confusing instructions! Well my friends that's all for today. Have fun with your creations! I'd love to see pictures of your lil' chickies. You can post them on my Facebook page and we can all "aaawwwhh" them together.
Thanks so much for stopping by and spending a bit of your day with me. Until next time, Be blessed and stitch & read with love! 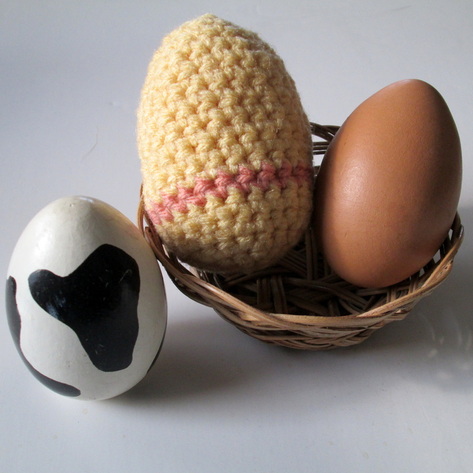 Greetings Friends! I hope that this first day of the vernal equinox finds you with a spring in your step! It's cold and blustery in New England with the remnants of the most recent snow storm visible at every turn. I'm optimistic though that the sun will soon shine brilliantly and before long it will only be a memory (the snow, not the sun!). Enough of the weather chat and onto the eggs. What about them you ask? Well, this morning I realized that while I had been thinking about Easter and the Resurrection I hadn't given much thought to the other side of Easter. With the bunny, jelly beans, chocolate and of course eggs. Since our son is a teenager the days of pastel baskets, shinny cellophane grass and copious amounts of candy for breakfast are (sadly) behind us. I wanted to do something though, so I decided to crochet myself an egg. I also thought it would be fun to share the pattern with the knitting/crochet group who meet at the library on Wednesdays. And if I'm going to share with them, of course I'm going to share with you! It's quite easy and took about half an hour to finish. Without further ado here you go: An Easy Crochet Egg Pattern 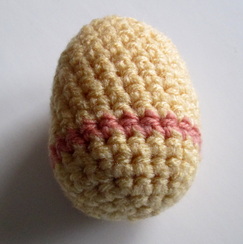 Gauge isn’t important so feel free to use whatever you have handy. For this extra-large egg I used: F/5 – 3.75 (US) hook Bits of worsted acrylic from the stash Left over fiber fill for the stuffing, but most anything soft will work (cotton balls, bits of yarn etc.) Stitches and Stuff: Single Crochet (sc) Single Crochet 2 Together (sc2tog) – Insert hook in stitch and pull up a loop, insert hook into next stitch and pull up another loop (3 loops on hook). Yarn over, and pull through all 3 loops. One stitch decreased. Eggs are worked in continuous rounds – do not join. Use a marker at beginning of the round and move it up as each round is completed. To Make the Egg: With color of your choice – ch 2. Rnd 1: 6 sc in first ch. Place marker in 1st st to mark beg of rnd; move marker up as rnd is completed. Rnd 2: 2 sc in each sc around. (12 sc) Rnd 3: *2 sc in next sc, sc in next sc; repeat from * around. (18 sc) Rnd 4: *2 sc in nxt sc, sc in next 2 sc; repeat from * around. (24 sc) Rnd 5 – 12: Sc in each sc around. Rnd 13: *Sc2tog, sc in nxt 4 sc; repeat from * around (20 sc). Pull tail from starting chain into the egg, and begin stuffing. Continue stuffing as you go until it’s firm and holds its eggy shape. Rnd 14: *Sc2tog, sc in nxt 3 sc; repeat from * around. (16 sc) Rnd 15: *Sc2tog, sc in nxt 2 sc; repeat from * around. (12 sc) Rnd 16: *Sc2tog, sc in next sc; repeat from * around (8 sc). Keep stuffing! Rnd 17: (Sc2tog) around. (4 sc) Fasten off, leaving a long tail. Weave the tail through the stitches on top to close the opening. Knot the end and the weave into the egg to hide. If you make stripes, make sure to pull the ends into the egg before stuffing (it’s easier that way!) There you are! A great way to use up some stash scraps. Imagine how cool they'll look in variegated yarns. I was also thinking that you could embroider designs on then too. I created a PDF if you want to download it for later. Well friends, that's all for now!
Thanks so much for stopping by and spending a bit of your day with me. Until next time, Be Blessed and Stitch & Read with Love! PS: There's still time to enter the book raffles. Check the links on the side bar if you haven't already!!
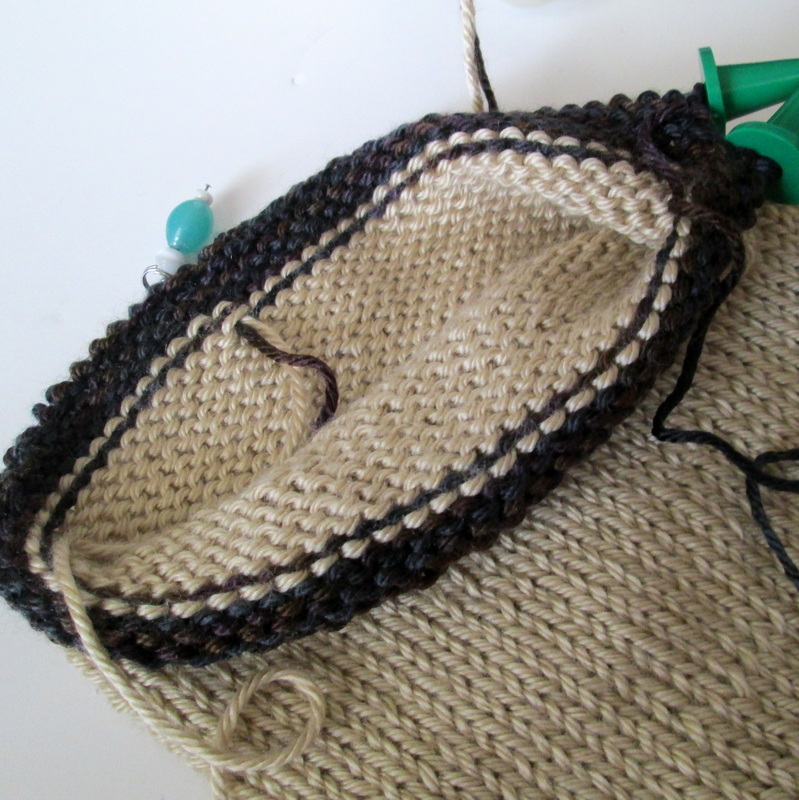
But again, in time I'm sure that it will come. It only seems natural that the next step is knitting in the round. Especially since I don't like seaming anything - at all. But that means double pointed needles. Have you seen what this looks like? There are points sticking out hither and yon just waiting to skewer you. And there's nothing to stop the stitches from sliding off those smooth needles except for tension and gravity. I'm pretty sure that both of these things can work against you just as easily as for you!! I did what I always do and headed for the books. I also watched a hand full of videos where everyone assured me that it's really not as hard as it looks. (Did I mention that it looks like you're performing a magic trick?) With my resources in front of me and a simple project in mind (leg warmers) I got to it. At first I tried casting onto one needle and then sliding the stitches onto the other two. It didn't work too well because my tension was too tight. After a few tries I was able to cast on to all three needles. I laid them out in a little triangle and then tried to pick the whole thing up to knit the first stitch. Ha! They swiveled and rocked and rotated about causing a fair amount of frustration and a bit of flowery language. I resorted to keeping them on the table and gently lifting the needles to join them. Success!! And it wasn't even twisted. Can you hear the halleluiah chorus?
Ever so carefully I picked up the fragile contraption and started knitting. Imagine my surprise when it worked! I was doing it. I struggled some when it was time to go from one needle to the next and again resorted to laying the whole thing down. But just like everyone promised, after a few rounds it gained stability and the whole matter was so much easier! Woo - hoo!! Now we're cooking. I was cruising along like no tomorrow. Then I remembered a post by my friend Pumpkin. Pumpkin is an accomplished knitter who creates beautiful garments. After years of knitting, she recently learned (and admitted!) that she has been doing it wrong. Doing what? Knitting in the round inside out. That is to say the front of her work was inside the tube. What? I panicked! Where was the front of mine? Was I doing it wrong too? Of course you know the answer is yes! It was so easy that way, so natural. How was I supposed to fix it? I pushed and turned and flipped it around eventually getting things to where they should be. Thanks goodness! And thank you Pumpkin for sharing your story. Otherwise I might never have known. I suppose it really doesn't matter that much, but I'd rather learn the right way from the start than have to fix a bad habit somewhere down the line.
Yes! Yes it is easier than it looks! Once you get the first few rows started and are able to accept that part of your work is just going to hang there it really isn't that hard! I'm convinced. But what about circular needles? So many bloggers sign their praises - for working in the round and back and forth. Not wanting to miss anything I decided to move my legwarmer from the dpns onto a 16 inch circular. Making the transition was a breeze and after just one round it was clear to me why people love using these.
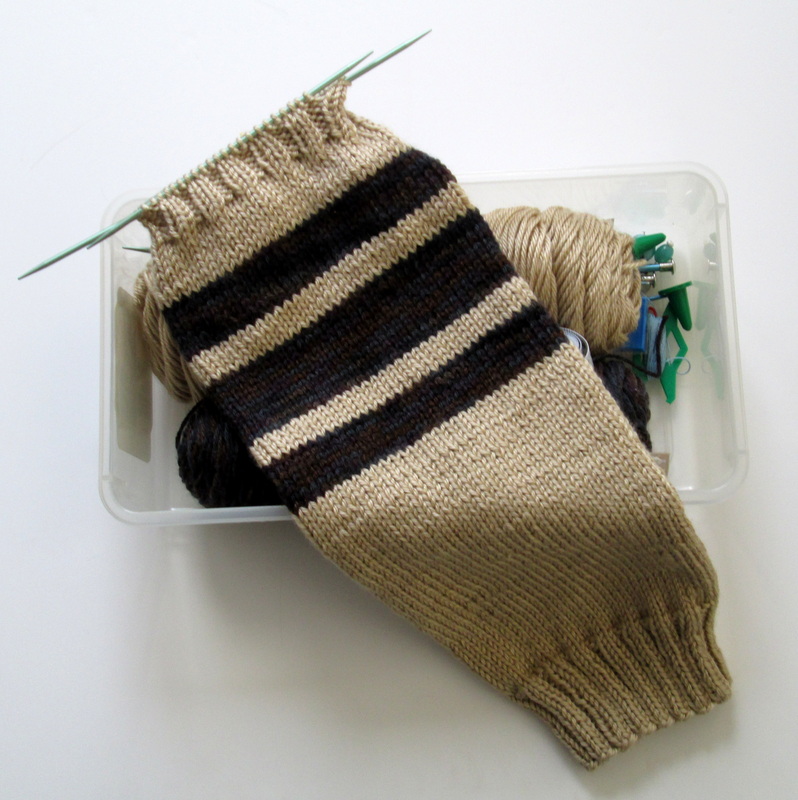
I was even brave enough to go ahead and try stripes. The "jog" is there, but I can live with that if it means no seaming. I'm still struggling with carrying the yarn up the inside and I'm fighting with a little gap when I change colors. There are all kinds of techniques that I have yet to try so I'm not too worried about it. Plus I think that's a story for another day!
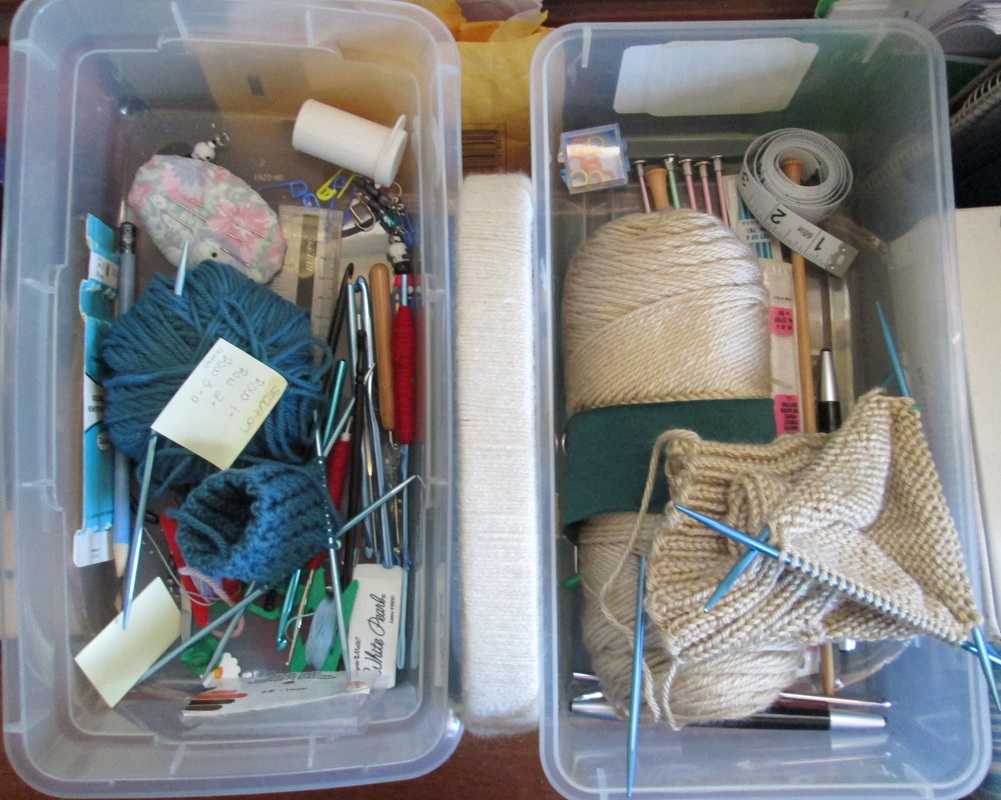
Are you still with me? I know this is a long one and I've been rambling on, it's just that there's so much to tell!! Legwarmer number one is all most finished. I switched back to the smaller dpns and only have a few rounds left. Did I tell you that I'm just making this up (the pattern that is) as I go along?? Something I never would have imagined a few months ago. Mitt number one is finished. I needed help with the thumb. Attaching the yarn and picking up stitches to close the gap are new and different from crochet. Once Jean showed me I realized that I was making it more complicated than it needed to be. Hopefully I'll remember what to do when I get to number two! One last thing (promise!) I'm always working on several projects at the same time ( it's crafting A.D.D.) and recently discovered a great way to keep organized. Each project gets it's own plastic storage container (shoe box size). In it goes the yarn, the pattern, the needle(s), stitch markers, a pencil and anything else specific to that project. The scissors and tape measure stay on the table. Now everything is in it's place and there's a place for everything. Brilliant, right?! Phew! That's it. All done for now. Thanks so much for stopping by and spending a bit of your day with me. Until next time friends, Be blessed and stitch & read with love! P.S. : Don't Forget - There's still time to win these awesome books!
click on the picture(s) to enter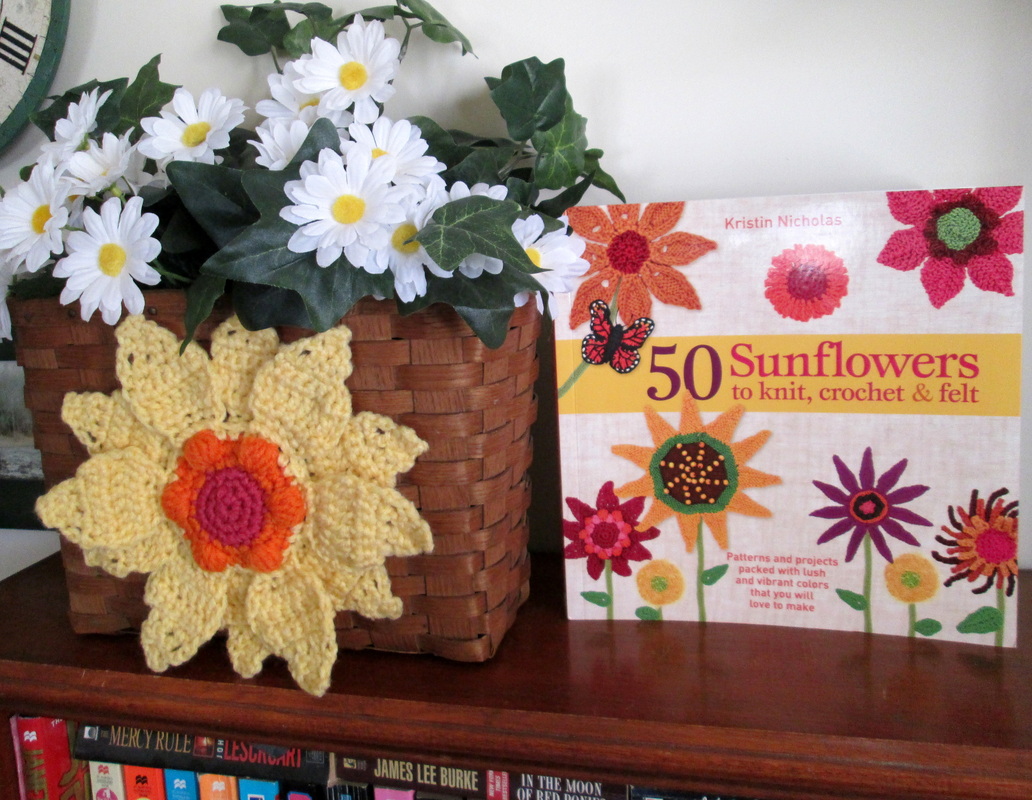
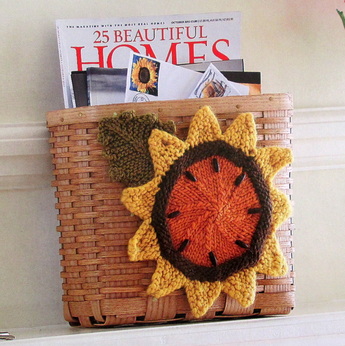
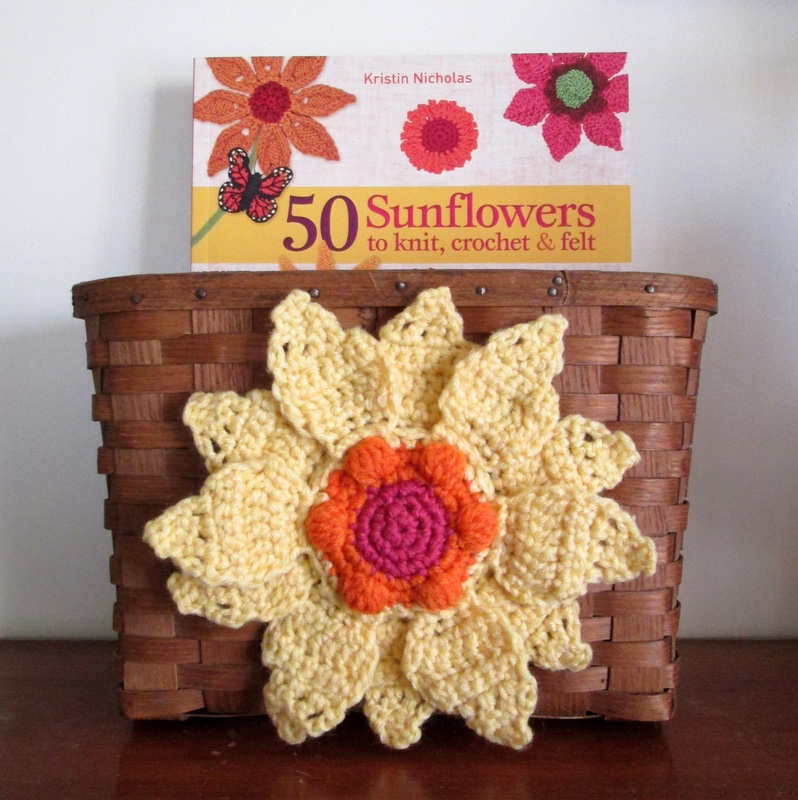
From the Book, Project 6 - Mail Basket (on left) and My Version (on right)!!
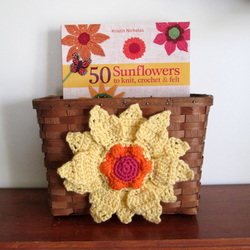
Pretty neat huh? As I was getting ready to write this post I did a bit of looking around the internet for details about the author. It really is a small world, because what I discovered is that Ms. Nicholas lives in the same region of Massachusetts that I do! Now we're not next door neighbors, but all things considered we're close enough that I'm sure we've driven on the same roads and shopped in the same stores! It's a rural area so we're pretty lenient about what we consider close by!! Now are you ready for another bit of coincidence that will make you say wow?? Do you remember about a month ago when I decided it was time to learn how to knit and I got myself a stack of books from the library? Well, the first book that I opened up when I got home and the one that I am still referring to on a regular basis because of it's easy to understand illustrations is called Kids Knitting by Melanie Falik. Guess who illustrated that book? You got it - Kristin Nicholas!! Now I'm not sure what the universe is trying to tell me, but I feel confident that there is a message in there somewhere. It seems like our paths are destined to cross and I'm curious about what the future holds. In the meantime though I'll settle for making more sunflowers and working on my knitting skills!! What do you think about that?!? Now it's your turn! I'm giving away a copy of "50 Sunflowers" to one lucky winner. It's free and easy to enter and I just know that you're going to love this book! If you're interested in purchasing a copy it goes on sale on March 19. You can get a signed copy from the author herself by following the link on her blog, Getting Stitched on the Farm. You can also find it on Amazon and other retailers. Here's Your Chance to Win a Copy for Your Collection A few things about the giveaway. First, please know that the books that St. Martin's sends me are newly published or advance copies that they have asked me to review. The opinions that I express are my honest views about the books and are not influenced in anyway by the publisher. Second, I'm sure it says it somewhere, but this giveaway ends on Wednesday, March 20, 2013 at midnight. I'll announce the winner within 48 hours. And finally, this giveaway is open to everyone everywhere. If I can mail it to you through the USPS please feel free to enter! Good Luck! and Thanks for Visiting! Thanks so much for stopping by and spending a bit of your day with me!
I hope you enjoyed the review and will take a moment to enter the drawing. Until next time friends, Be blessed and stitch & read with love! 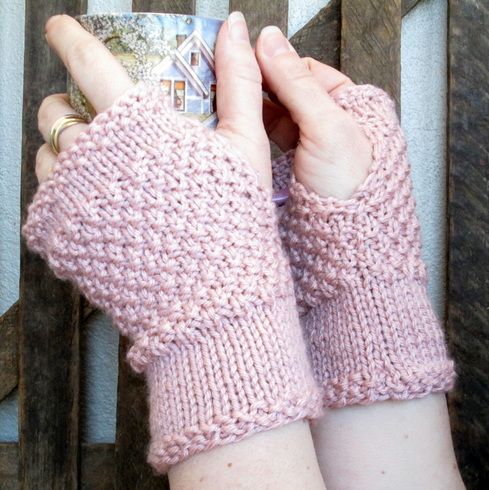
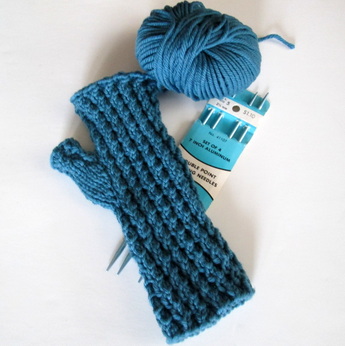
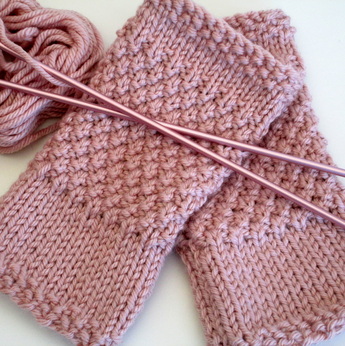
Greetings! So I've been knitting for about a month now, and I have to say that I'm really lovin' it. My husband is calling me a traitor because I haven't picked up a crochet hook since I started. What can I say? It's so awesome to cast those stitches on and watch the fabric that develops. And for some reason the idea of designing my own projects seems natural with the knitting, something that I never really felt about crochet. But I'm getting ahead of myself. Let me tell you about my first project. I've been on a hand/wrist warmer kick this winter and it seemed like the right size project to begin with. Jean W. (the library's knitting queen) gave me a pattern for fingerless gloves that she's made many times. They are worked in the round, but she told me I could do them flat and adjusted the pattern for me. They are a cable ribbing pattern which looks like a "mock" cable. It seemed a bit adventurous for a first project, but I figured what the heck! Plus I was flattered that she had such confidence in me! I used the the easy thumb cast on and set to work on the first row. It was really hard. And sloppy. And I'm pretty sure it didn't follow the pattern. After several tries I sort of got the hang of it. It was tough going though and I don't think it was looking like it was supposed to. I decided that a different pattern might be in order. It must have been fate because the following day one of our knitting regulars (who just happened to be working on a cute little wrist warmer at the last meeting) came into the library. She didn't have the pattern with her, but told me if I searched Emerald Green Handwarmers I'd find it. Sure enough, she was right.
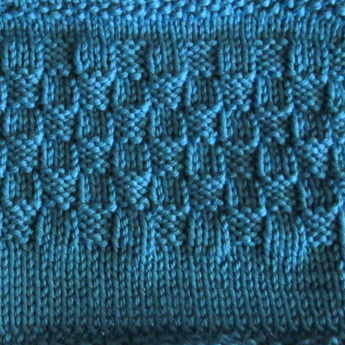
That night I set out to make a dusty rose version. Something clicked. The planets aligned and by the end of the evening I was more than half way through the first one. Honestly it was a thing of beauty! As I worked each row my confidence grew and I felt more and more comfortable with the needles. After a few more sessions I had completed my first knitting project ever! I wanted to make another pair, but I get bored easily. (Sad I know, but at least I'm realistic about it!) One of the books that I have in my collection is called the Complete Book of Knitting. Among other things, it has page after page of stitch patterns in it. Since I was feeling comfortable with the knit and purl, I decided that I could substitute one of the simpler patterns for the section that is worked in the double moss stitch. It took a little bit of calculating and a little bit of hope, but I went for it and look!! It worked! This is the "small check" pattern and I think it looks terrific. If you thought I was happy after the first pair you should have seem me when I finished the personalized pair! My husband (bless him) even listed attentively and with (I think) real interest as I explained to him what I had achieved! 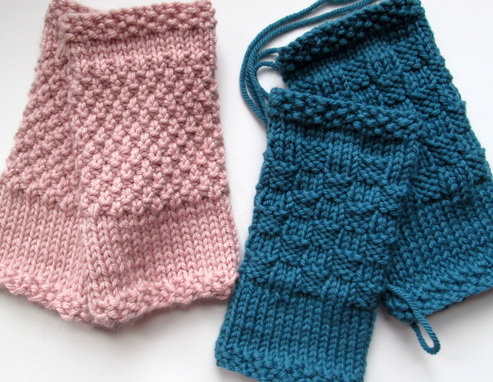
Here's the thing about me and knitting. For some reason I am able to visualize stitches and elements coming together to make changes - or even to make something from scratch. That never happened to me with crochet. Even though I have the big stitch dictionary I never thought about substituting one into an existing pattern. Strange isn't it? It's like the light bulb went on, or the door opened (or some other inspirational quote) and I can imagine creating designs of my very own. Of course I realize that I have a long way to go. I'm encouraged though that my brain is thinking that way. Don't get me wrong, I'm not giving up crochet. I'm keeping myself open to the plethora of possibilities that exist. I love learning new things and flexing those synapses to keep me motivated and intrigued. I've all ready been entertaining the idea of a project that contains both knitting and crochet!!
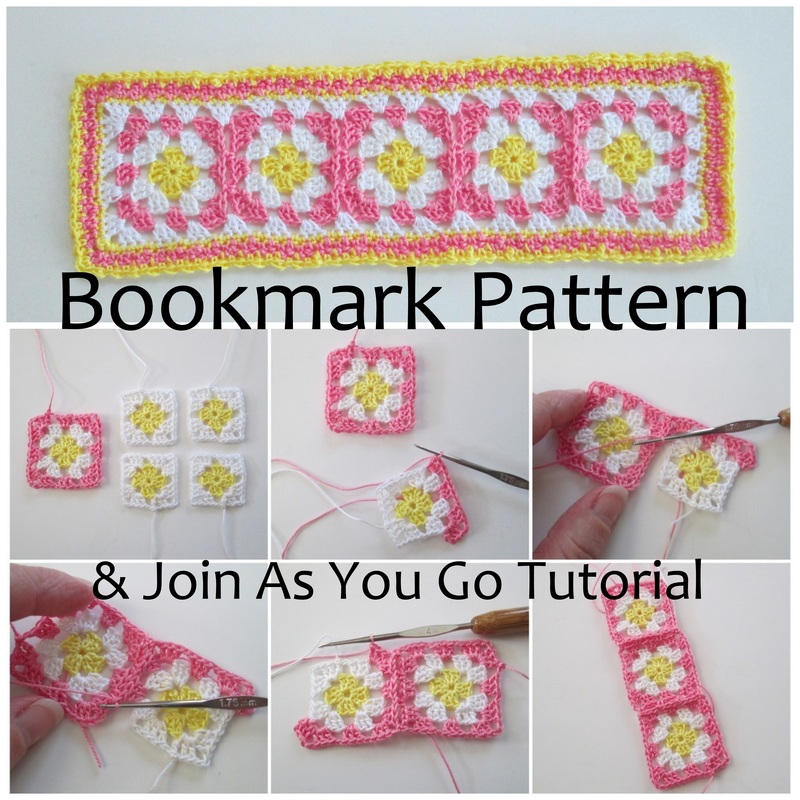
Next up is knitting on double pointed needles. A daunting proposition for sure. Every book that I've read, and everyone in the knitting group assures me that it is much easier than it appears. Surely that can't all be wrong?? I'll let you know how it goes. Thanks so much for stopping by and spending a bit of your day with me. And also a big thanks to everyone who entered the book giveaway. Karen W. was so excited to win. She told me this was the first time she ever won anything!! March is going to be a busy month. There's the knitting and crocheting and the book reviews too. Plus, it's my first blog-iversary and I have more giveaways planned. I hope you'll join the fun! Until next time friends, Be blessed and stitch & read with love! Quick, Easy and Awesome Bookmarks! 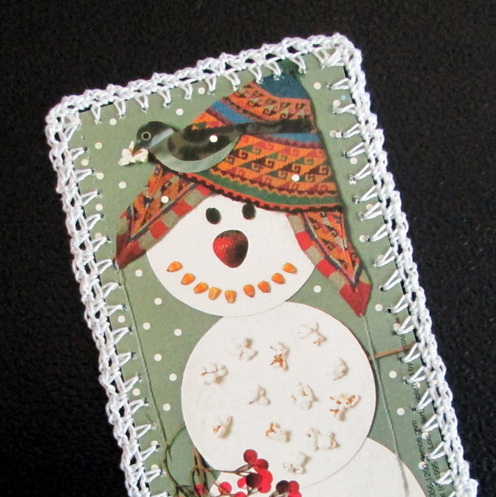
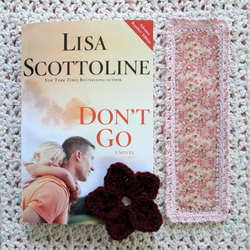
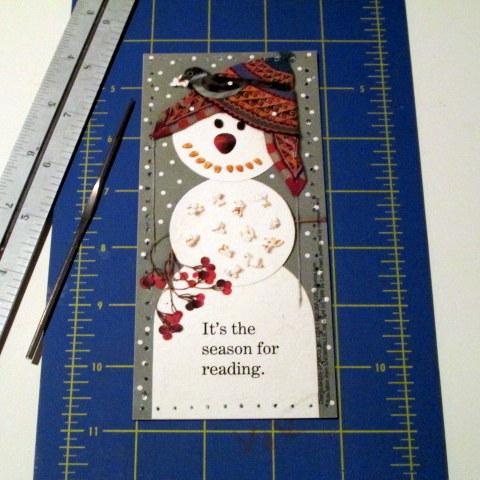
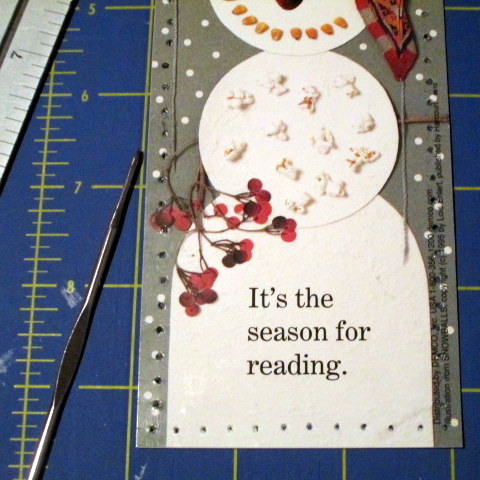
Greetings Friends! Isn't this country snowman just adorable? I knew when I saw this bookmark at the library that it was the perfect candidate for a little paper crochet. Back in December I tried out the Sharp Hook (here's the post), and I knew that it would be just right for this project. One of the advantages of the SH is that most of the time you don't have to pre-poke your holes. While this can be convenient, I was having difficulty getting the holes in the right spot. In order to come up with the same number of evenly spaced holes I had to use a ruler. I tried to poke the holes as I went, but that didn't work very well. I ended up marking them 1/4 inch apart first and then doing the poking. It was a little painful for the finger on the "other" side until I remembered my leather thimble! With appropriate protection I was able to move along quickly!
The bookmark is made of card stock and only printed on one side. I glued two together because I thought it would look better being double sided. Even with the two, I'm sure you would be able to make the holes using any small steel hook. Just get them started first, and definitely use (finger) protection!!
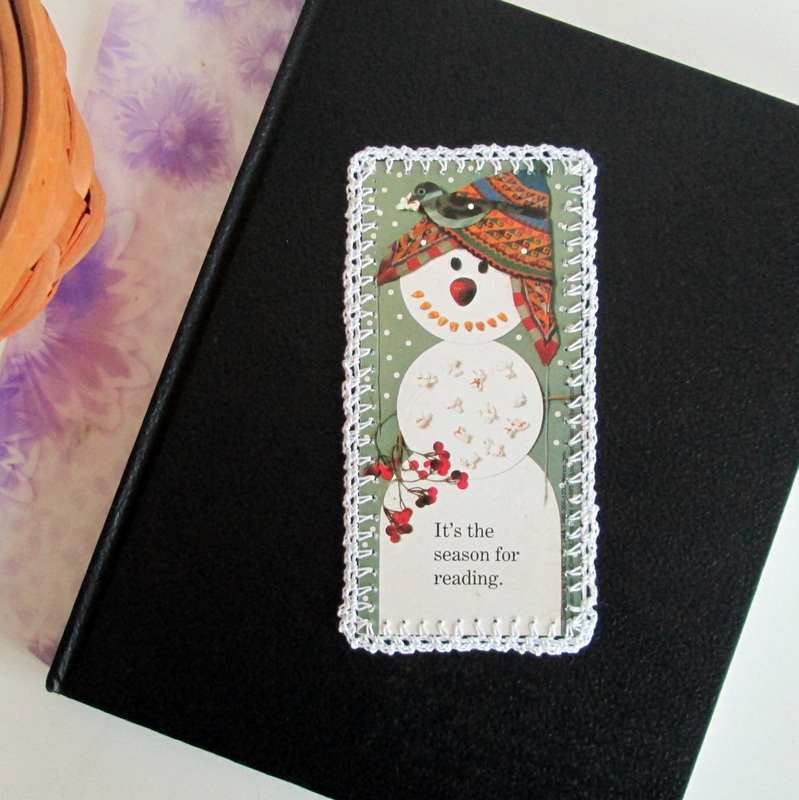
This is the first time that I combined paper and crochet. It really is an easy project, and I'm sure there are more bookmarks in my future. The hardest part is marking where the holes go, and that's more tedious than anything. I can see using this technique to embellish handmade cards, or holiday ornaments. To add a border to a wall calendar. Or, even use it on photographs to create a unique frame. Like anything in crochet, the possibilities are only limited by the imagination!
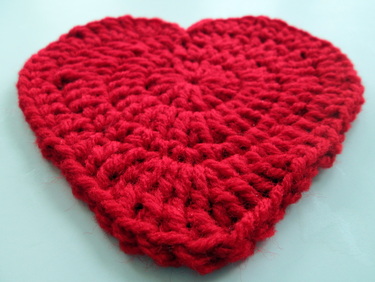
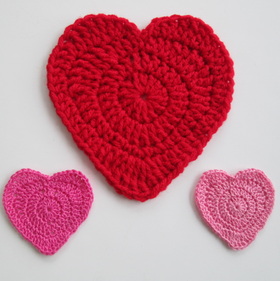
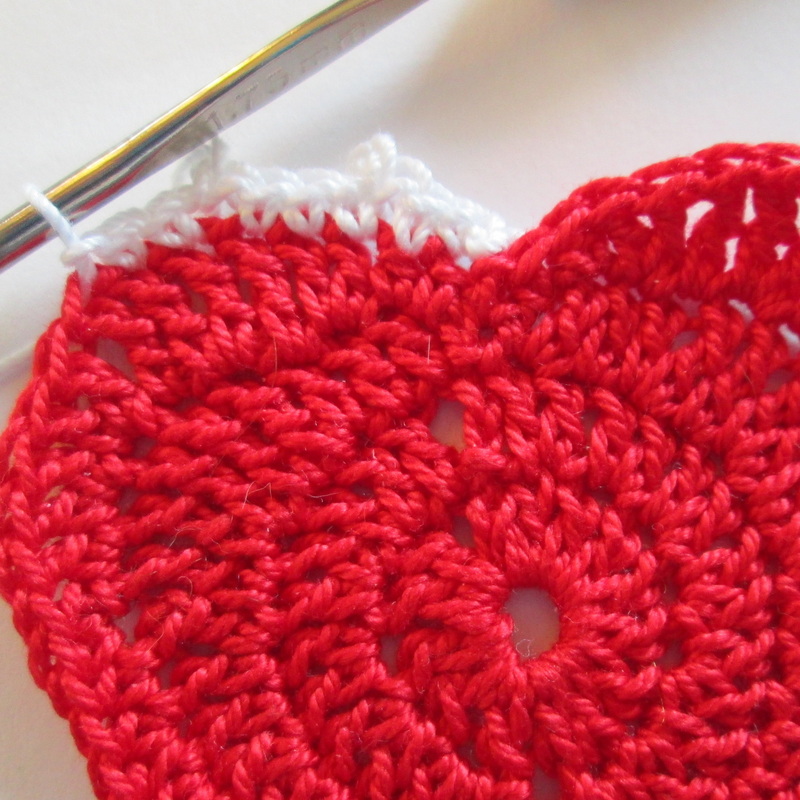
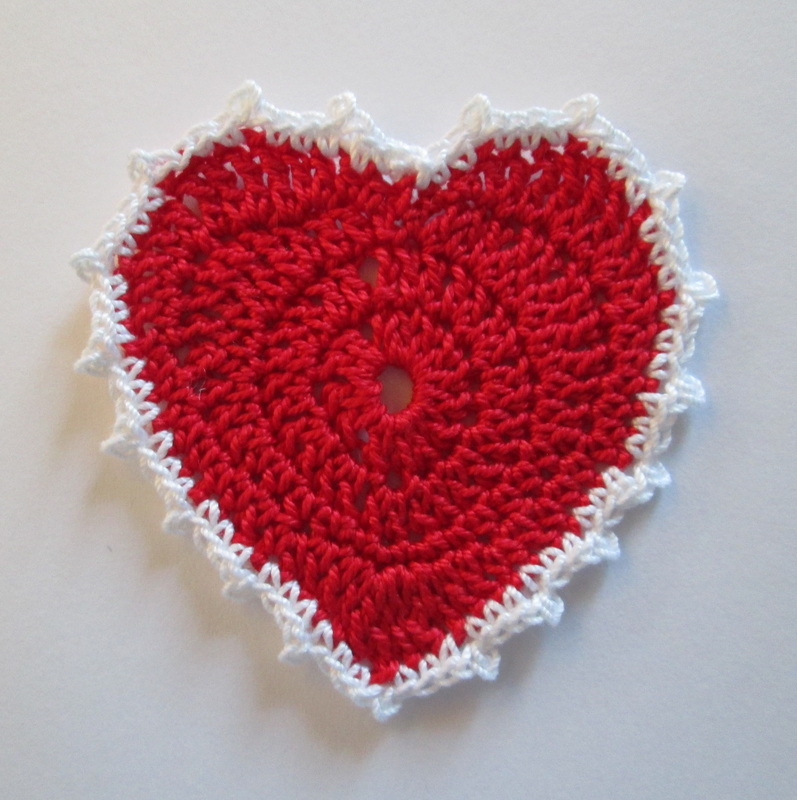
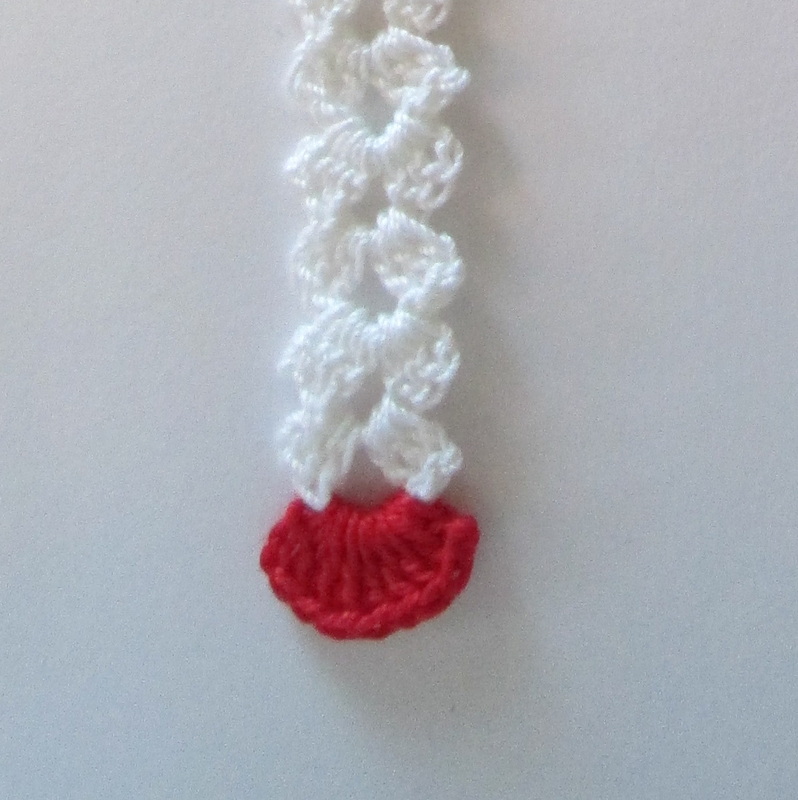
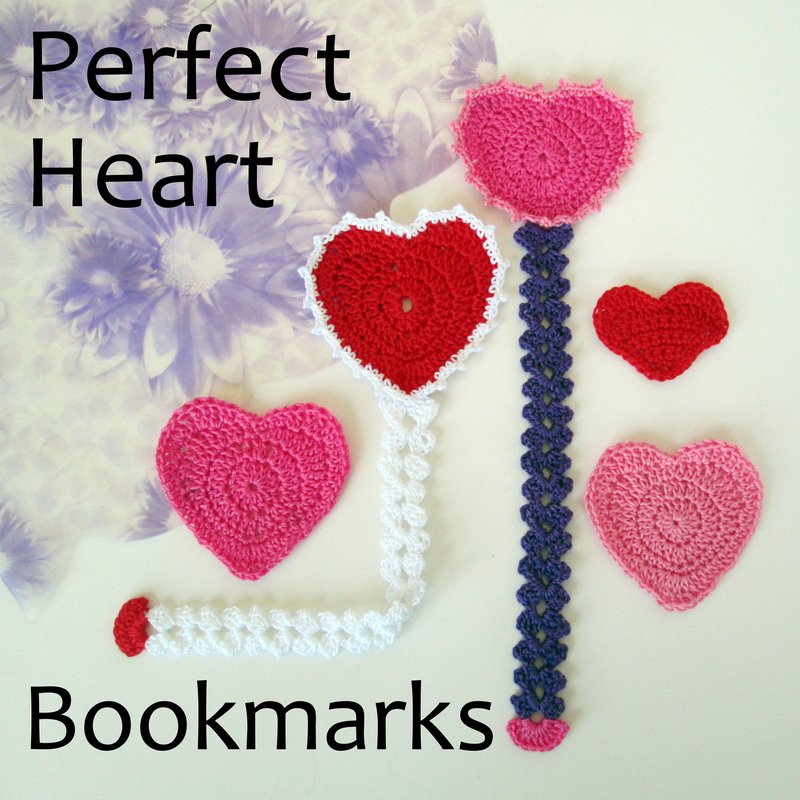
Where will your imagination take you? I'd love to hear your ideas for combining paper and lace! Thanks so much for stopping by and spending a bit of your day with me. Until next time friends, Be blessed and stitch & read with love! "A kind heart is a fountain of gladness, making everything in its vicinity freshen into smiles." ~ Washington Irving (1783-1859) Perfection. We strive towards it. We practice to achieve it. In matters of the heart it is often elusive. But in crochet, all things are possible. And so I set out to crochet a perfect heart. There are patterns that make them in the round and those that work them in rows. Some came close, but nothing gave me exactly what I was looking for. I knew that creating a perfectly symmetrical heart was a matter of diligence, patience, and little geometry. I learned a lot from all the different versions I made. Using the elements that worked the best from other patterns and through lots of trial and error this beauty came to life! I made my thread hearts into bookmarks, and I included the instructions here so you can make them too. If they're not your style there are lots of other things you can do. Thread hearts can be attached to a card with ribbon and given as a lovely Valentine. Sew them onto a shirt, hat, jacket or pants pocket. Sew 2 together and stuff for fluffy hearts. Add a little cat nip to make a treat for you favorite kitty. Attach one (or more) to a hair clip, barrette, or head band. Hearts made with worsted weight yarn and an H hook are the perfect size for a coaster. Add personalization by stitching you and your love's initials with embroidery floss. Embellish them with terms of endearment (like the Sweetheart's Conversation Heart candies). Or just make them because they're fun and easy!
The heart in the pattern is made with #10 cotton thread and a #4/1.75 mm steel hook. It measures about 2.5 inches x 2.5 inches. The large heart in the picture above is made with worsted weight acrylic and an H/5.00 mm hook. It measures about 5.5 inches x 5.5 inches. You can make them with whatever yarn or thread and hook makes you happy.
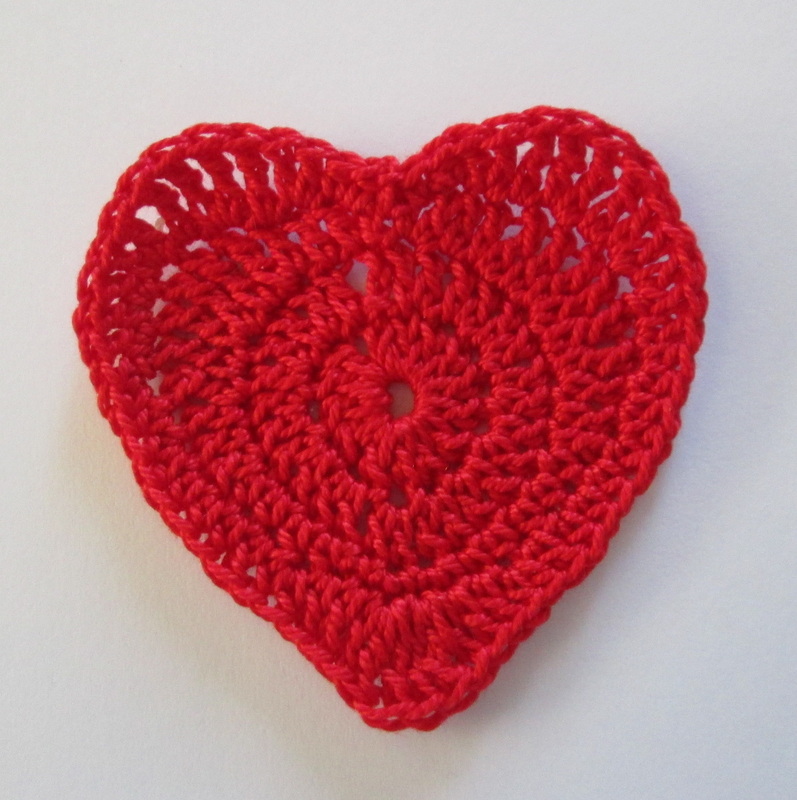
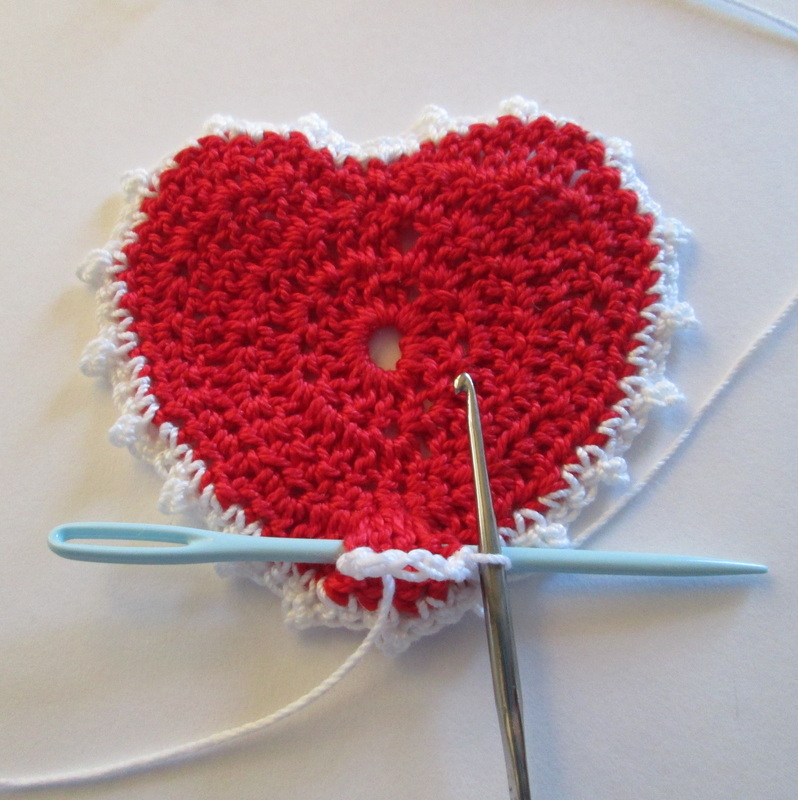
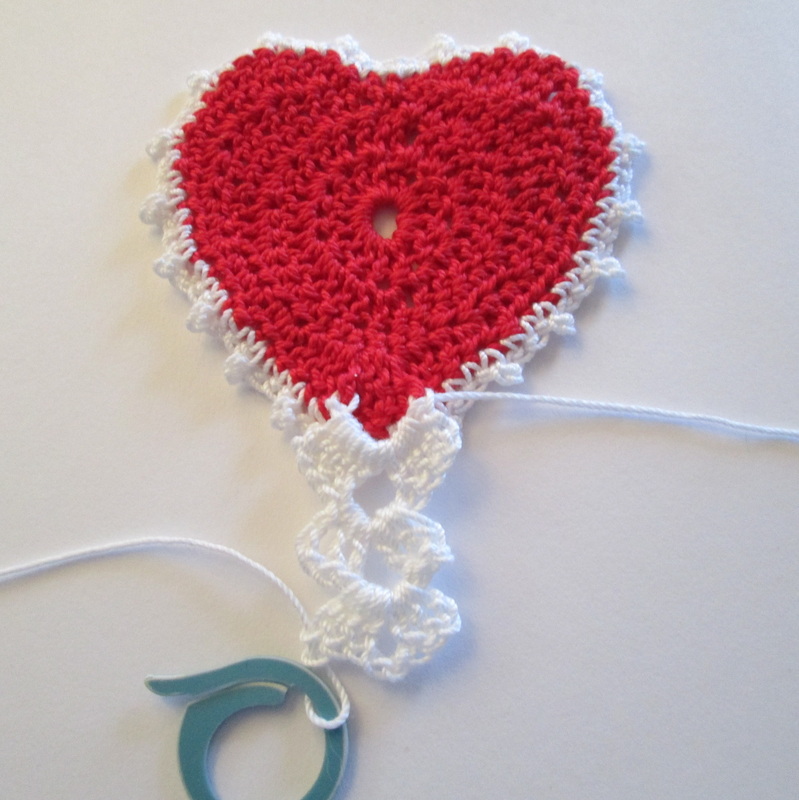
Now turn it into a bookmark...
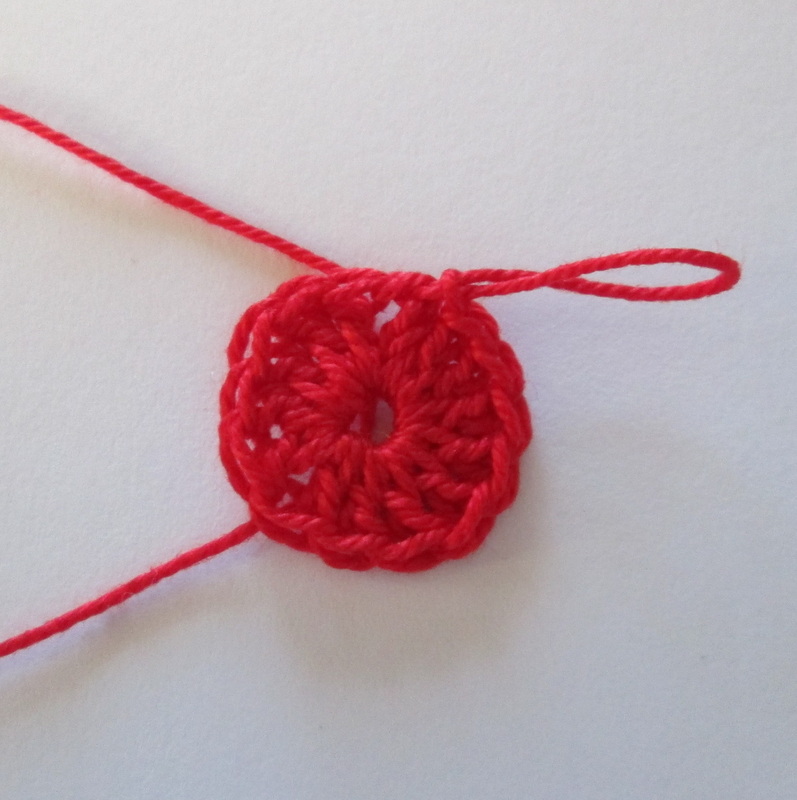
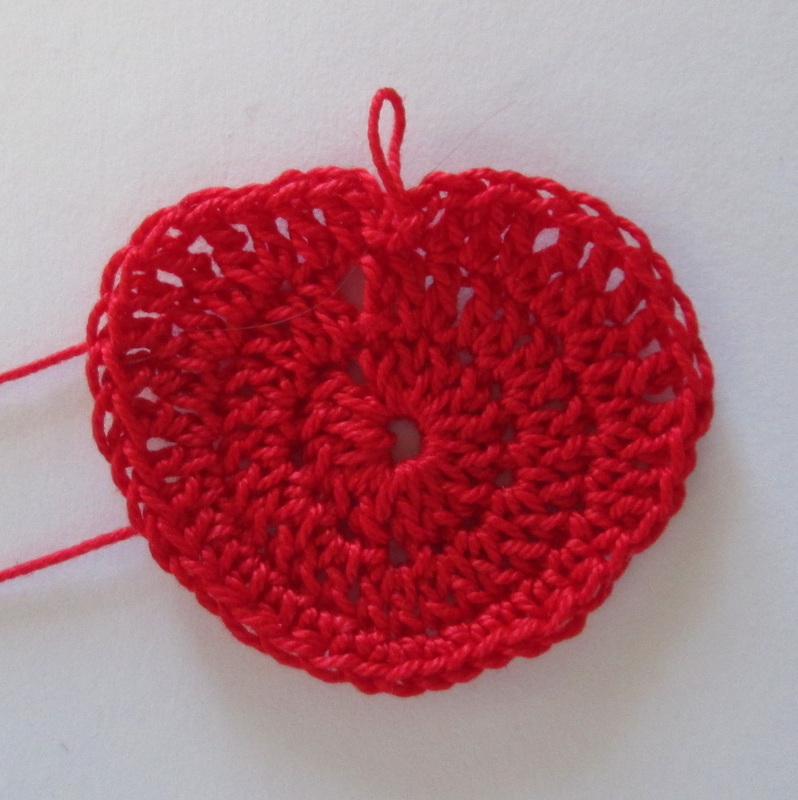
No matter what you do with your heart, I hope it fills you with gladness and brings you a smile! It's easy to loose your place when working rounds 3 and 4 so I created a PDF that you can download. I point the corner of a sticky note at each step/stitch and move it to the next after working it. Then if I have to put my work down I know where to start! Thanks so much for spending a bit of your day with me. Until next time friends, Be blessed and stitch & read with love!
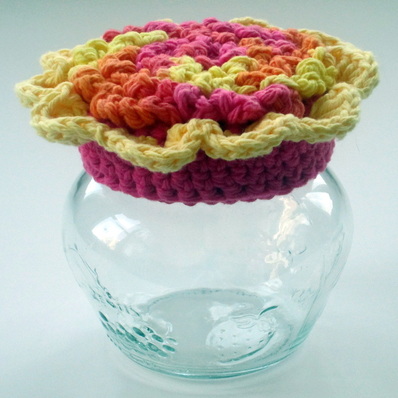
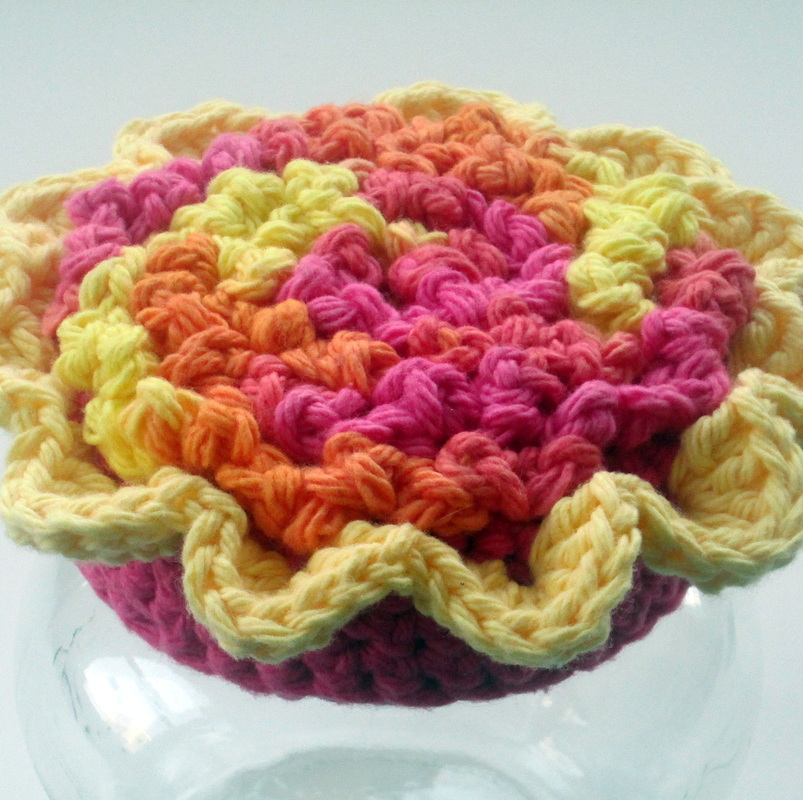
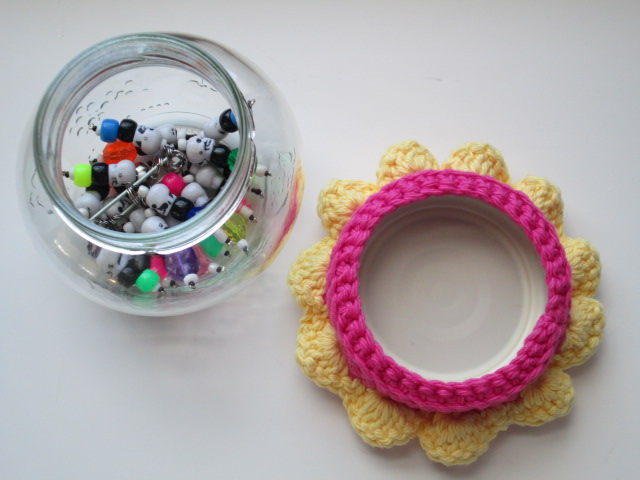
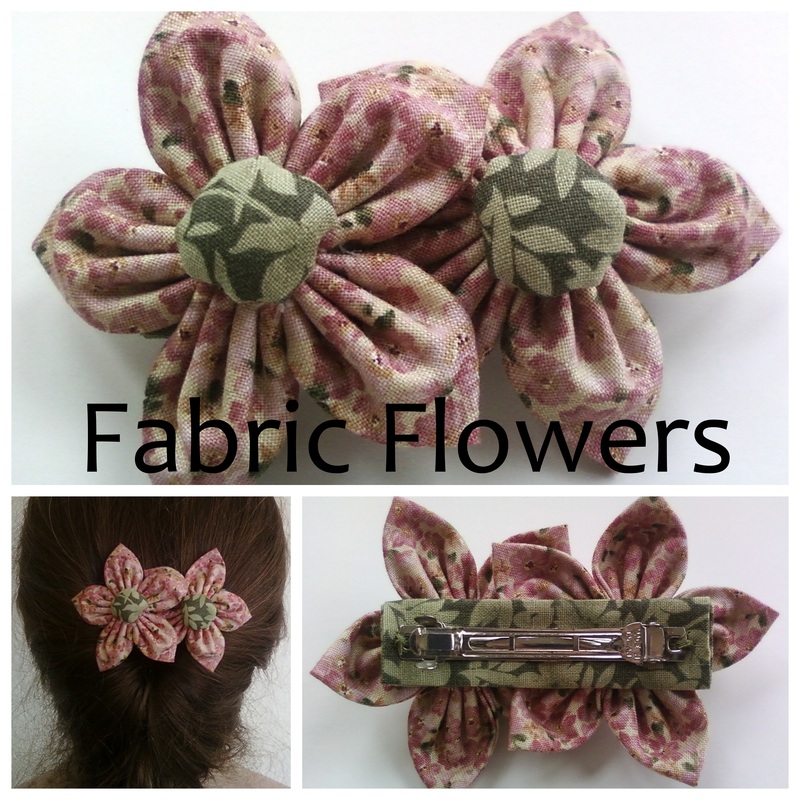
Greetings Friends! Let me just say that it is mighty cold in Massachusetts. The eye watering, face burning, toe numbing cold that grips us every winter. Our ability to endure must be coded into our DNA, because otherwise I fear after a week like this we would flee en masse leaving behind all but our most cherished valuables (yarn and books!) in search of a more hospitable climate! For months I've been focused on making things that keep you warm, like hats, mittens, and sweaters. As awesome (and important!) as they are I think we can use a splash of spring, and that's what this flowery jar topper reminds me of. This is the Flower Jewelry Keeper from the August 2012 issue of Crochet World magazine. I think the idea of crocheting a decorative topper for any type of jar is very clever, and I can imagine making them in a variety of different flowers, designs and yarns.
The pattern calls for a wide mouth half-pint canning jar. I didn't have one of those, but I did have this cutie languishing on the door of the refrigerator with a smidge of orange marmalade in it that no one was ever going to eat. After a hot soapy bath it was ready to be repurposed!
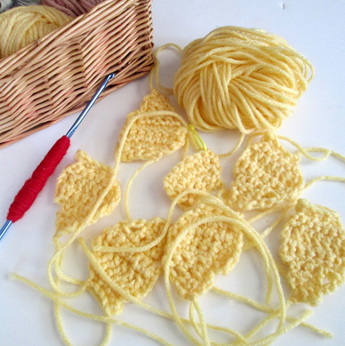
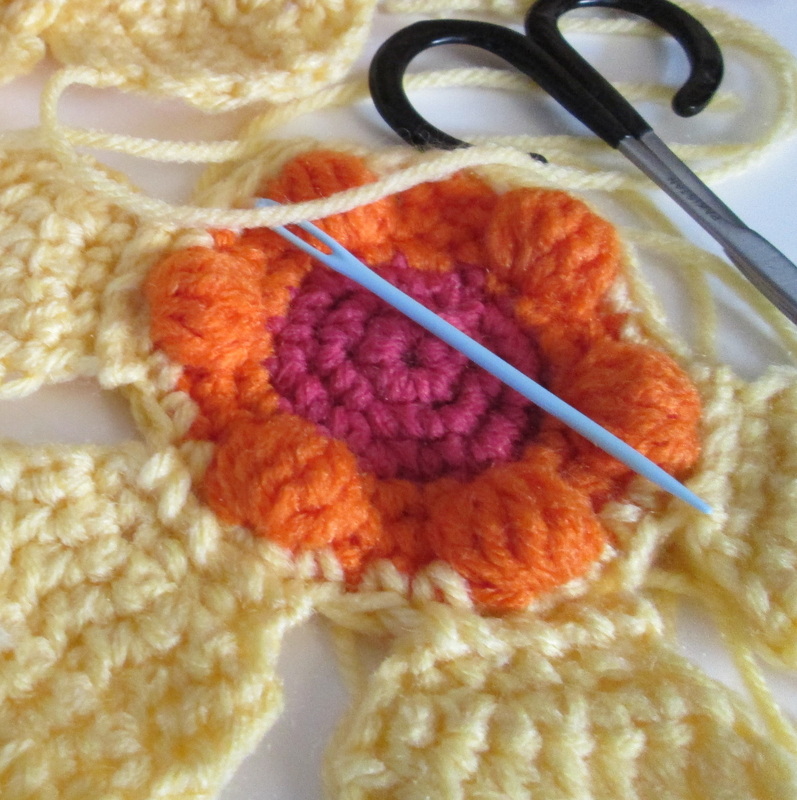
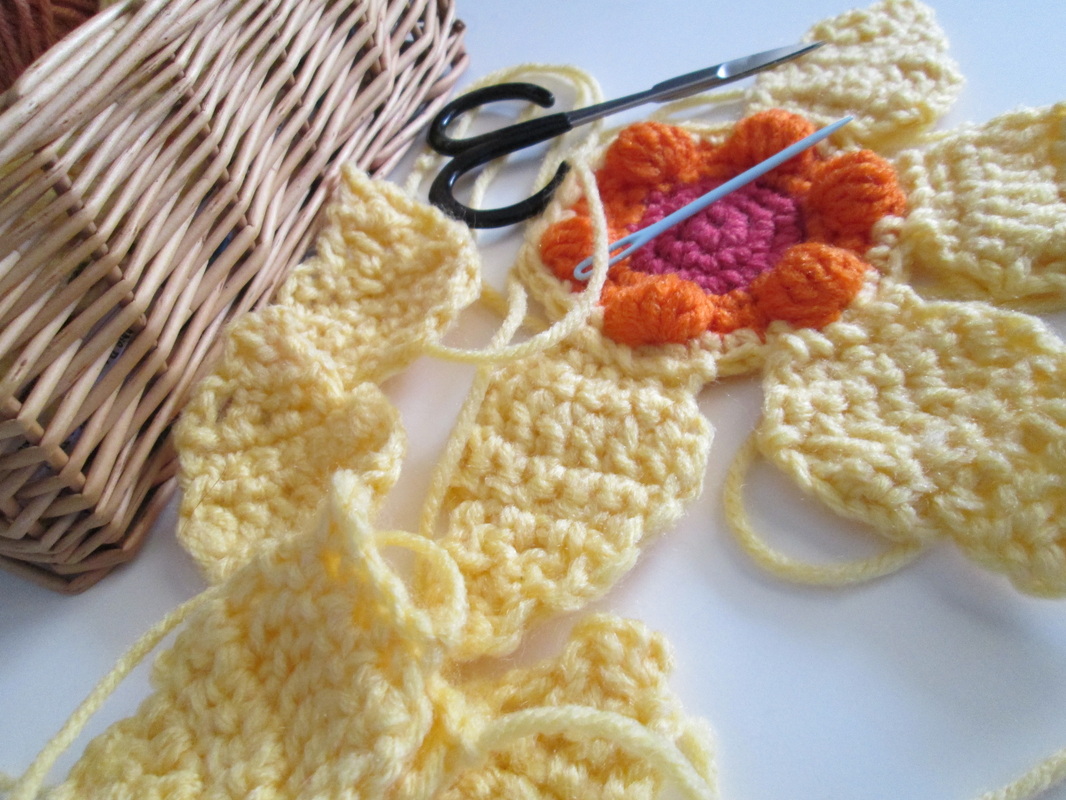
Finish by making the petals. My version looks identical to the one in the magazine, but is simpler because I skipped the part where you make a second circle, stitch them together and stuff it with fiber fill. They also secure the crocheted topper to the lid with hot glue. Since I ended up with a nice snug fit I didn't bother. The bright cotton makes a color saturated flower that is a welcome reminder of spring and the warmth it promises. I'm using my jar to hold a pile of stitch markers. With this technique you could decorate jars for the kitchen, bath, office, or studio - any room that needs organizing would benefit from one or even a set of coordinating storage containers. It's a great way to do something creative with all those uniquely shaped jars that would otherwise be destine for the recycle bin. Plus, it's a project you can easily finish in one sitting which I always find appealing! You can be sure that there are lots of toppers in my future! 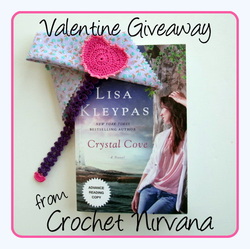 And finally today I want to tell you about the giveaway that I'm hosting on Robin Reads & Writes. Just in time for Valentine's Day I'm giving away an advance reader copy of Crystal Cove by Lisa Kleypas, and a heart shaped thread bookmark made by yours truly. Pop over and have a look at the review. I really enjoyed the book, and hope the lucky winner feels the same. After all, what could be better than a bit of romance and magic to round out your Valentine plans?
Thanks for stopping by and spending a bit of your day with me. Until next time friends, Be blessed and stitch & read with love! or why I found it necessary to relax, regroup and refocus for the new year...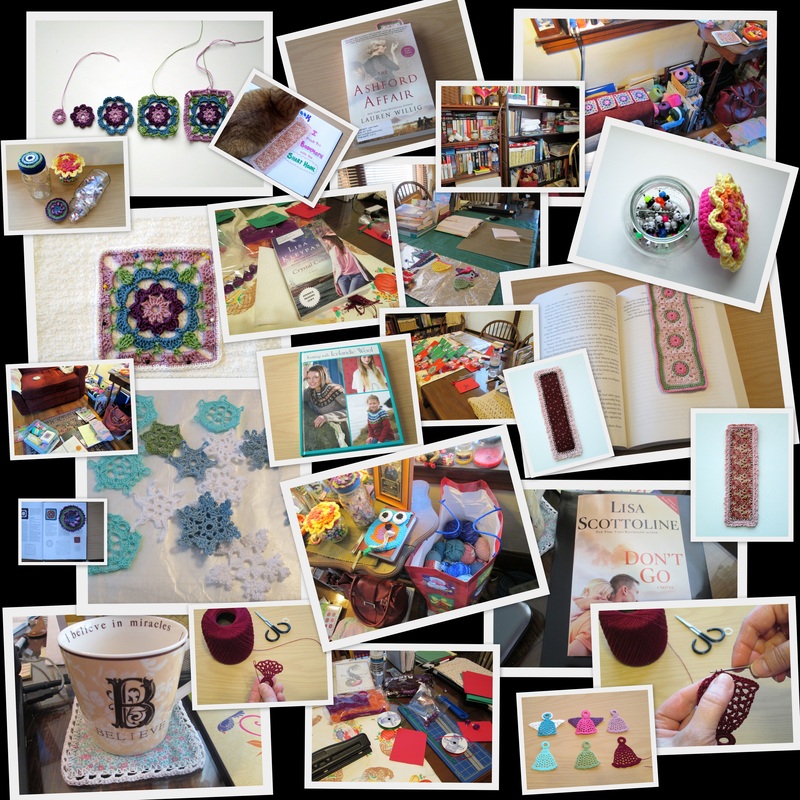
Here's a sneak peek at some of the projects I've got in store for you!!
Greetings Friends!
How are you?! I've missed you all so much! I trust that you glided smoothly through the holidays enjoying all the good things and letting the rest slide? Things at our house were low-key and pleasant. I made a point of focusing on what's really important (like family and the true meaning of Christmas) instead of getting tricked into thinking I somehow had to create the perfect "TV Christmas" with tons of gifts, over the top decorations, mountains of food and a houseful of jovial guests. That we were all sick with the worst cold/flu/bug we've had in years made it even easier to adjust expectations! Happily we have all recovered and it feels terrific to be getting back into the blogging zone. My self imposed hiatus from blogging and computer use in general has allowed me to evaluate my goals for 2013. This is really important because as the title of the post indicates, by the end of the year I was feeling woefully unable to successfully navigate my world of crochet, books, family, and work. I was trying to do so many things it was inevitable that they would all suffer and so would I. Giving myself time to simply relax and enjoy the activities that fill my world turned out to be the best present ever. I worked on and completed all kinds of crochet projects (plus read several books!). Now I have lots great material for blogging. That was one of my biggest worries - that I was running out of interesting things to write about. I mean really, how many Wednesdays do you want to see the cardigan that I'm still working on?? The other significant change was the creation of my new book blog - Robin Reads and Writes. (RR&W) If you're a regular you know that I've been including book reviews (mainly fiction) in with my crochet posts for some time. When the library where I work approached me about making my reviews available on their website I knew that a change of format was in order. After trying several layouts the new blog was born. Having everything live together under one roof works well for me as far as maintenance goes. When I started Crochet Nirvana I knew that books would always be part of my site. Now I'm happy that they have their own special place where they can really shine. Of course a second blog means more work. But it's work that I love, and the response has been amazing. In fact, I have been approached by two different publishers and asked if I would like to be an "early" reviewer. You know that I said yes!! I mean honestly, how cool is that? (I'll tell you all about in an upcoming RR&W post!) Now that I've given myself time to regroup I feel energized and focused. Knowing that I have interesting projects, patterns and tutorials to share makes me feel confident about the future. I also am thrilled about the direction the book blog is headed. In addition to fiction I'll be reviewing new crochet/knitting (and other yarn/fiber/craft) books. With so many exciting things on tap the future looks bright indeed. Thanks so much for stopping by and spending a bit of your day with me. Until next time friends, Be blessed and stitch & read with love! |
I'm Robin and this is  
Click to see what's new on the Craftsy Crochet Blog!
Follow Along
 Tutorials and Patterns


On Instagram 
Look for me, I'm RobinBrz


Places I Post

 Archives
July 2015
Categories
All
 
Thank you for visiting!
My name is Robin. I am a wife, mother and strong believer in the power of faith. I'm a maker, a crafter and an artist. I love exploring new mediums and sharing my adventures with you. Did you enjoy your visit? Let me know by leaving a comment. I love knowing you dropped by, and hope to see you again soon! Be Blessed and Stitch & Read with Love! 
|