|
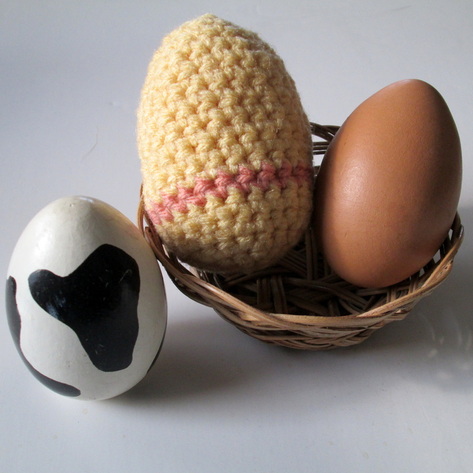
Greetings Friends! I hope that this first day of the vernal equinox finds you with a spring in your step! It's cold and blustery in New England with the remnants of the most recent snow storm visible at every turn. I'm optimistic though that the sun will soon shine brilliantly and before long it will only be a memory (the snow, not the sun!). Enough of the weather chat and onto the eggs. What about them you ask? Well, this morning I realized that while I had been thinking about Easter and the Resurrection I hadn't given much thought to the other side of Easter. With the bunny, jelly beans, chocolate and of course eggs. Since our son is a teenager the days of pastel baskets, shinny cellophane grass and copious amounts of candy for breakfast are (sadly) behind us. I wanted to do something though, so I decided to crochet myself an egg. I also thought it would be fun to share the pattern with the knitting/crochet group who meet at the library on Wednesdays. And if I'm going to share with them, of course I'm going to share with you! It's quite easy and took about half an hour to finish. Without further ado here you go: An Easy Crochet Egg Pattern 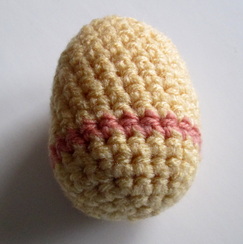 Gauge isn’t important so feel free to use whatever you have handy. For this extra-large egg I used: F/5 – 3.75 (US) hook Bits of worsted acrylic from the stash Left over fiber fill for the stuffing, but most anything soft will work (cotton balls, bits of yarn etc.) Stitches and Stuff: Single Crochet (sc) Single Crochet 2 Together (sc2tog) – Insert hook in stitch and pull up a loop, insert hook into next stitch and pull up another loop (3 loops on hook). Yarn over, and pull through all 3 loops. One stitch decreased. Eggs are worked in continuous rounds – do not join. Use a marker at beginning of the round and move it up as each round is completed. To Make the Egg: With color of your choice – ch 2. Rnd 1: 6 sc in first ch. Place marker in 1st st to mark beg of rnd; move marker up as rnd is completed. Rnd 2: 2 sc in each sc around. (12 sc) Rnd 3: *2 sc in next sc, sc in next sc; repeat from * around. (18 sc) Rnd 4: *2 sc in nxt sc, sc in next 2 sc; repeat from * around. (24 sc) Rnd 5 – 12: Sc in each sc around. Rnd 13: *Sc2tog, sc in nxt 4 sc; repeat from * around (20 sc). Pull tail from starting chain into the egg, and begin stuffing. Continue stuffing as you go until it’s firm and holds its eggy shape. Rnd 14: *Sc2tog, sc in nxt 3 sc; repeat from * around. (16 sc) Rnd 15: *Sc2tog, sc in nxt 2 sc; repeat from * around. (12 sc) Rnd 16: *Sc2tog, sc in next sc; repeat from * around (8 sc). Keep stuffing! Rnd 17: (Sc2tog) around. (4 sc) Fasten off, leaving a long tail. Weave the tail through the stitches on top to close the opening. Knot the end and the weave into the egg to hide. If you make stripes, make sure to pull the ends into the egg before stuffing (it’s easier that way!) There you are! A great way to use up some stash scraps. Imagine how cool they'll look in variegated yarns. I was also thinking that you could embroider designs on then too. I created a PDF if you want to download it for later. Well friends, that's all for now!
Thanks so much for stopping by and spending a bit of your day with me. Until next time, Be Blessed and Stitch & Read with Love! PS: There's still time to enter the book raffles. Check the links on the side bar if you haven't already!!
3 Comments
Leave a Reply. |
I'm Robin and this is Click to see what's new on the Craftsy Crochet Blog!
Follow Along
Tutorials and Patterns
On InstagramPlaces I Post
Archives
July 2015
Categories
All
Thank you for visiting!
My name is Robin. I am a wife, mother and strong believer in the power of faith. I'm a maker, a crafter and an artist. I love exploring new mediums and sharing my adventures with you. Did you enjoy your visit? Let me know by leaving a comment. I love knowing you dropped by, and hope to see you again soon! Be Blessed and Stitch & Read with Love! |
